Author:
Tamara Smith
Date Of Creation:
28 January 2021
Update Date:
1 July 2024
Content
- To step
- Method 1 of 3: Using techniques without sewing
- Method 2 of 3: Sewing the border by hand
- Method 3 of 3: Using a sewing machine
- Necessities
- Finishing without sewing
- Sew the edge by hand
- Using a sewing machine
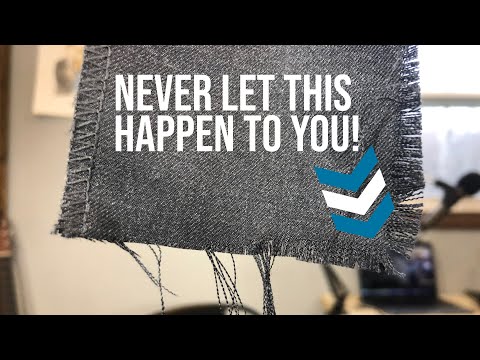
Learning how to effectively prevent fabric from fraying can save you time, hassle and money. Whether you're in the middle of a sewing or quilting project or trying to save a favorite piece of clothing, a frayed edge can look ugly. There are several methods that will help you preserve the edges of the fabric and prevent fraying.
To step
Method 1 of 3: Using techniques without sewing
 Use masking tape for a quick fix. Place the fabric on a hard, flat surface with the back side up. Place the tape along the top of the edge, with the edge of the fabric horizontally in front of you. Cover about 1.5 cm from the edge with the masking tape. Allow the excess tape to loosely attach the fabric to the work surface. Cut a new and clean line through the taped fabric, just where the edge starts to fray.
 - Leave the tape on the edge to prevent it from fraying.
- Adhesive tape is transparent. Choose a matte tape instead of one with a glossy finish, as it will be less noticeable.
- This method will not last long when the fabric is washed, but it is useful for cutting straight edges in difficult-to-handle fabrics. Also useful for pillows or other projects where the seams are hidden and hardly washed.
 Glue the edges with fabric glue, hem tape or super glue. Buy one of these adhesives from a craft store or online. Place small blobs of glue along the edge of the fabric. Use a cotton swab or toothpick to spread the glue evenly. Do not use too much glue as this can leave dark spots on the fabric once it has dried.
 - Use the same process to apply the glue, but then fold over the glue-covered edge of the fabric and press down to create a seam.
 Cut a new edge with pinking shears. Pinking shears look like scissors with teeth and you can find them at all craft stores or online. Cut a new edge on the fabric in the same way you would cut it with regular scissors. However, instead of in a straight cut, the scissors cut in a serrated pattern. This cut prevents the edges from fraying.
 - This is a popular beginner level method for tackling frayed edges.
- Apply glue to the cut edge with a cotton swab or toothpick for extra stability.
Method 2 of 3: Sewing the border by hand
 Cut and knot the thread. The non-technical and old-fashioned way to tackle a frayed edge is to secure it with a needle and thread. To start, cut a piece of wire about 50 cm long. Tie a knot on one end by wrapping the end around your index finger, then push the shorter end through the loop and pull it through.
  Thread the needle. Take the untied end of the thread and grab it between your thumb and index finger. Make a loop around the needle and slide the small loop over the head of the needle to create a tight little loop. Flatten the loop between your fingers, then pass it through the eye of the needle until the loop is sticking out on the other side. Grab the loop with your fingers and pull it through until the tail comes through.
 - You may need to cut a new end of the thread if it is a little worn and slack, as working with a soft piece of thread is difficult.
- Pull the tail through so that it is about 7 to 10 cm long.
 Insert the needle from back to front to make an overcasting stitch. Hold the fabric right side up. Start at the wrong side of the fabric and insert the needle as close to the edge as possible. Push the needle forward through the fabric and pull the thread through until the knot hooks.
 - Do not pull too tight or the edge will appear crumpled.
- Stay close to the edge, about 3mm or less is ideal.
 Repeat the stitch to finish the edge. Place the needle back on the wrong side of the fabric, next to where you stitched it for the first stitch. Continue to repeat the same stitch along the length of the edge, always inserting the needle from back to front.
 - For a tighter stitch, move the stitches closer together or further apart for a looser stitch.
 Tie off the thread after the last stitch. Go to the wrong side of the fabric. Thread the needle under the last stitch and pull the thread under it until a small loop forms. Pull the needle through the loop and pull to tie a knot. Repeat to make a second knot for extra security.
 - Cut the thread to finish the edge, leaving no more than 3mm left at the end.
Method 3 of 3: Using a sewing machine
 Secure the brim with an overlocker. The most professional way to finish an edge is with a specialized sewing machine called the overlocker. This sewing gadget uses four threads and two needles. Thread the overlocker and feed the seam under the foot by running it through the machine needles as you would with a regular sewing machine.
 - Make sure to remove any pins from the fabric before feeding it through the overlocker.
- An overlocker sews, cuts and finishes one seam at the same time. It can therefore save you time.
- An overlocker is a specialized machine that cannot replace all basic functions of a regular sewing machine. They cost a few hundred dollars, but if you do a lot of finishing work this might be a good choice for you.
 Make a zigzag stitch on your sewing machine. Put your sewing machine in zigzag mode by using the dial or the digital display on the side. Place the fabric under the raised foot of your sewing machine. Lower the foot and feed the fabric through the machine. Align the fabric edge with the center of the foot.
 - Consult your machine manual for more details if you are unsure of how to set it up for a zigzag stitch.
- Add a few reverse stitches at the beginning and end to tie the thread.
 Use an overlock foot on your sewing machine to simulate an overlock stitch. Remove the regular presser foot from your machine and attach the overlock foot in place. Set your machine for the overlock stitch. Align the fabric with the inside of the foot. Feed the fabric through the machine as usual.
 - By attaching an overlock foot to your sewing machine, you can create a stitch much like the stitch an overlocker makes.
- Use a zigzag setting with the overlock foot to achieve a similar finish effect when there is no overlock setting on your machine.
- Refer to your sewing machine manual for more details on how to turn off the foot. It is usually a matter of turning it off and on again and requires no tools.
Necessities
Finishing without sewing
- Adhesive tape
- Scissors
- Textile glue, hem tape or superglue
- Pinking shears
Sew the edge by hand
- Needle
- Wire
- Scissors
Using a sewing machine
- Overlocker or sewing machine
- Wire
- Scissors
- Overlock foot (if using the overlock stitch)


