
Content
- Ingredients
- To step
- Method 1 of 2: Making the base for the soy sauce
- Method 2 of 2: Fermenting and pasteurizing the sauce
- Necessities
Soy sauce or soy sauce is one of the most used seasonings in the world. Soy sauce has been used for over 2000 years to flavor dishes, both during cooking and at the table. Making your own soy sauce is a very time consuming process. In addition, you must be able to tolerate the smell that is released during fermentation. But the end result is a delicious, complex seasoning that you will be proud to serve to your family and friends!
Ingredients
For making 3.5 to 4 liters of soy sauce
- 800 grams of soybeans
- 500 grams of white flour
- Koji-chin starter or basic koje or KojiKoji
- 4 to 5 liters of water
- 950 grams of salt
To step
Method 1 of 2: Making the base for the soy sauce
 Wash and sort 800 grams of soybeans. You can get soybeans (or edamame, or green soybeans) at most major supermarkets, but you may have to go to a store that specializes in Asian products.
 - If the soybeans are still in the shell, shell the beans before you soak them.
- If you have a choice of both dry soybeans and edamame at the store, go for the dry beans.
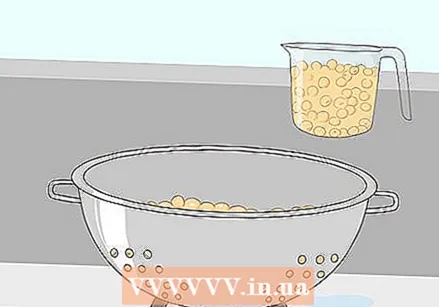
- To wash, put the soybeans in a colander and rinse under cold running water. Take out discolored or wrinkled beans.
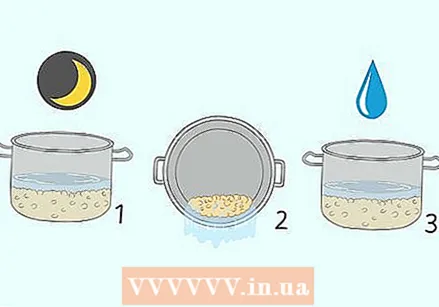 Let the soybeans soak overnight. Place the soybeans in a large saucepan and add enough water to cover the beans. You should need between four and five liters of water for that. Drain the soybeans and add clean water to the pan.
 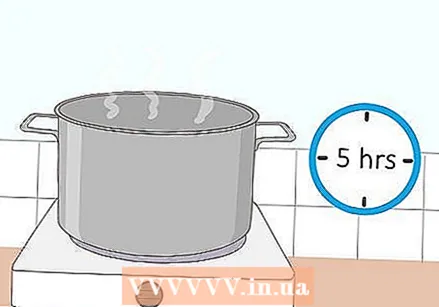 Cook the soybeans over medium heat for four to five hours. The intention is that you can easily puree the beans with your fingers after cooking.
 - If you want, you can also use a pressure cooker to cook the beans faster. Place the beans in the pressure cooker, add about 250 ml of water and close the lid. Put the pressure cooker on high heat and lower the heat as soon as the pressure cooker starts to whistle. Cook the soybeans for about 20 minutes.
 Puree the soybeans into a paste. Puree the soybeans with a food processor, with the back of a spoon or with a puree masher into a smooth paste.
  Mix 500 grams of wheat flour with the soy paste. You should now have a doughy substance. Knead the flour and bean paste well.
  Add the koji starter to the soy mixture and mix well again. Soy sauce gets its typical taste thanks to two types of fungi: Aspergillus oryzae and Aspergillus flavus. In the past, the fermentation fungi were created by letting the soy mixture sit for a week. Today, the fungus spores known as koji starter can be purchased ready-to-eat over the Internet at most Asian food shops or some health food stores.
 - To determine how much koji starter to add, read the directions for use on the package. The quantity can differ per brand.
- If the soybeans were still warm when you mixed them with the flour, let the mixture cool to room temperature before adding the starter.
 Transfer the koji mixture to a container about 3 inches deep. You are supposed to ferment the bean mixture with the koji starter in that container. Spread the mixture into a layer that is no more than 5 cm thick.
 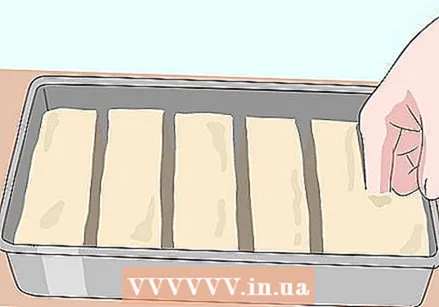 Make grooves in the mixture with your fingers to enlarge the surface. Push long channels into the koji mixture with your fingers. The grooves should be about 5 cm deep and spaced 5 to 8 cm apart. They should resemble the grooves you make to plant seeds in the garden.
  Let the koji mixture rest in a warm, moist place for two days. In this way the cultures have the opportunity to develop. The intention is that you can see the Aspergillus fungus growing on the soy mixture. The fungus should be light to dark green in color.
 - After the two days rest, proceed to ferment the mixture in water with salt or brine.
- Choose a place where the koji can ferment undisturbed. If you are not bothered by the smell, the kitchen is ideal for that; place the container in a kitchen cupboard or on top of the refrigerator, for example.
Method 2 of 2: Fermenting and pasteurizing the sauce
 Dissolve 900 grams of salt in 4 liters of water. Pour the salt into the water and stir until completely dissolved. This salt water (brine) will ensure that no unwanted bacteria or fungi grow in the koji mixture during fermentation.
 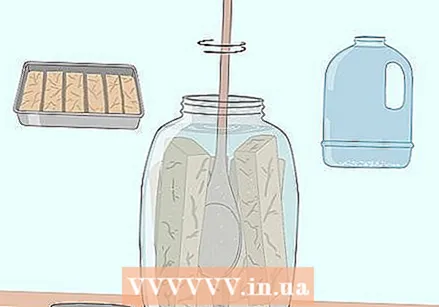 Mix the koji mixture into the brine to create what is called moromi. Place the koji mixture in a large pot with a tight-fitting lid. The pot should have a capacity of between seven and eight liters, so you have room to stir the mixture. Pour your brine over the koji mixture and stir in with a long spoon. The thick koji paste will not dissolve in the brine, but the soy and Aspergillus will slowly soak into the water.
  Cover the moromi and stir the mixture once a day for the first week. Place the moromi in a place with a warm, stable temperature and stir the mixture once a day with a long-handled spoon.
 - During fermentation, the koji will likely produce a rather strong odor, so keep the mixture well covered before and after stirring.
 Stir the moromi once a week for the next six to 12 months. The flavors only really develop during fermentation. You should let the soy sauce ferment for at least six months, but for an even fuller taste you better wait a year.
  Strain the mixture when it is done fermenting. As soon as you feel that the flavors have developed sufficiently, sift the moromi mixture. Scoop the solids into a press or piece of cheesecloth to make sure you can squeeze out all the liquid.
 - Discard the pulp remaining in the press or cloth.
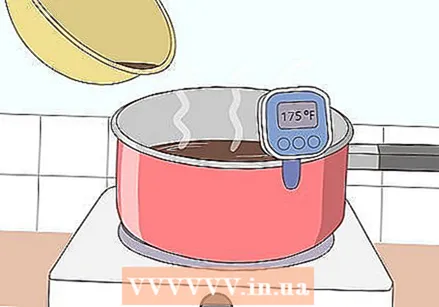 Pasteurize the soy sauce by heating it to 80 ℃. Heat the soy sauce over medium heat, then use a thermometer to make sure the mixture stays at this temperature for 20 minutes. Put the liquid left over after straining in a saucepan and use a sugar thermometer to keep an eye on the temperature. Good pasteurization ensures that no harmful bacteria or fungi grow in the soy sauce, so that it lasts longer.
  Transfer the soy sauce to a bottle and serve whenever you want. Pour the pasteurized soy sauce into a jar or bottle with a tight-fitting lid and refrigerate. If you want, you can pour some of your soy sauce into a smaller jar or bottle for easier serving.
 - Once ready, you can store the soy sauce in a hermetically sealed bottle or jar for up to 3 years. Once open, the soy sauce will keep for another one to two years.
Necessities
- Sieve
- Come to soak the soybeans
- Long handle spoon for stirring
- Large pan
- Press or cheesecloth
- 7.5 cm deep container
- 7.5-8 liter jar with tight-fitting lid
- Sugar thermometer
- Bottle


