Author:
Roger Morrison
Date Of Creation:
6 September 2021
Update Date:
1 July 2024
Content
- To step
- Part 1 of 3: Recognizing gears
- Part 2 of 3: The basics of shifting
- Part 3 of 3: Learn how and when to switch gears
- Tips
Are you completely done with pulling your pedal up the hill every time? Gears make cycling more comfortable and efficient, whether you have to go up hills or just drive through the city. Understanding the basics of how gears work can completely change the way you ride. So learn these techniques today and start cycling in style!
To step
Part 1 of 3: Recognizing gears
This section teaches you how to tell if your bike has gears, and if so, how many. Click here to skip directly to the switching section.
 Count the number of gears to the pedals. If you want to learn to shift gears on a bicycle, you really need a bicycle with gears. Fortunately, you can easily check this. First, look at the pedals. In the middle are one or more metal rings with teeth that engage in the chain. These are the front sprockets. Count the number of gears you see.
 - Most bicycles have one, two or three front sprockets.
 Count the number of sprockets on the rear wheel. Now look at the rear wheel. You should see the chain extending from the front sprockets over a second set of sprockets, in the center of the rear wheel. These are the rear sprockets. Count how many you see.
 - If your bike has gears, there are usually more sprockets at the back than at the front. Some bicycles have ten or more sprockets in total.
 Multiply the two numbers to find out how many gears your bike has. Now simply multiply the number of front gears by the number of rear gears. This will give you the total number of gears your bike has.
 - For example, if you have three sprockets in the front and six in the back, your bike will have 3 × 6 = 18 gears. If you have one sprocket at the front and seven at the back, then your bike has 1 × 7 = 7 gears.
- If your bike has only one sprocket in the front and one in the back, you have 1 × 1 = 1 gear. Such a bicycle is sometimes referred to as a "door-pedal". Unfortunately you cannot shift gears with these bikes.
Part 2 of 3: The basics of shifting
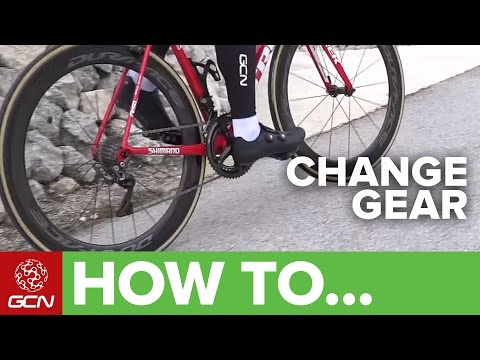
 Use your left hand to shift the front gears. Bicycles with gears almost always have the controls on the handlebars. If you use the controls on your left hand, a so-called derailleur the chain from sprocket to sprocket. There are a few types of controls that are common on bicycles. These are:
 - Adjusters with a rotary handle that you operate by turning your wrist
- Small switches above or below the handles that you operate with your thumbs
- Larger switches next to the brakes that you operate with your fingertips
- Rarer are electronic switches or switches mounted on the frame of the bicycle
 Use your right hand to shift the rear sprockets. The rear sprockets have their own derailleur. With your right hand you can move the derailleur from left to right, which moves the chain from sprocket to sprocket. The rear sprockets almost always have the same mechanism as the front sprockets.
  Shift down to make pedaling lighter but less powerful. You can shift gears to make cycling easier in certain situations. Downshifting (shifting to a lighter gear) makes pedaling faster and easier, but each revolution of your pedals will take you less far. There are two ways to switch back:
 - Switch to one smaller sprocket at the front.
- Switch to one larger sprocket at the rear.
 Shift up to make pedaling harder and more powerful. The reverse of downshifting is upshifting, or shifting to a higher gear. This makes pedaling harder, but each revolution of your pedals will take you further and give you more speed. There are also two ways to upshift:
 - Switch to one larger sprocket at the front.
- Switch to one smaller sprocket at the back.
 Practice shifting on a flat place. A great way to learn how to shift gear is simply to try it! Find a safe and level place (such as a park) and start pedaling. Now try to switch up or down. You should hear a click or chatter, and feel your pedals getting heavier or lighter depending on which way you shifted. Practice using both switches and toggle both up and down to get the hang of it.
 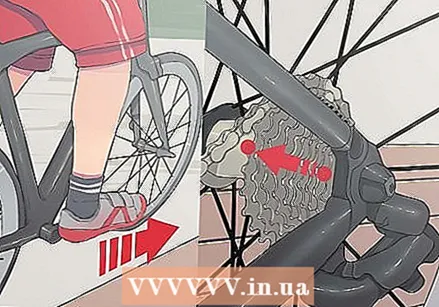 Only shift while pedaling. This will probably take some getting used to if you are used to a bike with a coaster brake. The chain can only engage a new sprocket if it is tight, and you have to pedal forward for this. If you shift while pedaling back or not pedaling at all, the chain will not be tight enough and will not engage. If you then start pedaling again, the chain can rattle or even run off the sprocket, which is not useful while cycling.
Part 3 of 3: Learn how and when to switch gears
 Start in a low gear. The first few revolutions you make with your pedals are often the toughest, because you have to accelerate from a standstill. So when you start cycling, use a low gear to make acceleration faster and easier.
 - It is also best to do this when you come to a stop and then have to pedal again (such as for a red light).
- If you know that you will soon be coming to a standstill, it is a good idea to downshift in advance so that you can accelerate again later. This is especially true if you know you're coming out of a tricky one, like an uphill driveway.
 Gradually shift up as you build up speed. As you go faster and faster you will notice that the lower gears feel too light. If you want to build up more speed, shift up. You will notice that the pedals feel heavier and you can keep accelerating.
 - If you are cycling on moderate terrain (eg in town with a small hill here and there) a gear somewhere in the middle will work fine for your normal cruising speed. For example, if you have 18 gears (three sprockets at the front and six at the rear), the second sprocket at the front and the third sprocket at the back will be a good middle ground option.
 Shift down for hills. This is an important skill, and if you don't you will have to lift your bike up heavier hills. It is almost impossible to ride uphill in a high gear. In a low gear you can steadily climb the hill without too much extra effort.
 - You may find it difficult at first to slowly climb hills in a low gear. That makes sense: because you have a low speed, it is more difficult to keep your balance. Fortunately, it is also easier to gain a foothold at low speed if you lose balance.
 Gear up for relatively flat stretches and descents. If you want to build up speed, it is best to use higher gears. By gradually shifting up to the highest gears you can keep accelerating until you reach your top speed. Be extra careful when you go that fast, because you hurt yourself much more easily.
 - Using a high gear is pretty much the only way to accelerate while descending. Lower gears cannot spin the chain fast enough to keep up with the wheels on a descent, making it nearly impossible to accelerate further on top of the acceleration of the descent itself.
 Be careful with upshifts to avoid joint injuries. It can be very satisfying to "pump" your bike forward in high gear, but it may be bad for your joints in the long run. With such great effort, moving forward on a bike in too high a gear can put a lot of pressure on your joints (especially your knees), which can lead to pain and even injury. Also to train your heart and lungs, it is better to cycle in a lower gear and at a regular pace.
 - To be clear: you can of course use your higher gears, but only if you work towards it gradually after you have already built up some speed.
 Avoid gears where the chain is very crooked. If you look at your chain as you shift, you may notice that it is sometimes slightly diagonal. This is not a problem unless you choose a gear where the chain is very skewed. This can cause your chain to wear out and even break after a while, and in the short term it can cause chatter and chain slippage. As a rule of thumb, it is best to avoid the largest and smallest sprockets both front and rear. Or, in other words:
 - Avoid it largest sprocket at the front with the largest sprockets at the rear.
- Avoid it smallest sprocket at the front with the smallest sprockets at the back.
Tips
- In strong headwinds, use one gear lower than you normally would. You will then go a little slower, but you will last longer at a constant pace.
- The size difference between the front and rear cogs determines how hard you have to pedal to move forward and how fast you move forward. For example, if the two sprockets are nearly the same size, your rear wheel will spin once for each revolution of your pedals. On the other hand, if you have a large sprocket at the front and a small one at the back, your rear wheel will turn several times for each revolution of your pedals. This allows you to achieve higher speeds, but it takes more effort to accelerate.
- Play it safe and use a gear that is too low when driving uphill. Pedaling that fast with less counterweight is exhausting, but it's better for you than fighting yourself up the hill. Moreover, you can keep this up longer.
- Switch back early for a climb. You want to avoid having to downshift in a hurry while you're already going uphill.
- Many people find between 75 and 90 rotations per minute the best pedal speed to maintain for a longer period of time. At this speed, your pedals will make a full revolution in a little less time than it takes you to say "twenty one."


