Author:
Frank Hunt
Date Of Creation:
14 March 2021
Update Date:
1 May 2024

Content
- To step
- Part 1 of 5: Install
- Part 2 of 5: Setting up Notepad ++
- Part 3 of 5: Creating a simple program in C ++
- Part 4 of 5: Create a simple batch program
- Part 5 of 5: Creating a simple HTML program
- Tips
- Warnings
This wikiHow teaches you how to install and use Notepad ++ on your Windows computer. Notepad ++ is a word processor optimized for programming languages, making it ideal for coding in languages such as C ++, Batch and HTML.
To step
Part 1 of 5: Install
 Open the Notepad ++ website. Go to https://notepad-plus-plus.org/ in your browser.
 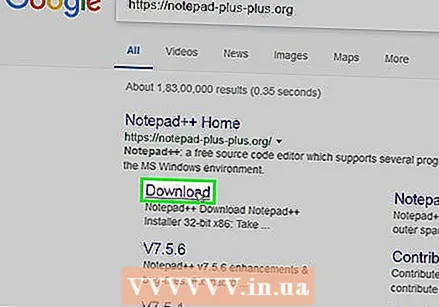 click on Download. This tab is located at the top left of the page.
 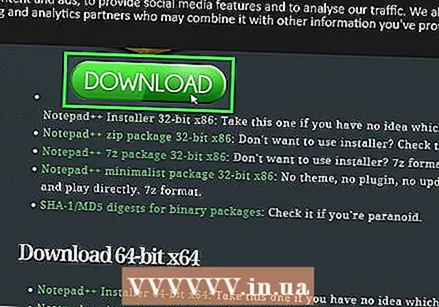 click on To download. It's a green button in the center of the page. The Notepad ++ installer will start downloading.
 - Depending on your browser settings, you may need to select a save location or confirm the download before you can continue.
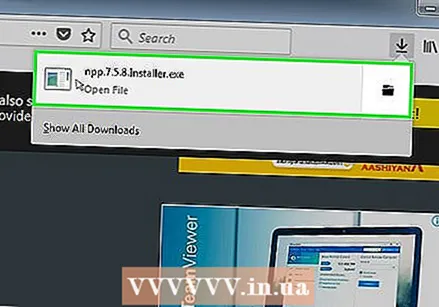 Double click on the setup file. It looks like a green frog.
 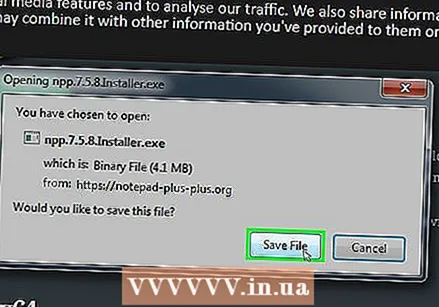 click on Yes to confirm. The installation window will open.
  Select a language. Click on the language selection menu and then click on the language you want to use.
  click on OK. It's at the bottom of the Language window.
 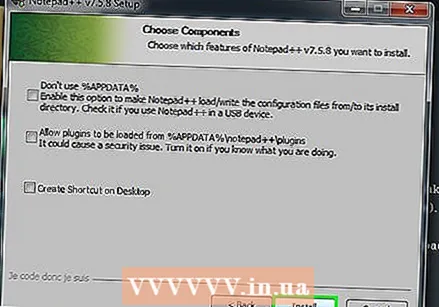 Follow the instructions on the screen. Do the following:
 - click on Next one
- click on agreement
- click on Next one
- click on Next one
- Check the advanced options and then click to install.
 click on Shut down. If you keep the option "Run Notepad ++" checked, this will both close the installation window and open Notepad ++.
Part 2 of 5: Setting up Notepad ++
 Open Notepad ++ if it is not open. Double-click on the Notepad ++ app icon, a white rectangle with a green frog on it.
  Delete any text that may be present in Notepad ++. Normally you'll see some developer notes here, so just select and delete those.
 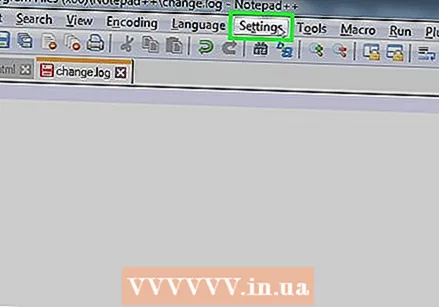 click on Settings. This tab is located at the top of Notepad ++. When you click on this, a drop-down menu will appear.
 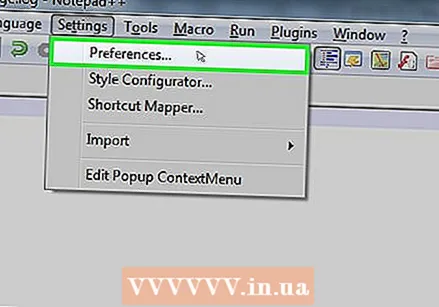 click on Preferences .... It's in the menu Settings. The Preferences window opens.
 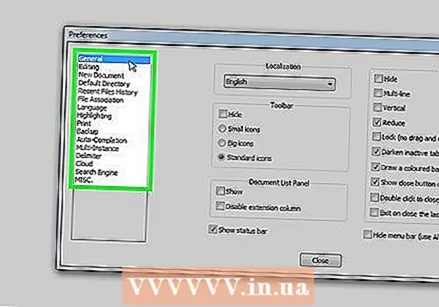 View the settings of Notepad ++. View the settings in the center of the window, or click a tab on the left side of the preferences window to change the category of settings you are viewing.
 - You can change these settings as you wish, but be careful not to change anything you don't understand.
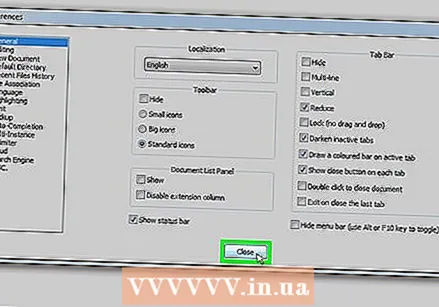 Click Close. It's at the bottom of the preferences window. This saves any changes and closes the window.
 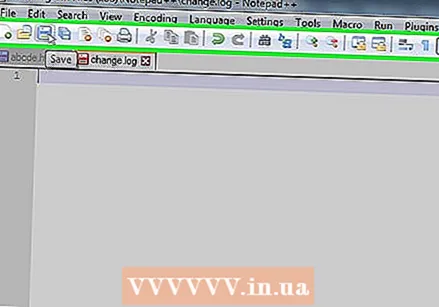 Check out the menu buttons. At the top of the Notepad ++ window you will see a row of colored buttons. Move your mouse over each of the buttons to show what each button does.
 - For example, the purple floppy disk icon at the top left of the window saves your project progress when you click on it.
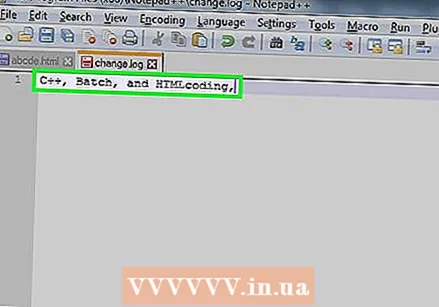 Choose a programming language. This article covers examples for C ++, Batch and HTML coding, but you can work in almost any programming language with Notepad ++. Once you've chosen a programming language, you can proceed to actually use Notepad ++ to create a program.
Part 3 of 5: Creating a simple program in C ++
 Click on the tab Language. It's at the top of the window. When you click on it, a drop-down menu will appear.
 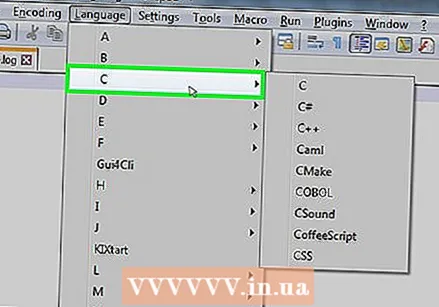 Select C.. You can find this option in the Language-menu. A submenu will appear.
  click on C ++. It's in the submenu. Most programmers' first experiences with C ++ involve creating a program that says "Hello, World!" When it runs, so that's what you're going to do here.
  Add a title to your program. Type // followed by the title of your program (eg "My First Program"), then press ↵ Enter.
 - Text in a line typed after two slashes is not read as code.
- For example, to name your program "Hello world", type // Hello world in Notepad ++.
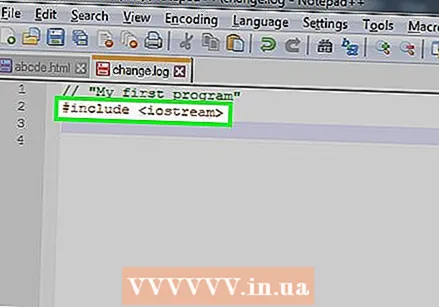 Enter the command from the preprocessor. Type #include iostream> in Notepad ++ then press ↵ Enter. This command instructs C ++ to run the following lines of code as a program.
  Declare the function of the program. Type int main () in Notepad ++, then press ↵ Enter.
 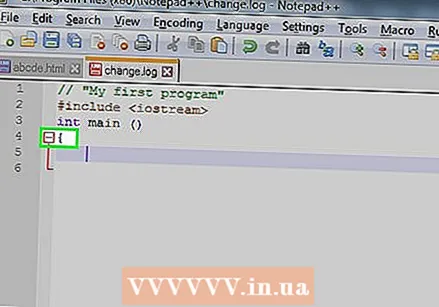 Add a start curly brace. Type {in Notepad ++ then press ↵ Enter. The main code of your program will later be placed between this start brace and an end brace.
 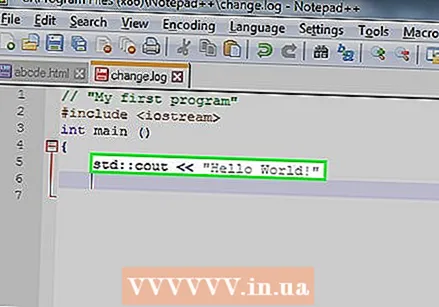 Enter the actual program. Type std :: cout "Hello World!"; in Notepad ++ and press ↵ Enter.
 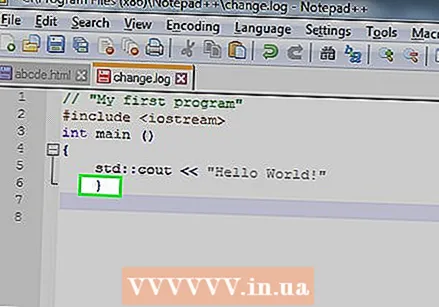 Add an end brace. Type} in Notepad ++. This concludes the implementation phase of the program.
  Check your program. It should look something like this:
 - //Hello World
- #include iostream>
- int main ()
- {
- std :: cout "Hello world!";
- }
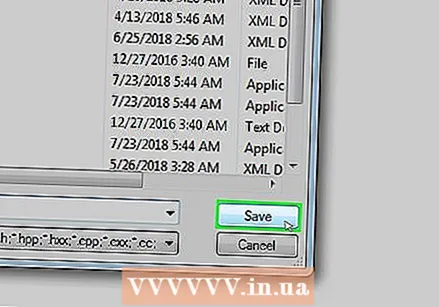 Save your program. click on File and then on Save as… from the drop-down menu, enter a name for your program, select a save location and click Save.
 - If you have a program on your computer that can run C ++, you should be able to open this "Hello World" program with it.
Part 4 of 5: Create a simple batch program
 Click on the tab Language. It's at the top of the window. When you click on it, a drop-down menu will appear.
 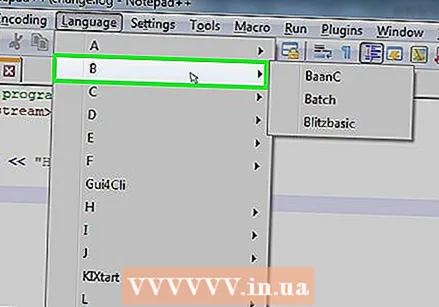 Choose B.. You can find this option in the Language -menu. A submenu will appear.
  click on Batch. This is in the submenu. Batch is a modified version of the commands you use in the command prompt, so each batch file will open in the command prompt.
  Type the command "echo". Type @echo off in Notepad ++ and press ↵ Enter.
  Give your program a title. Type title text and press ↵ Enter, replacing "text" with your desired title.
 - When you run the program, the title will be displayed at the top of the command window.
 Enter the text to be displayed. Type echo text and press ↵ Enter. Replace "text" with the text you want to display in the command prompt.
 - For example, if you want to display the text "People are superior!" In the command prompt, type echo People are superior! in Notepad ++.
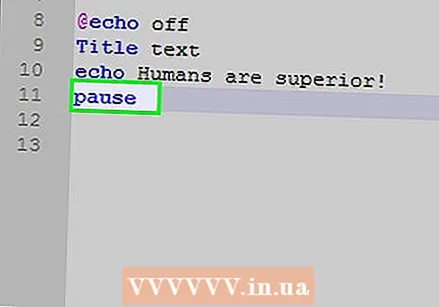 Stop the program. Type pause in Notepad ++ to tell the program to stop.
 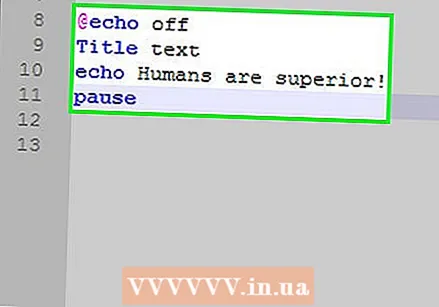 Check your code. It should look something like this:
 - @echo off
- title Improved command prompt
- echo People are superior!
- pause
 Save your program. click on File, Then on Save as…' from the drop-down menu, enter a name for your program, select a save location and click Save.
 - If you want to run your program, go to the location indicated and double-click the file.
Part 5 of 5: Creating a simple HTML program
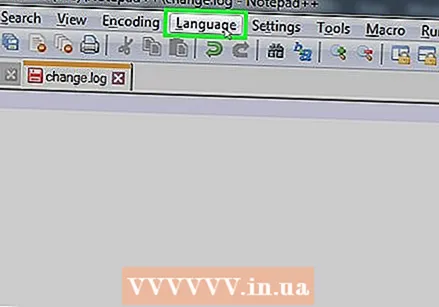 Click on the tab Language It's at the top of the window. When you click on it, a drop-down menu will appear.
 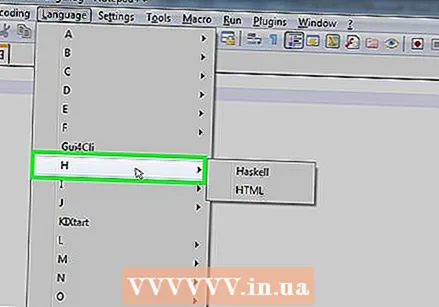 Select H.. This option is in the Language-menu. A submenu will appear.
 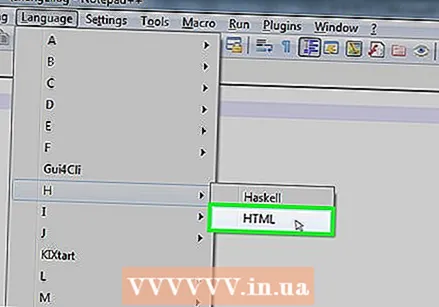 click on HTML. It's in the submenu. HTML is often used for web pages, so you create a basic web page with heading and sub-heading.
  Enter the document header. Type! DOCTYPE html> in Notepad ++, then press ↵ Enter.
 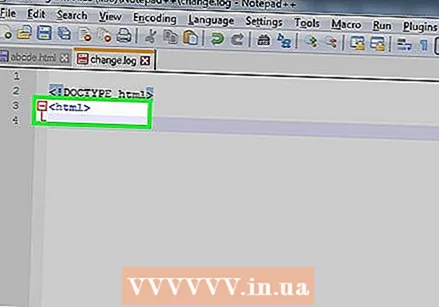 Add the tag "html". Type html> in Notepad ++ and press ↵ Enter.
 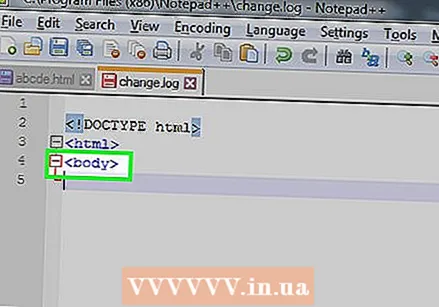 Add the "body" tag. Type body> in Notepad ++ and press ↵ Enter. This indicates that you are going to post a piece of text or other content.
 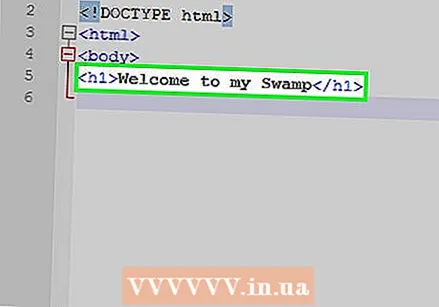 Type the header of the page. Type h1> text / h1> and press ↵ Enter, making sure to replace "text" with a heading for the page of your choice.
 - For example, to set your header as "Welcome to my swamp", you could enter h1> Welcome to my swamp / h1> in Notepad ++.
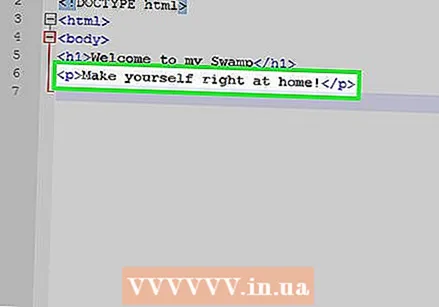 Place the text and other content under the heading. Type your p> text / p> and press ↵ Enter. Replace "text" with text of your own choice (eg, "Make yourself at home!").
 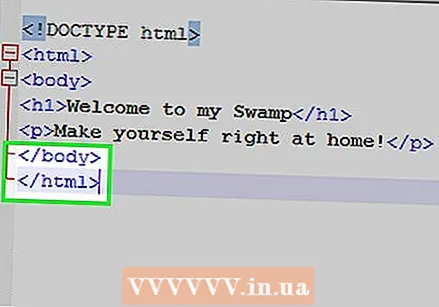 Close the "HTML" and "Body" tags. Type / body> and press ↵ Enter and then type / html>.
 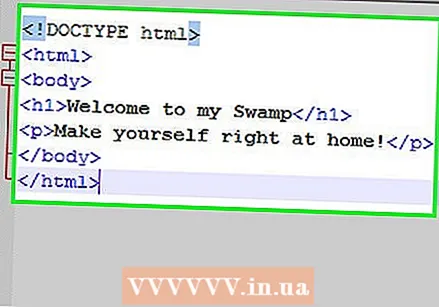 Check your code. It should look something like this:
 - ! DOCTYPE html>
- html>
- body>
- h1> Welcome to my swamp / h1>
- p> Make yourself at home! / p>
- / body>
- / html>
 Save your program. click on Filethen click Save as… from the drop-down menu, enter a name for your program, select a save location and click Save.
 - As long as you select your language for saving, Notepad ++ will choose the correct file format for you.
- You should be able to open your HTML file in any web browser.
Tips
- Notepad ++ uses tabs to hold different types of content, so if Notepad ++ crashes, your work will probably still be available when you reopen this program.
Warnings
- Selecting the wrong extension for the programming language used will lead to errors when executing the program.
- Always test your program before showing it to other people. This gives you the chance to fix any issues or make any necessary adjustments.


