Author:
John Pratt
Date Of Creation:
18 April 2021
Update Date:
1 July 2024

Content
- To step
- Method 1 of 3: Using a curling iron
- Method 2 of 3: Styling methods without heating
- Method 3 of 3: Get a perm
- Tips
If you want some bounce and volume in your naturally straight hair by adding curl, there are several easy options. A very popular and effective method is the use of a flat iron. If your hair holds curls easily and you don't want it damaged, certain overnight styling techniques can give you beautiful curls the next day. Finally, if you're sure you want to curl every day, but don't want to style your hair every day, you can always get another perm.
To step
Method 1 of 3: Using a curling iron
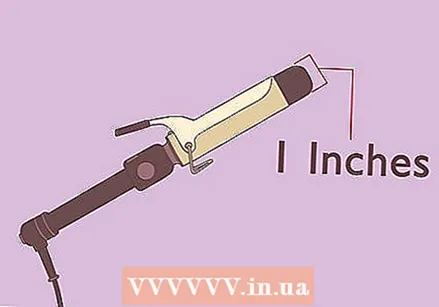 Buy a 2-3 cm straightener for short or medium length hair. If your hair is just a little past your shoulders or shorter, you should use a thinner straightening iron about 2-3cm for your hair. A thicker one may not give you the degree of curl you want.
 - Shop online for curling irons or at beauty supplies or department stores.
- A larger 3 cm thick straightener is best used on hair that extends beyond shoulder length. With a thinner iron, you may not be able to curl all your locks every time.
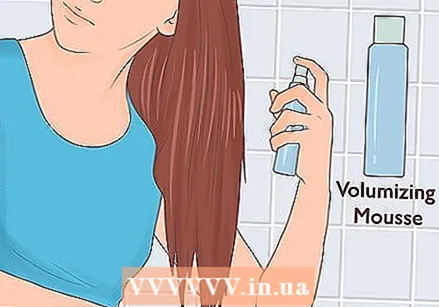 Apply volumizing mousse or hairspray to your dry, brushed hair. Your hair doesn't need to be freshly washed to start curling, but it should be free from tangles and drying. Use volumizing mousse or hairspray to cover most of your hair with a thin layer. Make sure to cover the ends of your hair with mousse or spray, as those parts of your hair usually lose curl first.
 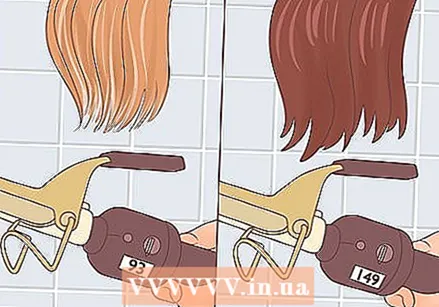 Set the temperature of the straightener based on the thickness of your hair. If you have a curling iron that allows you to change the temperature, you should set it to a lower temperature if you have fine hair. Too much heat on fine hair can cause damage. If you have thick hair, set your flat iron to a higher temperature so that the heat can reach all of your hair every time you curl it.
 - If you have fine to medium thick hair, or if you have dyed your hair, set your straightener to about 90 degrees Celsius or lower.
- If you have thick hair, you can set the temperature to 90-150 degrees Celsius.
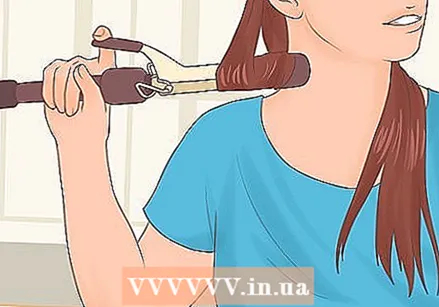
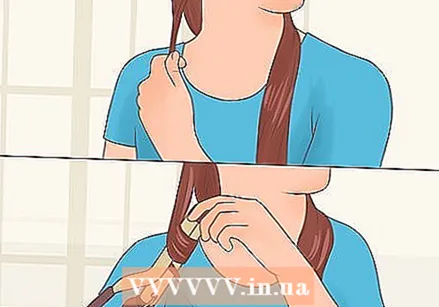 Take a 2-3 cm thick strand of hair and wrap it around your hot flat iron. Grab part of the hair between your fingers and wrap the entire strand vertically around the temperature straightener.
 - If you have a straightener with a clamp, it is best to wrap your hair from the bottom, making sure to clamp the end of your locks in the same direction that you are wrapping your locks.
- If you have a cone-shaped curling iron, you can start at the top or bottom of your hair. For looser waves, start at the top where you want the waves to start and wrap your hair around the flat iron, leaving some hair on the ends.
- For tighter curls with a wand iron, start wrapping at the bottom and use the top sections of your hair to cover the ends and keep them close to the flat iron.
 Wrap and hold your hair horizontally against the flat iron for more volume. The way you wrap and hold your hair around your flat iron affects the type of volume you get with each curl. For tighter curls with more volume, wrap your hair horizontally around the flat iron and keep it horizontal.
 - For looser curls with less volume, wrap each strand of hair vertically in your straightener and hold it vertically.
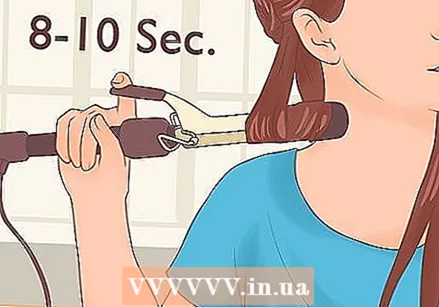 Keep your hair wrapped around the flat iron for 8-10 seconds. People are often tempted to keep their hair in the flat iron longer because they think it will get curlier. Unfortunately, this is not the case, but it will damage your hair. 8-10 seconds is enough time to heat each curl around your straightener.
 - You can always redo a curl if you notice that it doesn't hold well. Try more mousse or hairspray on your hair before curling it again.
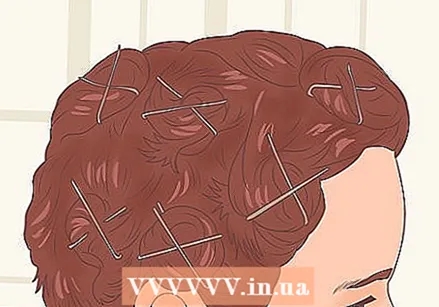 Gently pin up each curl to allow it to cool. To hold curls, let them curl up and cool close to your head. Take a hairpin (or a single prong clip or duckbill clip) and gently insert it into the curl close to your head to hold the curl up as it cools.
 - You can leave your curls pinned up when you're done curling the rest of your hair with your flat iron to save time and keep those finished curls out of the way.
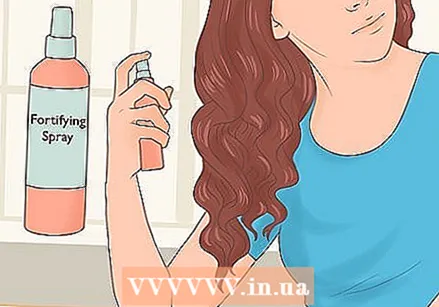 Loosen each cooled curl and spray it with strong or supportive hairspray. When you are done curling your hair, take the pins out of your curls and coat your hair with a coat of hairspray to strengthen it. Strength or "firming" spray helps keep your curls in place longer.
 - If you have very fine hair, make sure to apply only a thin layer of hairspray to your curls. Your hair doesn't need a lot of hairspray to hold it, and too much can weigh down fine curls and cause them to relax too much.
- If you live in a warm, humid climate, try an anti-moisture hairspray to keep your curls in when you go outside.
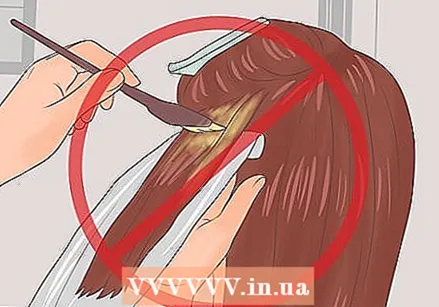
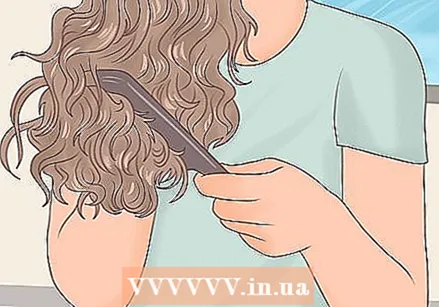 Avoid brushing freshly curled hair. You can gently part and style your hair with your fingers or with a hair pluck, especially if it stays too tight in the shape of the straightener for your taste. But unless you want to remove or add volume to your curls, don't brush or comb them. Brushing your curls can also cause frizzy hair.
Method 2 of 3: Styling methods without heating
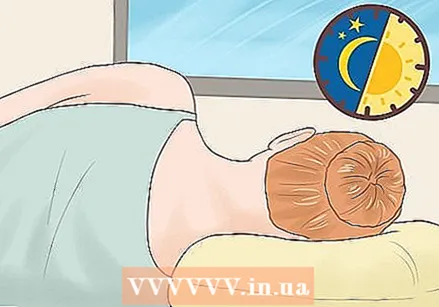 Wear a sock at night as a band for loose curls. If your hair is almost dry after showering, apply styling serum and secure it in a high ponytail with an elastic. Take an old sock that you have banished and put all your hair through it, then divide it in two. Wrap both sections tightly around the sock on both sides, securing the ends to your roots with a hairpin.
 - In the morning, take your hair out of the sock and spray it with hairspray to hold your curls.
- You can buy such "socks" at beauty stores or online, or you can make your own by cutting the toe out of a sock and rolling the sock into a thick circle.
- Remember that a sock bun is best for long hair.
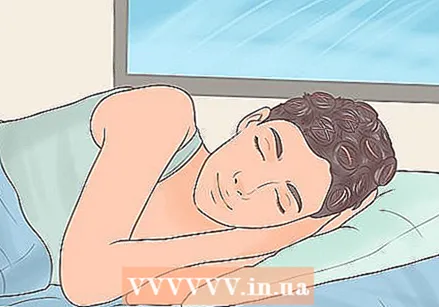
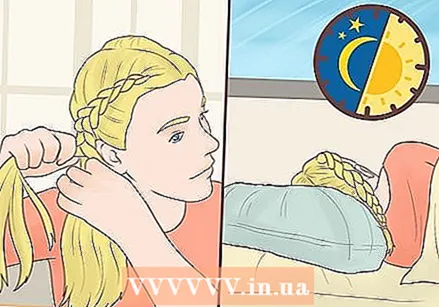 Sleep with braids in, for loose or shorter waves. If your hair is damp, apply a small amount of styling serum to your fingers and work it through your hair. Divide your hair into as many sections as you want and braid each section tightly.You can do your hair in two or more French braids, in "corn rows" or individual braids of three strands. Secure the bottom of each braid with an elastic hair band and sleep with the braids in.
 - In the morning, loosen your braids and comb your fingers through your hair. Apply volumizing hairspray to keep the curls in place.
- For sleek waves, divide your hair into many sections and make six to 10 small, tight braids when braiding your hair at night.
- For loose, wavy hair, put your hair in one or two braids for the night.
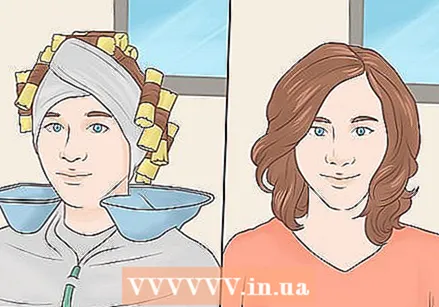
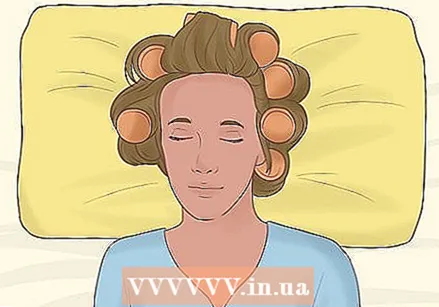 In the evening, roll your hair into soft curlers for curls of different sizes. Buy soft curlers from a beauty supply store. Choose small rollers for tighter curls or large ones for loose waves. Wrap your damp hair in the rollers before bed and secure with clips.
 - Some rollers come with clips, which are often easier to use at night than hair clips or other hair clips.
- In the morning, take your hair off the rollers and spray your hair with hairspray for curls that last all day.
 Make pin curls with mini buns. If your hair is damp, take a section of your desired thickness and twist it from top to bottom. When you twist all the way to the roots, wrap the roll in a circle against your scalp and pin it in place with two hairpins crossed over each other. Make these "mini buns" in all of your hair and leave them in while you sleep.
 - Remove the buns in the morning and watch your curls unfold. Spray them with hairspray so they last all day.
- You can make the buns as big or small as you want. Use more hair with each turn for bigger buns and looser curls, and less hair in each turn for smaller buns and tighter curls.
Method 3 of 3: Get a perm
 Do not chemically treat your hair for a month before getting a perm. Hair that has been colored, relaxed, or chemically treated in any way in the month prior to the perm is extra susceptible to damage and may cause the perm to fail.
 - Some stylists will not apply perms to hair that has been colored or chemically treated. Call the hairdresser ahead of time to inquire about perms policy.
- A perm can sometimes make your hair appear lighter in color. Talk to your stylist about whether this can happen to your hair type.
- Keep in mind that perms last for about six months, depending on the length and texture of the hair. The curl of a perm will not fade, but will grow out slowly.
 Tell your stylist what kind of curls you want. Are you interested in subtle waves, bouncy waves or classic curls? Let your stylist know what you want your curls to look like, and they can tell you what perm options there are for your hair type and curl types.
 - Browse photos in style magazines or online to get more ideas for the types of curls you want. It's even better if you can take a photo with you to the hair salon. Your stylist can tell you how your hair type will respond to the different types of perms.
 Ask for a digital or "hot" perm if you want looser curls while having thick hair. There are two main options for a perm: digital or "warm" perms and cold or alkaline perms. When applying a hot perm, your hair is first prepped with a relaxer, then treated with a hot straightener, the temperature depending on your hair length and thickness.
 - Digital perms are only suitable for thick hair. They produce looser wave-shaped curls and no corkscrew curls.
- The total process of a digital perm takes about 3-4 hours and is more expensive than a cold perm.
- Digital perms are basically less damage to your hair than cold perms, and you need fewer styling products to hold the curls.
 Ask for a "cold" perm to get tighter curls on any hair texture. If you don't have thick hair, your only option is a cold perm. In this type of perm, your hair is soaked in an alkaline compound and then wrapped tightly around the rollers to create curls. With cold perms, it is possible to make curls closer to the hair roots, and they are suitable for all hair types.
 - While cold perms may look less natural at first, they do eventually relax a bit.
- You should use curl-enhancing products more often on a cold perm, but the overall process is shorter and more affordable.
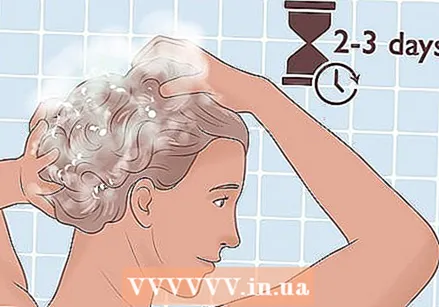 Wait 2-3 days before washing freshly permed hair. After the perm is applied, your hair will need time to adjust to the chemicals and damage it suffered during the treatment. Your curls should also be given as much time as possible to set in - washing your hair too soon after getting a perm can make your curls less obvious.
 - Use curl-enhancing shampoos, conditioners and styling products on your permed hair. Use a protein conditioner to help your hair recover the nutrients lost during the perm process.
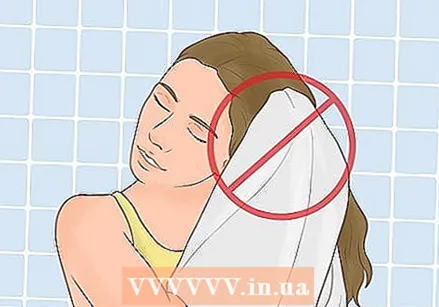 Do not rub your hair dry with a towel when it is wet. To prevent your hair from becoming frizzy and tangles, after showering, gently pat dry with a microfiber cloth instead of rubbing. Just dry it enough so that it isn't dripping wet and let it air dry further.
 - If you have a cold perm, apply curl enhancing cream or solution to your hair while it is still damp and let it air dry.
- Do not blow-dry your hair or use a flat iron if it is permed. Too much heat can damage permed hair.
 Avoid dyes and chlorine if you have a perm. Anything that contains a lot of chemicals, such as hair color or chlorine, can negatively affect your perm, making it look dry and damaged. Wait at least a month before dyeing permed hair.
 - If you enjoy swimming, wear a shower cap to protect yourself permanently from chlorine until the perm eventually grows and disappears.
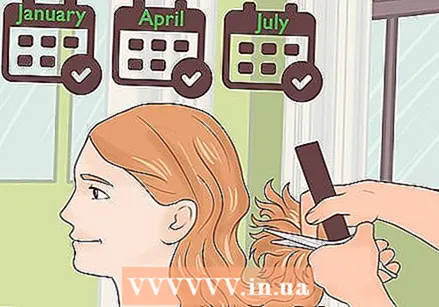 Get your hair trimmed every three months to add sparkle to your curls. You may be tempted not to cut your hair to try and keep the perm longer. To keep the curls that are there bouncy and healthy, get your hair trimmed every three months.
 - If your hair grows quickly, the top will likely straighten and the bottom curls will look a bit looser over time. Most perms are completely gone after about six months.
Tips
- Try different techniques to see which method of curling your hair works best for you, and consult your stylist for more ideas.


