Author:
John Pratt
Date Of Creation:
13 April 2021
Update Date:
1 July 2024

Content
- To step
- Method 1 of 3: Paint ceramic plates
- Method 2 of 3: Paint ceramic tiles
- Method 3 of 3: Painting a ceramic lamp
- Tips
- Warnings
Painting ceramic items is a fun and inexpensive way to refresh old household items or make a personalized gift or piece. Read the steps below to learn everything you need to know about painting ceramics yourself.
To step
Method 1 of 3: Paint ceramic plates
 Choose paint. Depending on how you plan to use the ceramic, there are a few different paints to choose from. Each type of paint produces a different result in terms of the appearance, durability and usability of the ceramic.
 - With regular paints such as acrylic paint and transparent acrylic lacquer you get highly glossy plates that are beautiful to look at, but which are not safe to eat.
- With a porcelain marker or paint pen with paint that you do not have to burn, you can easily and quickly apply decorations to plates that you can then safely eat from. However, the decorations will not last if you use the plates regularly.
- With ceramic or porcelain paint that you have to burn in, you get fairly strong glossy patterns and you can eat off your plates safely. In most cases, the decorations will keep looking good for years.
 Choose a brush or pen. When you have chosen a technique, get a brush that is suitable for the pattern you want to paint or consider using a paint pen. With a paint pen you can "draw" the paint like a marker on the surface. A paint pen is therefore very suitable for writing words and making line drawings, but is less flexible in use.
 - A small pointed brush is perfect for painting flower buds, branches and leaves.
- A flat-tipped brush is very suitable for geometric patterns such as edges and straight lines, as well as filling larger areas. If you plan to use a stencil for application, a small brush with a flat tip is probably the best choice.
 Buy other supplies. Buy clear varnish for signs that you want to use as decoration and some masking tape or masking tape if you want to paint straight lines and corners. An apron and a pair of disposable gloves also come in handy in many cases.
  Paint your plate. First, thoroughly clean and dry the board, then apply the paint of your choice in a pattern you like. How you perform this step varies by type of paint, but you will usually use acrylic or ceramic paint that needs to be burned in to create patterns. Use a small brush and paint your pattern on the ceramic board.
 - Use a pointed brush to apply flower buds and branches. Apply a small dollop of paint to the board where you want the bottom of the flower bud or leaf to be, then drag the brush towards the tip of the flower bud or leaf. You make the point when you pull the brush away from the board.
- To paint straight lines over a plate or bowl, tape the parts on both sides of the places where the lines should be with masking tape. Use a ruler or flexible tape measure to make sure that the space between the strips of tape is the same width throughout. Paint the area between the strips of tape with strong strokes with a flat brush. Then gently pull the pieces of tape away to reveal a clean line.
- For an unusual motif that somewhat resembles the work of the art movement The style from the early twentieth century you tape off rectangular pieces with strips of tape that you apply crosswise. Then paint the pieces with different colors of paint. Leave one or two pieces blank for a striking geometric effect.
- Note that after the first coat of acrylic paint has dried, you can apply more paint to brighten the colors. This step is usually not necessary if you are using ceramic paint.
 If necessary, draw or write with a porcelain marker with no-burn paint. You can buy these markers at many hobby shops, art supply stores and web shops. You can apply the paint relatively neatly, making them very suitable for children's parties and other group activities.
 - Draw, write or doodle just as you would with a colored felt-tip pen. The paint will dry quickly after application. If no paint comes out, hold it with the tip tilted down and shake it gently.
- Try drawing a background motif or part of an image with a color of paint and letting the paint dry briefly. Then add the next layer in a different color to get a brightly colored and fun image.
- Don't forget to put your signature on the bottom of the sign so that everyone knows you painted the sign.
 Keep breathing. For your own safety, make sure to paint in an open and well-ventilated area, especially when using acrylic paint. Paint fumes can be unpleasant and worsen existing conditions such as allergies you may have.
  Sand the board for a better result. Boards that appear to be too smooth and glossy for the paint to adhere properly can be carefully painted with very fine sandpaper with a grain size of, for example, 1800 or 2000. Do not apply much pressure and try to paint the surface evenly.
 - This works because the sandpaper will leave microscopic scratches in the glaze of the board, so the paint will adhere better.
- Do not make the glaze visibly rough or uneven. A light sanding is more than enough.
 Apply acrylic lacquer to acrylic paint. If you painted a decorative plate with acrylic paint, let the paint dry thoroughly and apply clear acrylic lacquer on top. Let the first coat dry and apply a second coat to make sure your painting is well protected.
 - This plate will look very shiny and beautiful, but it is not safe to eat. Instead, put it on a shelf as a decoration or give it as a gift. Tell the recipient that the plate is not suitable for eating.
 Let ceramic paint burn in. If you chose to paint a plate with special ceramic paint, find a quiet place to let the plate dry for at least 24 hours. When the plate is completely dry, burn the paint in a preheated oven according to the directions on the package.
 - Always follow the directions on the packaging. If you need to burn the plate earlier, do so.
- This plate will have a nice shine and be safe to eat. If you've opted for high-quality ceramic paint that is dishwasher safe, you can even wash the plate in the dishwasher. The image should look good for many years to come.
- Consider hand-washing all of your painted dishes, even if you can basically use the dishwasher. Washing by hand is a lot gentler on the surface and ensures that your plate lasts as long as possible.
 Use your painted ceramic plate. If you've chosen to use porcelain markers with no-burn paint, you can use the board immediately once the paint is dry. You do not have to perform any other steps.
 - You can safely eat off your plate, but the paint will eventually peel off and be damaged from contact with cutlery, teeth, and other hard edges. This paint is certainly not dishwasher safe.
Method 2 of 3: Paint ceramic tiles
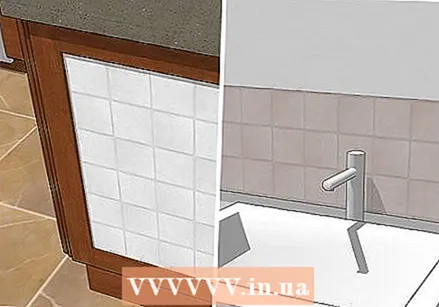 Know your limitations. Ceramic tiles in kitchens, bathrooms and laundry rooms can certainly be painted, but the process involves more than painting a plate or the base of a lamp. In addition, there are practical limitations on how to paint and how long you can expect the paint to last.
 - Make a plan in advance. When you paint tiles in the house, you will not be able to use that part of the house where you are working for a while. So make a plan in advance to avoid awkward situations with the bathroom and kitchen.
- Only paint suitable tiles. Places that are used a lot and tiles that are constantly exposed to moisture are generally not very suitable for painting. You will also not receive unambiguous painting advice from experts. Choose to paint less frequently used tiles or accept that the paintwork will not last as long as you would like.
 Gather your supplies. Painting or repainting ceramic tiles in your home requires more patience and preparation than painting the other ceramic items in this article. You should be able to keep working properly if you have the right supplies. Gather the following supplies:
 - Fine sandpaper with grain size 220 or 240
- Sander with a rotating sanding disc
- Thick rubber gloves, eye protection and a face mask
- Abrasive cleaner for tiles, for example in powder form
- Bleach to kill mold
- Strong adhesive primer intended for glossy surfaces
- High-quality acrylic or epoxy paint
- Transparent polyurethane lacquer or epoxy lacquer
- A large paintbrush and / or paint roller
- Cloths and a vacuum cleaner to clean up
 Clean and sand the tiles. The first step in painting your tiles is to make sure they are ready to be painted. Make sure to wear a face mask and goggles when performing this step so you don't get dust in your eyes or airways. If you are concerned that a 220-grit piece of sandpaper will be sanding too fast or too deep, you can use finer sandpaper. Note that you will probably spend longer on sanding if you use sandpaper with a higher grit size.
 - Start with the abrasive tile cleaner. Thoroughly scrub the area you want to paint and wipe the surface until it is clean and dry.
- Disinfect the surface. Make a bleach solution and scrub the tiles a second time with a clean cloth to kill mold.
- Sand the spot. Attach your sandpaper to your sander and gently sand your tiles. The goal is to remove the extra gloss layer on top of the ceramic without damaging the ceramic itself.
 Apply primer to the tiles. Just like when painting a lamp, the untreated ceramic tiles will have to be treated with a primer. Spread the primer evenly with a brush.
 - Choose the right primer. Apply an oil-based primer to make the tiles more resistant to water.
- Apply two coats and finish the job. When the first coat has partially dried, apply a second coat of primer. Allow time for the paint to dry thoroughly (several hours). Then sand the surface with very fine sandpaper (for example grit 1500 or 2000) to remove all bumps and irregularities in the paint layer.
 Choose paint. Now that the tiles have been primed and dry, it is time to paint them. Choose the best paint possible. You basically have three options to choose from:
 - Epoxy paint has a strong shine, is very durable and lasts a long time, but is more expensive than other types of paint.
- Acrylic paint is not as durable as epoxy paint and therefore less suitable for places that are used a lot. However, you can work with it more easily and the paint is also cheaper.
- Latex paint has a soft, rubbery finish that some people like, but is the least durable of the three paints.
 Apply the paint evenly with a paintbrush. It is best to use a flat, fairly wide paintbrush. Start with a thin coat of paint, let the paint dry and apply a second coat. The paint will then be brighter in color and smoother than if you applied a single thick coat of paint.
 - Read the paint thinning instructions on the paint can to learn how to properly dilute the paint if necessary.
- To paint a geometric pattern, before you start, make shapes from blue painter's tape and use a laser level and ruler to stick them in the correct places on the surface to be painted. Remove the tape when you're done, but before applying clear coat to get clean lines and shapes.
 Finish the tiles. Wait 2 to 3 days for the paint to dry completely. When the paint is dry it is time to apply clear coat to protect the paint. Apply two coats of lacquer. After the first coat of paint, wait long enough for it to feel dry. Choose between polyurethane enamel and epoxy enamel. Both have their own advantages:
 - Polyurethane lacquer is cheaper, faster to apply and easier to work with. However, in places that are used a lot, this lacquer does not last as long as epoxy lacquer.
- Epoxy lacquer is hard, glossy and, in fact, permanent, making this lacquer the better choice for areas that are frequently walked on or that get wet regularly. However, it is more expensive and you will have to work more accurately to apply the paint properly.
 Clean up everything. Discard the paper you used. Vacuum up all the dust and dirt with a vacuum cleaner. Clean and store your tools. Let the paint dry completely. It is recommended to let the paint dry for 2 to 3 days.
Method 3 of 3: Painting a ceramic lamp
 Gather your supplies. To paint an old ceramic lamp or other decorative ceramic object, you perform four basic steps: sanding, applying primer, painting and lacquering. To paint a ceramic lamp, spray paint is the most sensible choice. There are different brands of paint that are suitable for painting ceramics. Buy the following materials for your project:
 - Face mask and plastic safety goggles
- Insulating tape
- Very fine sandpaper with a grain size of, for example, 1800
- Sanding block for the sandpaper
- Sheets of kitchen paper and old newspapers
- Primer in an aerosol can in a neutral color like dark gray
- Semi-gloss or glossy spray paint in the color of your choice
- Transparent, glossy spray paint
 Sand your lamp. Unless you are painting a ceramic lamp that is not finished at all, the first major step will be to sand the surface to be painted so that the primer will adhere better. To prevent sanding dust from getting into your mouth and nose, put on a face mask before sanding.
 - Remove the lampshade. Also remove all other parts of the lamp that you do not want to paint and that can be detached. Also turn the lamp out.
- Sand the lamp. Attach the sandpaper to the sanding block and sand the entire lamp, applying light, even pressure and smooth strokes.
- Do not sand the lamp too strongly. Make sure that the lamp does not feel rough and you do not see any irregularities. Sanding is only intended to improve the adhesion of the primer to the surface.
 Clean the lamp. When you're done, wipe the lamp with damp paper towels and / or a mild cleaner. Be thorough to make sure you remove all sanding dust, as well as all other debris.
  Apply undercoat. When the sanded lamp is clean and dry, it is time to apply a primer. Take the lamp outside or to an open garage or workshop, if you haven't already. Put on safety glasses and a new face mask. You work with spray paint, which can get into your mucous membranes through the air and irritate them.
 - Prepare the lamp. Place the lamp on a number of sheets of newspaper that are wider than the base of the lamp so that you can easily clean everything. Use electrical tape to tape the cord and all other parts that could otherwise get paint on, including the underside.
- Apply the first coat of primer. Spray the paint evenly and steadily on the surface of the lamp. When you're done, let the paint dry for at least 3 to 4 minutes. You don't have to wait more than 10 minutes to start the next step.
- Apply the second coat of primer. When the first coat of paint is dry repeat the process and apply a second coat of primer. This will give you a smooth, even base to apply the spray paint to. The primer should also completely cover the old colors and patterns of the lamp.
 Apply the first coat of paint. Let the primer dry for half an hour to an hour and then start painting. You will apply several coats of paint to give the lamp a nice finish.
 - Apply the first coat of paint. Make even movements and apply a thin coat of spray paint to the primed lamp. Chances are you can still see the primer through the paint, but this is normal. Apply a not too thick first coat of paint. Applying several thin coats of paint will give you a brighter color and smoother finish.
 Wait for the first coat of paint to dry. How long you have to let the first coat of paint dry before applying the second coat varies by brand, but usually you will have to wait half an hour to 2 hours. In this article, it is recommended to wait an hour between painting sessions.
 - Spray paint takes about a day to fully cure, but there is no need to wait that long before applying another coat.
 Apply second and third coats of paint as needed. Repeat the above process to apply two more coats of spray paint. Make sure you always apply a thin layer of paint.
  Apply lacquer to the lamp. When the last coat of paint is dry enough to apply paint, grab your paint and spray it on the surface. For a professional-looking finish, choose a transparent, glossy lacquer.
 - Just like you did when painting, after the first thin layer of lacquer has dried, apply a second coat of lacquer to make the lamp shine even more beautifully.
- When you are satisfied, place the lamp indoors and let it dry overnight. Do not touch the lamp during this time.
 Complete the process. The next morning, remove the electrical tape from the lamp and take it inside. Turn the lamp back in and put the hood back on so that your lamp is completely ready.
 - Don't feel obliged to use the original lampshade. Look at department stores and thrift stores for a lampshade that you like.
Tips
- When you paint details, first apply the parts to the background and let them dry. Then paint the details over it with a fine brush.
- Don't forget to use non-toxic paint on items that come into contact with food. Most ceramic paints are non-toxic, but check the packaging to be sure.
Warnings
- Make sure you work in a well-ventilated room, or try to ventilate the room where you will be working as well as possible. Dust, mold and paint fumes are all bad for your respiratory tract.


