Author:
Morris Wright
Date Of Creation:
24 April 2021
Update Date:
1 July 2024

Content
- To step
- Method 1 of 3: Piercing your belly button yourself
- Method 2 of 3: Get your belly button pierced professionally
- Method 3 of 3: Take good care of your belly button ring to prevent infection
- Tips
- Warnings
- Necessities
You want to pierce your belly button and you wonder how to do it yourself. You can follow the following directions to pierce your own belly button or you can go to a top-notch artist who can do that for you. You will also find here some instructions on how to care for your piercing after you are done with it.
To step
Method 1 of 3: Piercing your belly button yourself
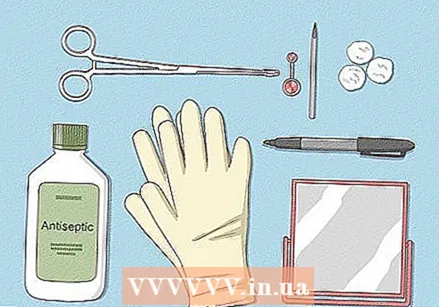 Buy a belly button piercing kit. Make sure to include a 14 g piercing needle and clip. You will also need sterile gloves, a disinfectant, cotton wool, a skin marker, a mirror, and a piercing. Your first piece of jewelry should be small and thin.
 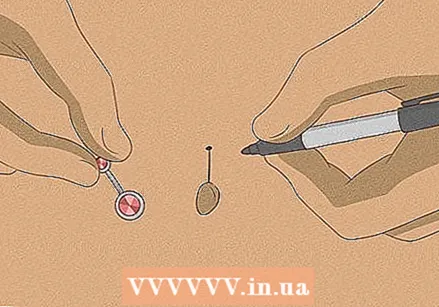 Choose the place for your piercing. Most people usually get pierced just above the belly button. Hold the jewelry against your belly button until you find the right angle and place for it. Mark the entry and exit points of the jewelry on your skin with the skin marker.
 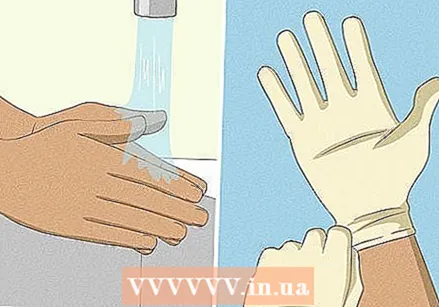 Wash your hands with soap and water. Put on your sterile gloves.
  Put disinfectant on a cotton ball and rub it over the area where you will be piercing.
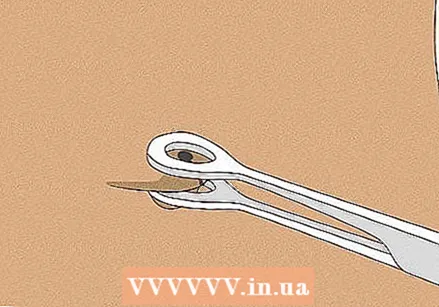 Pinch the fold of skin you want to pierce. Use the clamp in your kit to hold the fabric in place.
 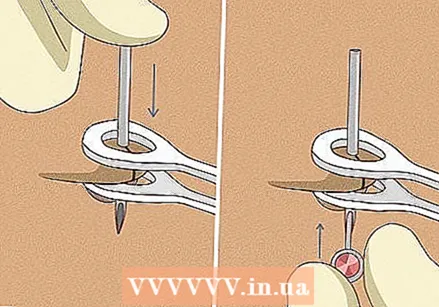 Stretch your skin and quickly pull the needle through. Push the needle through the hole and thread the jewelry right after the needle through.
 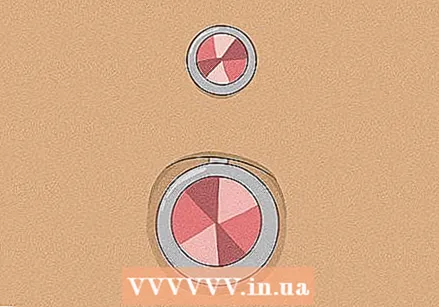 Attach the end of the jewelry to make sure it stays in place.
Method 2 of 3: Get your belly button pierced professionally
 Rate the cleanliness of the store. Check for general cleanliness and keep an eye on the performer to make sure he or she is wearing sterile gloves and using sterile solutions on the skin. Ask if they have a sterilizer. Don't be afraid to walk out of the piercing studio if you feel like they aren't very hygienic with their piercing techniques.
 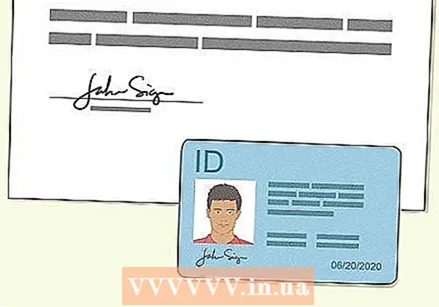 Be prepared to show your identification to prove you are 16 or older. You will likely be asked to sign a form for legal purposes. If you are under the age of 16, you will likely need a parent's consent before the piercing is performed.
 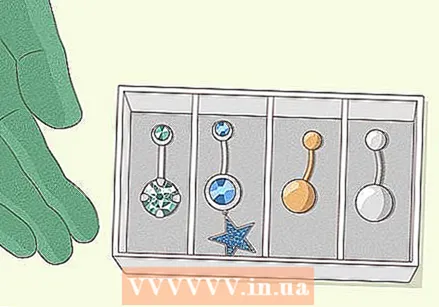 Select the piece of jewelry you want. An expert piercing artist will advise you which types of jewelry are best for healing.
  Relax in the chair or armchair.
- Expose your belly button upon request and the piercing artist will mark the place for the piercing on your belly button with a felt-tip pen.
- In preparation for the puncture, a surgical clamp will be attached to the top of your belly button to stabilize the tissue.
 Take a deep breath and relax as much as possible during the procedure.
- Now coming out of the sterilizer is a very long and very sharp type of hollow needle that will be used to pierce your skin for your new piercing.
- The jewelry is placed on the end of the spear and passed through your new piercing.
- Do not forget to breathe throughout the procedure for maximum rest and comfort.
Method 3 of 3: Take good care of your belly button ring to prevent infection
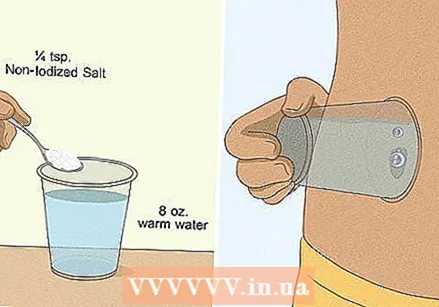 Invert a cup of warm saline solution over your piercing to create a vacuum. If you don't have a store-bought solution, make your own using 1/4 teaspoon of non-iodized salt and 2 ounces of warm water.
 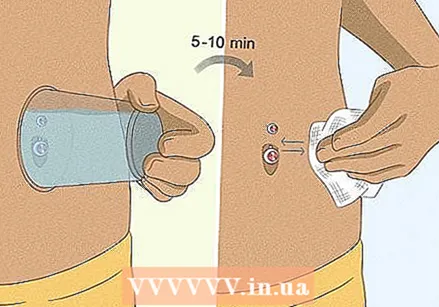 Hold the solution on for 5 to 10 and blot the area with a piece of sterile gauze. Rinse off the residue with a jet of cold water.
  Skip the rubbing alcohol, hydrogen peroxide, or strong soaps to avoid damaging your skin cells.
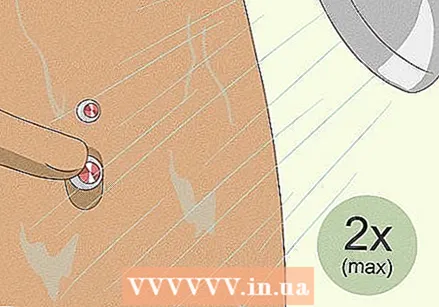 Don't wash your piercing more than twice a day. Put a pearl-sized drop of soap on the piercing and gently rub the piercing and jewelry with your fingers. Rinse and dry the area with sterile gauze. Make sure the soap is anti-microbial and odorless - odor increases the risk of inflammation.
  Keep all body fluids and lotions off the piercing. Keep your belly button away from oral contact and do not apply lotions, creams, or cosmetic products to the wound.
 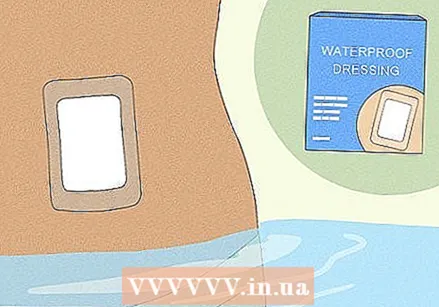 Protect your piercing when you go to a lake, pool, or hot tub. Try with a waterproof bandage that you can buy at a drugstore.
  Buy a hard and ventilated eye patch from a drugstore. Place the eye patch over the piercing and secure it by wrapping a cloth bandage around your belly. The eye patch protects your piercing when you have to wear tight clothes or when you play contact sports.
  Keep the jewelry in until the piercing has healed completely. Do not hang charms on the jewelry until the healing process is complete.
Tips
- Sweatpants and low-waisted jeans are your new best friends for months to come, as the new piercing will still be quite fragile. It is important to wear soft and comfortable clothes to avoid irritation of the navel.
- Do not use ice to numb the area - it will harden the skin cells and make it more difficult to pierce.
- Bring a spare bubble in case the jewelry breaks or you lose the bubble that came with the piercing. Keep the bulb in a sealed plastic bag to keep it clean.
- It is normal to have some pain, minor bruising, and tenderness after piercing. You may also see a clear and whitish liquid secrete and a crust form around the piercing.
- If you are going to have surgery and you need to remove the piercing, consult your doctor and your piercing artist to find out about non-metallic jewelry alternatives.
- Don't take it out when you can move it and it hurts when moving and wait another month or two with it. When you move the piercing and it doesn't hurt, you can take it out.
- Get to know your piercer by having a conversation with him or her beforehand. He or she will likely try to relax you by talking to you during the appointment. Just make sure you feel comfortable and calm!
- Do not wear tight shirts until you feel it has healed enough.
- Avoid touching the piercing too often as you could irritate it and cause an infection, especially with unwashed hands.
Warnings
- Do not touch your belly button if you have dirty hands.
- Do not pierce your own belly button unless you already have experience with other types of piercing.
- If your piercing gets infected (constant redness, terrible pain, pus, and maybe a fever), don't take it out. It could heal otherwise and seal the inflammation in you. Instead, see a doctor as soon as possible.
- If you are pregnant or planning to get pregnant soon, you can buy pregnancy piercings which are actually soft tubes that can bend. They also come with o-rings if you would need a caesarean section. This way, there will be no metal in your body and the piercing can be taped so it won't get in the way. This is because you have to remove the jewelry during your pregnancy if it is standard metal jewelry.
Necessities
- Belly piercing kit with a 14 g needle and a clip
- Sterile gloves
- Cotton wool
- Disinfectant
- Skin highlighter
- Mirror
- Small and thin piece of jewelry
- Identification
- Cup
- Warm saline solution
- Clean gauze or paper towels
- Waterproof bandage
- Ventilated eye patch
- Cloth bandage


