Author:
Tamara Smith
Date Of Creation:
26 January 2021
Update Date:
1 July 2024

Content
- To step
- Method 1 of 3: Using AirDrop for iOS
- Method 2 of 3: Using AirDrop for macOS
- Method 3 of 3: Using iTunes for macOS or Windows
This article will teach you how to copy photos from another device to the Gallery of your iPhone.
To step
Method 1 of 3: Using AirDrop for iOS
 Enable AirDrop Receiving on the receiving iPhone. This method can be used to copy photos from another iOS device (iPad, iPod or another iPhone) to the Gallery of your iPhone. As long as you're within 10 feet or so of the device, you can do this with AirDrop. On the receiving iPhone, do the following:
 - Swipe up from the bottom of the home screen.
- Press the "AirDrop" button and then select "Contacts Only" (if the owner of the other phone is in your contact list) or "Everyone".
 Open Photos on another iOS device. This is the device on which the photos are. The icon with a rainbow-colored flower is on the home screen of the device.
  Select photos to send.
- In the album containing the photos, press "Select" and then tap the photo you want to send.
- To select more than one photo, tap each photo you want to send.
- Press "Select All" to select all photos in the album.
 Press Share on the sending device. This is a square with an arrow in the lower left corner of the screen. Now you will see all the names of nearby devices with AirDrop enabled, including the receiving iPhone.
  Select the receiving iPhone. A message will appear on the receiving iPhone asking to accept or decline the Airdrop.
  On the receiving iPhone, press Accept. The photos from the sending device will be copied to the Gallery of the receiving phone.
 - To turn off AirDrop after receiving the photos, swipe up on the home screen. Then press the "AirDrop" button and then "Receive Off".
Method 2 of 3: Using AirDrop for macOS
 Enable AirDrop Receive on your iPhone. As long as your Mac and iPhone are within ten meters of each other, you can use AirDrop to copy files from your Mac to your iPhone's Gallery. Start by enabling AirDrop on your iPhone:
 - Swipe up from the bottom of the home screen.
- Press the "AirDrop" button and then select "Contacts Only" (if the owner of the other phone is in your Contacts list) or "Everyone".
 Open Finder on your Mac. This is the blue and gray icon of a smiley on your Dock.
 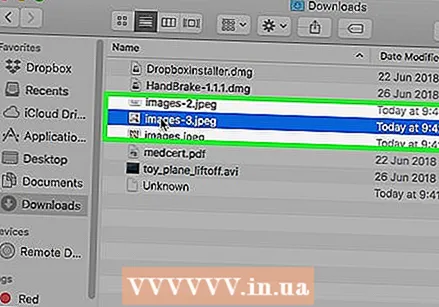 Select one or more photo (s) to send. Go to the folder where the photos are stored and click on a photo to select it. To select more than one photo, you must ⌘ Cmd Hold down while clicking additional photos.
 - Drag the selected photos to Airdrop. It's in the left panel of Finder. Don't let go of your mouse button just yet - just hover over it until the AirDrop window with your iPhone icon appears.
- Paste the files on your iPhone. You do this by releasing the button of your mouse.
 On your iPhone, press Accept. The selected photos will be copied to your Gallery and will be immediately available.
 - To turn off AirDrop after receiving the photos, swipe up on the home screen. Then press the "AirDrop" button and then "Receive Off".
Method 3 of 3: Using iTunes for macOS or Windows
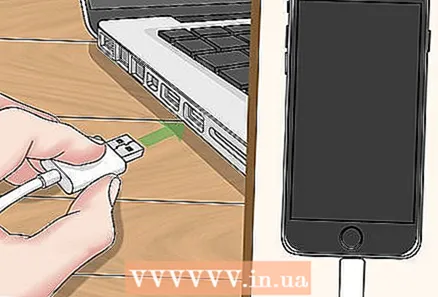 Connect your iPhone to the computer. Use the cable that came with your iPhone or one that is compatible.
 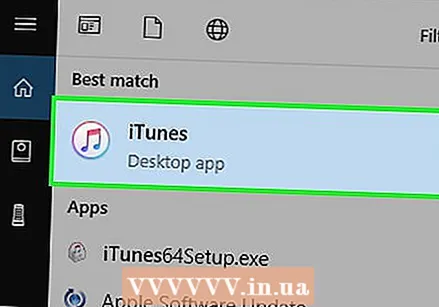 Open iTunes. If iTunes didn't open automatically, open it by double-clicking the iTunes icon (a music note) on the Dock at the bottom of the screen (macOS) or in the Start menu (Windows).
  Click on the iPhone icon. This is near the bottom left corner of iTunes.
  Click on Photos. This is in the left panel.
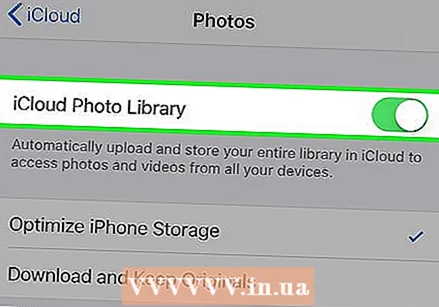
  Check the "Sync Photos" box. This is in the main iTunes panel. If you see a message saying "iCloud Photos is On" instead of "Sync Photos", then you need to turn off iCloud Photos on your iPhone. Don't worry, you can turn it back on later. You do this like this:
 - Open the Settings of your iPhone (the gray gear icon on your home screen).
- Scroll down and select "Photos & Camera".
- Slide the "iCloud Photo Library" switch to the Off position (gray).
- Slide the "iCloud Photo Sharing" switch to the Off position (gray).
- Disconnect your iPhone from the computer and then reconnect. You should now see "Sync Photos" in the Photos menu.
 Select a folder to add to the Gallery. Click the drop-down menu next to "Copy photos from" and navigate to the folder containing your photos. If you don't see the folder, click "Choose Folder" to browse your computer for it.
 - If the folder contains videos you want to add to the Gallery, check the box next to "Include videos".
 Click Apply. It's in the bottom right corner of the screen.
  Click on Sync. The photos are now synced to your iPhone.
  Open the Photos from your iPhone. This is the icon on your home screen with a rainbow flower.
 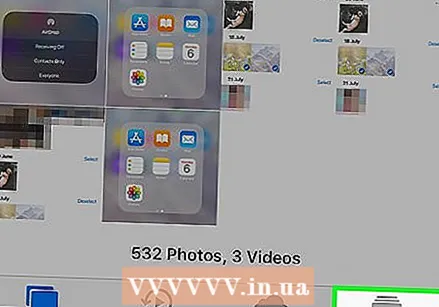 Tap Albums. This is at the bottom of the screen.
  Select the folder you just synchronized. This is under "My Albums".
  Press Select. It's in the top right corner of the screen.
  Press Select All. It's in the top left corner of the screen. All photos in the album are now selected.
  Click the Share icon. This is the box with an arrow in the bottom left corner of the screen.
 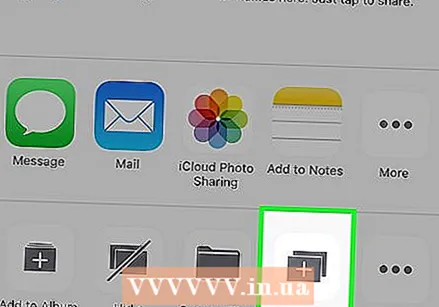 Press Duplicate. This is at the bottom of the screen. The selected photos will now appear in the Gallery.
  Delete the newly synced folder from your device. Since you cannot manually delete synced albums, you will need to perform a new photo sync in iTunes that does not contain the folder this time.
 - Select your iPhone in iTunes.
- Click on "Photos" in the left panel.
- Select another folder to sync. The folder doesn't even have to contain photos. Just don't select the folder you want to delete from your device.
- Click on "Apply". Synchronization will be completed and the previously synchronized folder will be deleted. All of its content will remain in your Gallery.
 Recover iCloud Photos. If you turned off iCloud Photos to perform this method, don't forget to turn it back on. Select "Photos & Camera" in the "Settings" app, then slide the "iCloud Photo Library Geek" and "iCloud Photo Sharing" switches to the On position. This will not affect your Gallery.


