
Content
- To step
- Part 1 of 3: Buying the right thinning shears
- Part 2 of 3: Structuring thick points
- Part 3 of 3: Thinning your hair
- Tips
- Warnings
You can give your hair texture and remove extra volume with the help of thinning scissors. Thinning shears are scissors with teeth or notches on one side, while the other side consists of a smooth blade. Several factors determine whether you give the hair texture or thinner. You can use different thinning techniques to give your hair a well-groomed look. Fortunately, thinning your hair is quick and easy to learn.
To step
Part 1 of 3: Buying the right thinning shears
 Buy slice and texture scissors. These scissors are very versatile and can cut about 40% to 70% of the hair in a few quick cuts. They can be used to add some texture or blend different layers of your hair naturally. Generally, this particular type of scissors have 25 teeth.
 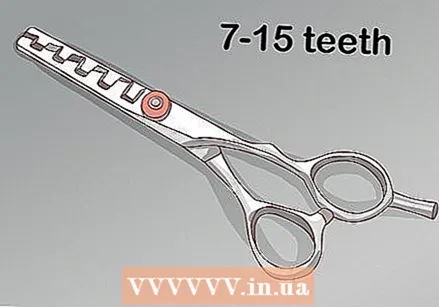 Add coarse thinning shears to your collection. Ideal if you have to cut particularly thick hair. However, these types of scissors can be difficult to use and can cause holes in the haircut, so only use them on very thick hair. They can remove large amounts of hair in one go (40% to 80%) and cut through thicker hair than standard scissors. In fact, these work best with curly hair that is difficult to cut with normal scissors. These scissors have about 7 to 15 teeth.
  Buy finishing scissors. They remove much less hair than the previous scissors. These are ideal scissors to finish the haircut after cutting the hair with regular shears. It gives your hair a softer, airy look. However, you will have to cut several times with these scissors as it removes very little hair.
  Buy scissors with adjustable screws. Most if not all scissors are made from stainless steel. Scissors with an adjustable screw can make cutting a lot easier. When you notice that the tension is gone, you can adjust it with the screw.
Part 2 of 3: Structuring thick points
 Comb through your hair. Make sure your hair has just been washed and is still damp. Then use a comb and run it through your hair a few times. Run your hand through your hair when you are done combing. Check for tangles or lumps. Try to get them loose and then brush or comb through your hair again.
  Grab part of your hair. This part of the hair should come from the front of your face. Each section should be about an inch wide. Pull the lock of hair out, away from your body, holding the ends between the fingers with one hand. Hold your hand about 5 to 7 cm from the tips of your hair.
 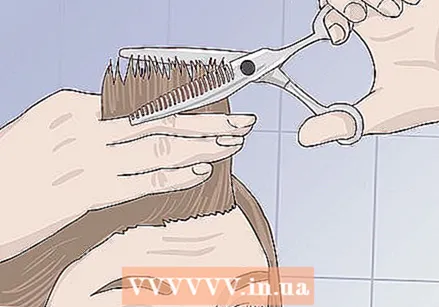 Use the other hand to hold the thinning shears. Bring the scissors to the tips of the hair and cut the hair diagonally about 2 cm inward from the tips. If you wish, you can turn the scissors over and cut in the same place, but with the scissors in the opposite direction. EXPERT TIP
 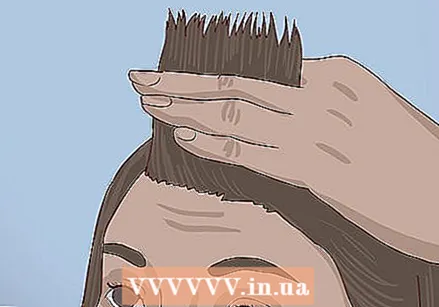 Grab another strand of hair with your hand. This should be right behind the first section you just thinned out. Pull the hair out and hold the hair between your fingers. Take the thinning scissors and cut through the hair, starting 2 cm from the ends. Again, you can turn the scissors over and cut in the same spot for extra thinning and / or shaping.
 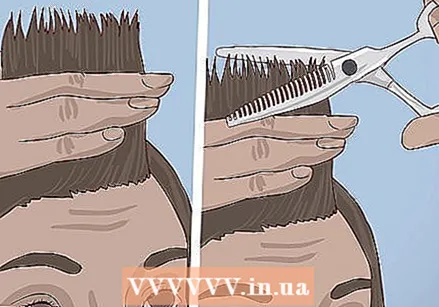 Repeat until you've done everything. Make sure to cut through all the points. To make sure you've cut them all, you can do a few more overlapping cuts. You can take a few strands from a previously thinned section and add them to the section you want to thin. This guarantees that you cut all points to almost the same length. Feel free to go back to cut again if you feel like they are misshapen or still too thick, but be careful not to cut too many.
 - Note that when you take a new strand of hair, let go of the previous section of hair, except for a small section to guide the length of the cut.
 Shake the cut hair off your ends. You can take a towel or run your hands through the ends. Shake your hair so that the cut hair falls to the floor. This would also be a good time to wash or rinse your hair to remove the cut hair.
Part 3 of 3: Thinning your hair
 Dry your hair. If you've just got out of the shower or walked out in the rain, it's critical that you dry your hair. Run a towel through your hair. You can also use a hair dryer if your hair is really soaking wet. This is necessary because thinning shears are difficult to cut through wet hair, which could lead to a bad-looking haircut.
 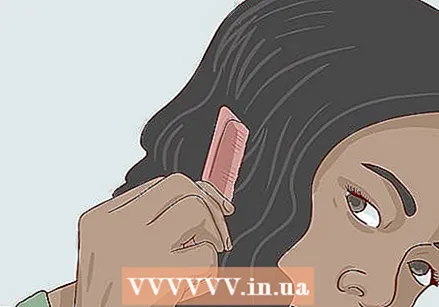 Comb through your hair until smooth. You can use a brush if your hair is thick or a comb if your hair is thin. Comb through at least 20 to 30 times, depending on how your hair has been treated and its texture. After you are done run your hands through your hair to see if you have any tangles. If so, run the comb or brush through it a few more times.
 - If you have curly hair, you might want to consider straightening your hair first. Otherwise, the thinning scissors could cut your hair unevenly.
 Divide your hair with hair clips. Each section should be approximately three inches wide. Just take an estimated section of hair and hold it with your hand. You can attach the hair clip to the hair bundle or around it, as long as it stays tight and separated. Depending on the thickness of your hair, you may need to add more hair clips.
  Remove a hair clip. The first one you remove should be on the front of the head. Comb through and straighten that loose section of hair. Then gently pull the comb to the end of your hair, but not all the way. Hold your hair high in the air, with the comb still attached at the end.
 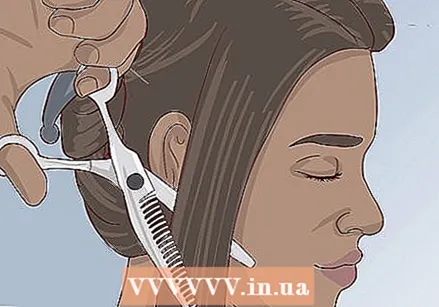 Start thinning your hair. About halfway down the strand, cut that part of the hair with the thinning scissors. The ends of the scissors should point upwards, towards the ceiling. Then comb out the hair. If it still looks bulky, turn the scissors over and cut at the same point, with the ends of the scissors pointing down. This completes the thinning of this part of the hair. You can now release the scissors and place it on a nearby table.
  Hold the comb loosely in your other hand. Go back through the thinned section and comb through. This will loosen and dispose of the cut hair. If some hair appears to be stuck, run your fingers through it to loosen it. Otherwise, you can wait until you're ready to rinse your hair in the shower.
  Thin your hair in sections. Whenever you finish a section of hair, drop it with the rest of the hair already thinned. Don't forget to cut each section both up and down. Better to go clockwise or counterclockwise. Don't run random sections or it might look unnatural.
  Comb through your hair one last time. Depending on the thickness of your hair, you may have to go back with the thinning shears and thin out more hair. Do not cut in the same place this time. Instead, do another corner cut and then comb and check your hair.
Tips
- Use thinning scissors with one row of teeth if you have thick or curly hair. These types of thinning shears help to remove large amounts of hair.
- If you only need to remove a little bit of hair, buy thinning shears with two rows of teeth, instead of one row of teeth. The more teeth a thinning scissors have, the less hair it removes.
- Never cut near the roots of your hair. Always start in the middle of the entire length or close to the points.
- Thin your hair again after 2 to 4 months. It is important to remove excess hair on a regular basis to keep your hair and scalp healthy.
Warnings
- If you are just starting to thin out, it is best to practice on a wig or a good friend first. You could mess up a complete stranger's hair, which would lead to a bad haircut.
- If you're thinning your own hair, it's okay to ask a friend or family member for help. Mirrors are difficult to see when cutting your own hair, and you may be cutting too much hair at the wrong angle.
- Always be careful when using thinning shears. They are as sharp as regular scissors.


