Author:
Roger Morrison
Date Of Creation:
27 September 2021
Update Date:
1 July 2024
Content
- To step
- Part 1 of 3: Connecting a router to a modem
- Part 2 of 3: Configuring a wireless network
- Part 3 of 3: Troubleshoot setting problems
- Necessities
By connecting a router to your modem, you can access the internet from multiple devices in your house and offer extra security against hackers and other third parties. A router and modem can be properly installed using two Ethernet cables, a coaxial cable, and the power cables supplied with both devices. This wikiHow teaches you how to connect a router to a modem.
To step
Part 1 of 3: Connecting a router to a modem
 Connect the correct internet cable to the wall socket. If you have internet via cable or fiber, then connect a coaxial cable to the cable connection in the wall through which you receive internet. If you have a DSL modem, you must connect a telephone line to the telephone wall jack.
 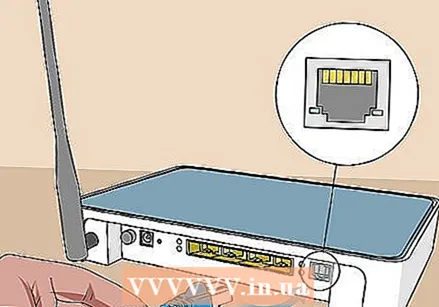 Connect the other plug of the cable to your modem. Connect the other end of the coaxial cable or telephone line to the correct port on your modem. This allows your modem to receive internet.
  Connect the modem's power cable to your modem. Find the power adapter port on your modem and plug the power adapter into your modem.
  Plug the modem into a nearby electrical outlet. This supplies the modem with power.
  Turn on your modem. If your modem doesn't turn on immediately, find a power switch on your modem and turn it on.
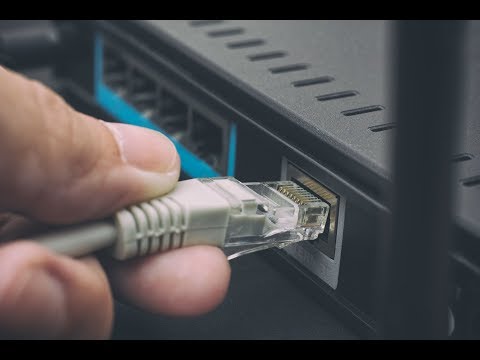
  Connect an ethernet cable to the ethernet port of your modem. This port is used to connect other devices to your modem.
 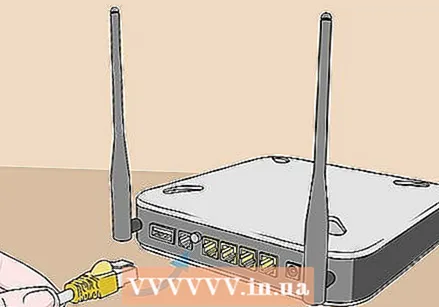 Connect the other end of the cable to the router. Use the other end of the Ethernet cable to connect to the port labeled "WAN", "Internet" or similar. It is likely to be located next to the four colored "LAN" ports on the router.
 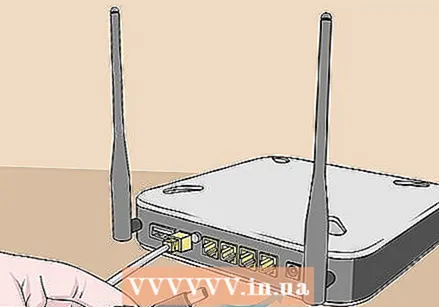 Connect the router's power cord to your router. Find the power adapter input on the router and connect the power adapter to the router.
  Plug the router's power cord into a nearby electrical outlet. Your router may start up on its own. Give it a few minutes to fully boot up.
  Connect the second ethernet cable to the router. Connect the Ethernet cable to one of the ports labeled "LAN".
  Connect the ethernet cable to your computer. Find an open LAN port on your laptop or desktop computer and connect the other end of the Ethernet cable to your computer.
  Verify that the lights on your modem and router are on. This indicates that the devices are properly connected to each other. The way the lights light up will vary from one make and model of the router to another. Refer to the user manual or the manufacturer's web page for more information.
  Open a web browser. If you are properly connected to the internet, you should now be able to surf the internet using a web browser.
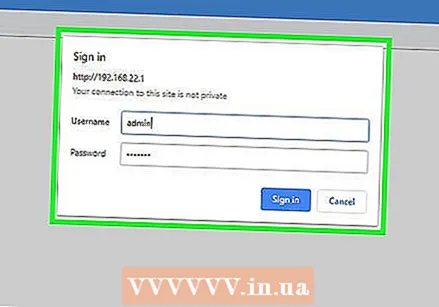
  Enter the router's IP address in the address bar. This will connect you to the router's web interface. The default IP address of the router depends on the make and model of the router. Consult the user manual or the manufacturer's web page to find out the default IP address of your router.
 - The usual default IP addresses are 192.168.0.1, 192.168.1.1 and 10.0.0.1.
 Enter the default username and password. You must log in to the router with the default username and password. Consult the user manual or the manufacturer's website to find the default username and password for your router.
  Update your router's firmware. When connecting a new router, it is likely that the router will need to be updated. Find the option in the web interface to update the router and click that button. How you update a router's firmware will differ from the router's make and model.
 - You can also use your router's web interface to set up port forwarding and website blocking.
Part 2 of 3: Configuring a wireless network
 Open a web browser. If you are properly connected to the internet, you should be able to surf the internet using a web browser.
  Enter the router's IP address in the address bar. This allows connection to the router's web interface. The default IP address of the router depends on the make and model of the router. Consult the user manual or the manufacturer's web page to find out the default IP address of your router.
 - The usual default IP addresses are 192.168.0.1, 192.168.1.1 and 10.0.0.1.
 Enter the default username and password. You must log in to the router with the default username and password. Check the user manual or the manufacturer's website to find it for your router.
 - Common usernames and passwords are "admin" and "password".
 Find the settings for a wireless connection. The web interface is different for every router. Find the wireless settings for your router. These can be under "System", "Settings", "Configuration" or something similar.
  Name your wireless network. Find the SSID settings on your router's web interface. Enter a name for your wireless network in the SSID field.
  Select "WPA / WPA2" as the encryption key. This is the most secure encryption key for wireless network passwords.
  Type in a wireless password. This can be referred to as "key", "wireless key" or "pass key". This is the password you enter on other devices to connect to your wireless network.
 - A strong password must have at least eight characters and consist of a combination of letters and numbers.
- Make sure to use a password you don't mind giving to guests. Do not use a password that you use for other personal accounts.
 Save the changes in your system. Find the option to save the changes to your router. This will differ from one make and model of one router to another.
Part 3 of 3: Troubleshoot setting problems
 Try unplugging the modem for 15 seconds. If you are suddenly unable to connect to the internet, unplug the power cord for a few seconds and then plug it back in. This will shut down the modem completely and allow a new, stronger connection to be initialized. After 15 seconds, reconnect the modem and wait at least two minutes before connecting to the internet.
  Restart both your modem and your router. If you are having trouble connecting to the internet, try shutting down your entire network and rebooting each device. This can help refresh both devices and provide a stronger, better Internet connection.
 - Turn off your computer and unplug the modem.
- Unplug your router from the power outlet. Then check that both the Ethernet cables and the coaxial cable are securely attached to your devices.
- Reconnect the modem to the power source. Then reconnect the router to the power source.
- Wait two minutes and then turn on your computer. You should now be able to connect to the internet.
 Swap the Ethernet cables and coaxial cables. This will help rule out problems with faulty cables if you cannot connect to the internet. In most cases, damaged or faulty cables will prevent access to the Internet.
  Check if there are any disturbances in your area. If you experience an interruption in service, please contact your internet service provider. In some cases there may be temporary signal interruptions due to local maintenance or malfunctions.
  Check if your modem is compatible with your router. If you cannot connect, check with your ISP to see if the router is compatible with the modem. Some modems may be outdated or incompatible with the routers offered by your ISP.
 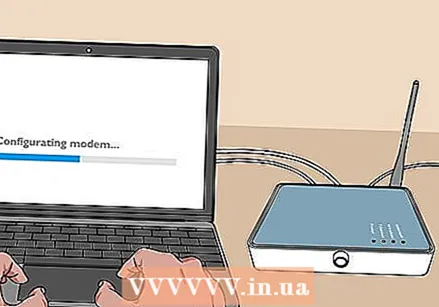 Check if your modem needs a special configuration. If you cannot connect to the internet, contact your internet service providers to see if your modem requires any special configuration. Some cable modems require properly configured Ethernet ports before they can communicate properly with Internet routers.
Necessities
- Router
- Modem
- Ethernet cables (2x)
- Coaxial cable
- Power cord for the router
- Power cord for the modem


