
Content
- To step
- Part 1 of 5: Troubleshooting
- Part 2 of 5: Clearing the DNS cache
- Windows
- Mac
- Part 3 of 5: Disable additional connections
- Part 4 of 5: Editing the DNS server
- Windows
- Mac
- Part 5 of 5: Reset the router
- Tips
- Warnings
This wikiHow teaches you how to troubleshoot connection problems with your computer caused by DNS errors. DNS, which stands for Domain Name Server, is a server that translates website addresses so that your browser can connect to those websites. If the addresses have expired or the server has problems, a DNS error will occur and you will not be able to connect to a particular website or set of websites, even if your internet is working normally. You may be able to fix DNS problems by troubleshooting your current connection, clearing the DNS cache, disabling additional connections, changing your computer's default DNS server, or resetting your router. Open DNS is a pretty good solution. Some people use 64.94.1.1 and 4.2.2.4 as primary and secondary DNS servers. It is rare that you have to search for and select the domain name with Google or your browser. This is much more common if you are using OpenDNS. Go to "Settings", "Network and Internet" and then "Change adapter options". Right-click on your active connection and choose properties. You choose "Internet Protocol Version 4 (TCP / IPv4)" and then "Properties". There you can find the option to enter alternative server addresses. You may also need to change your router's DNS, but this will only work for a particular computer. To find your own DNS servers and diagnose DNS problems, you can go to Gibson Research's website (grc.com) and try their DNS tools, which are very informative.
To step
Part 1 of 5: Troubleshooting
 Try connecting with another device. If you can connect to the network with a phone, tablet, or computer and go to the webpage you are having problems with on the device you typically use, then there is a problem with the device and not the router.
 - If you can't connect to a second device, it doesn't necessarily mean the router is causing the problem.
Tip: if you have problems with a particular website, try viewing it with your internet bundle. If you still can't load the website, there is a problem with the website.
 Try a different browser. This is one of the fastest ways to test your DNS connections. Download another free browser like Firefox or Chrome and try to connect to the internet. If you're still having problems, you know it's not your browser that the DNS server is not responding.
 - If you manage to connect to a different browser, uninstalling and then reinstalling your old browser can help fix the problem.
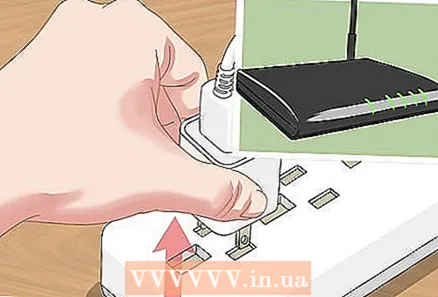 Unplug your modem and router. This will clear the cache of your router and DNS errors may be resolved. Do the following:
 - Unplug both your modem's power cable and your router's power cable.
- Leave the plugs of your modem and your router unplugged for at least 30 seconds.
- Plug your modem back in and wait for it to come back online.
- Reconnect your router to your modem and wait until it is back online.
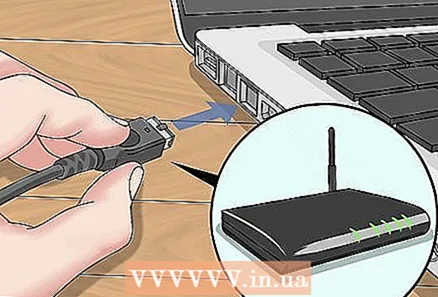 Connect your computer to your router via ethernet. If you are already using ethernet, skip this step.
 - If you use ethernet and you can access web pages, the problem is probably with your router. You will probably have to reset your router.
- If you cannot connect to a webpage over Ethernet, the problem may be caused by your DNS settings.
Part 2 of 5: Clearing the DNS cache
Windows
 Open the Start menu
  Tap command prompt in the search box. Your computer will now search for the command prompt.
 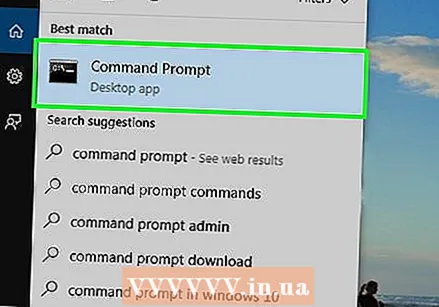 click on
 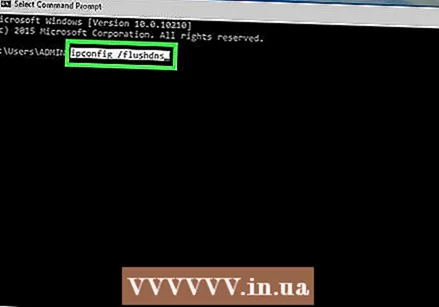 Tap ipconfig / flushdns and press ↵ Enter. This command will delete all stored DNS addresses. The next time you try to open a website, a new DNS address will be created.
  Restart your computer. Doing this clears your browser's cache. If you can now connect to the website you were having problems with before, the problem has been resolved.
 - If you still have connection problems, move to the next method.
Mac
 Open Spotlight
 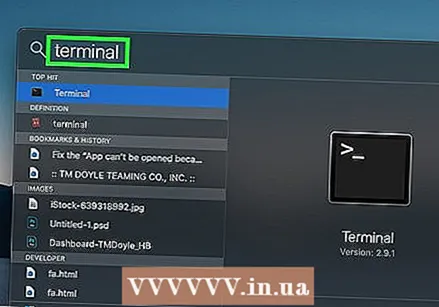 Tap terminal in in Spotlight. Spotlight will then start searching your Mac for the Terminal.
 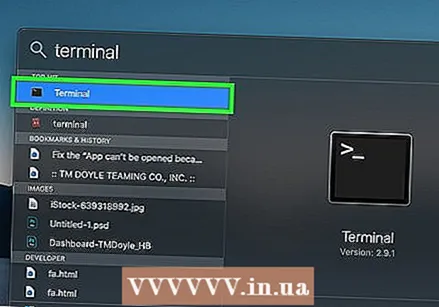 click on
  Type the following command in the Terminal:
sudo killall -HUP mDNSResponder
and press ↵ Enter. The macOS DNS process will now start.- You may need to enter the password for the administrator account first.
 Open your web browser again. This also clears the cache of your web browser. If you can now connect to the webpage you were having problems with, the problem has been resolved.
Part 3 of 5: Disable additional connections
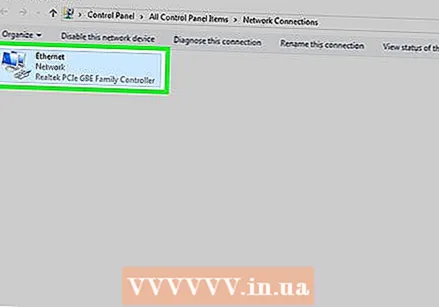
 Open the network settings on your computer.
- In Windows: open it Start menu
 Look for additional connections. You can delete any connections that you are not currently connected to. This also applies to bluetooth and wireless connections.
 - DNS problems are usually caused by the "Microsoft Virtual Wifi Miniport Adapter".
 Select an additional connection. Simply click on a connection to select it.
 - In Windows, each icon on the page represents a connection.
- On a Mac you can find the connections on the left side of the window.
 Delete the connection. You do this as follows:
 - Windows - click at the top of the window Disable network device.
- Mac - click on the minus sign (-) at the bottom of the network window.
 Try to open a web page. If this works, the problem has been resolved. If it fails, move to the next method.
- In Windows: open it Start menu
Part 4 of 5: Editing the DNS server
Windows
 Click on the name of your current connection. You can find it on the page with all your connections under "Change adapter options". Click on it to select the name.
 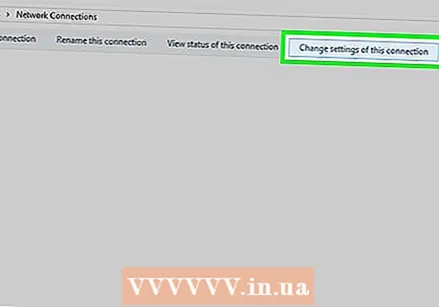 click on Change the settings of this connection. This button is located in the top row of options in the window. Clicking on it opens the connection settings.
  Click on the text "Internet Protocol Version 4 (TCP / IPv4)". This is in the box in the center of the connection properties pop-up window. By clicking on it you select the option.
 - If you don't see this box, click the tab at the top of the connection properties pop-up window Networking.
 click on Properties. This option is located at the bottom of the window.
  Click the circle for "Use the following DNS server addresses". This is near the bottom of the Properties window.
 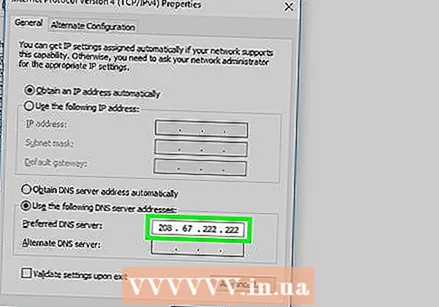 Enter your preferred DNS address. You enter this in the "Preferred DNS Server" box at the bottom of the window. Reliable DNS servers include:
 - OpenDNS - feed 208.67.222.222 in.
- Google - feed 8.8.8.8 in.
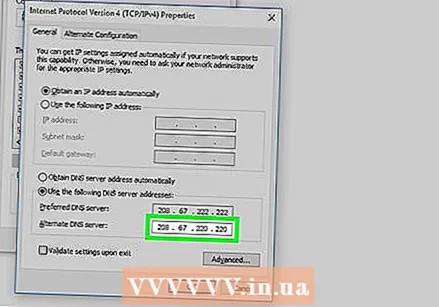 Enter an alternate DNS address. You enter this in the "Alternative DNS server" box below the first box. What you enter here depends on what you entered in the "Preferred DNS Server" box:
 - OpenDNS - feed 208.67.220.220 in.
- Google - feed 8.8.4.4 in.
 click on OK. This will save your DNS settings.
 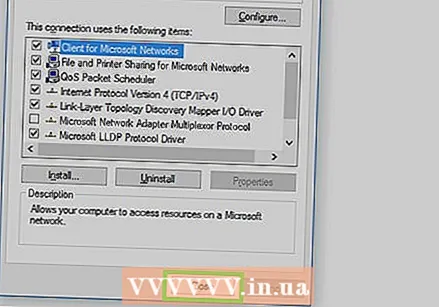 click on Close. This is at the bottom of the window.
  Restart your computer. When your computer has restarted, you can test your network connection. If it works now, the problem was caused by your computer's preferred DNS server.
 - If your computer can connect, consider calling your ISP to tell them about your DNS issues.
- If you still can't connect, move to the next method.
Mac
 Open the Apple menu
  click on System Preferences. This is at the top of the pull-out Apple menu.
 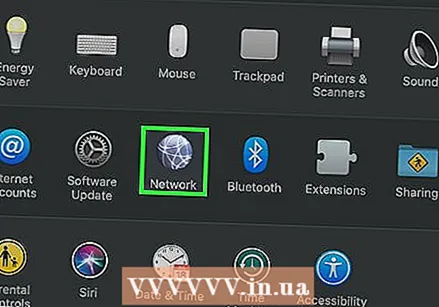 click on Network. This globe icon is located in the System Preferences window.
 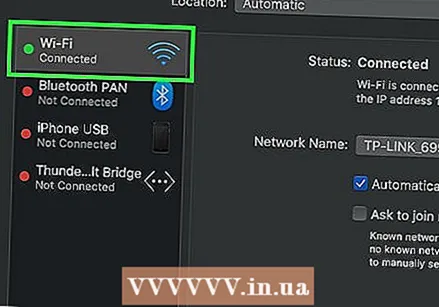 Click on your current WiFi network. You can find the network in the panel on the left side of the window.
  click on Advanced. You can find this in the center of the window.
 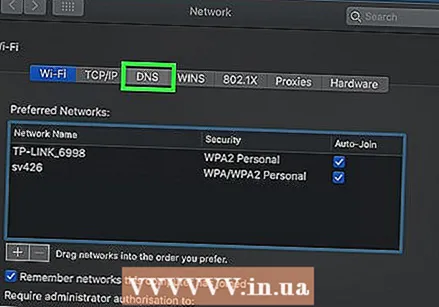 Click on the tab DNS. You can find this at the top of the window.
  click on +. This option is located below the DNS servers box.
 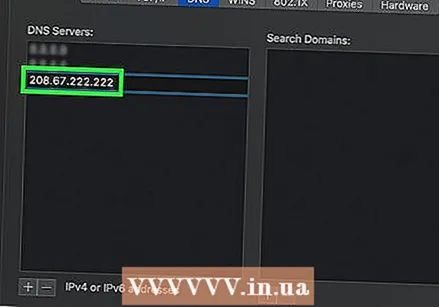 Enter the address of a DNS server. OpenDNS and Google both have reliable and fast DNS servers:
 - Google - 8.8.8.8 or 8.8.4.4.
- OpenDNS - 208.67.222.222 or 208.67.220.220.
 Click on the tab Hardware. This tab is located on the far right of the row of tabs at the top of the window.
  Click on the "Configure" box and then choose Manually. This box is located at the top of the tab Hardware.
 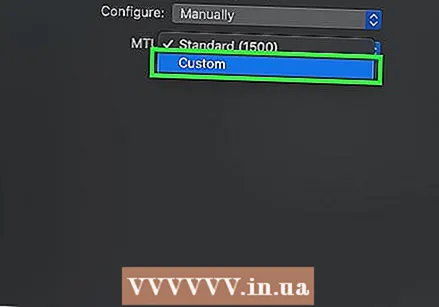 Click on the "MTU" box and then choose Adjusted. The "MTU" box is located below the "Configure" box.
 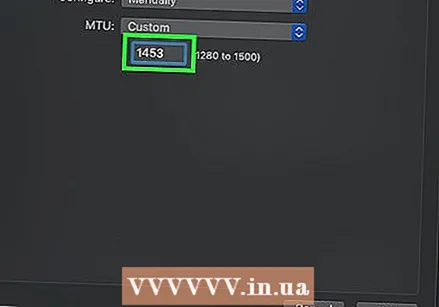 Tap 1453 in the text box. This is located under the "MTU" box.
  click on OK. This button is located at the bottom of the page.
 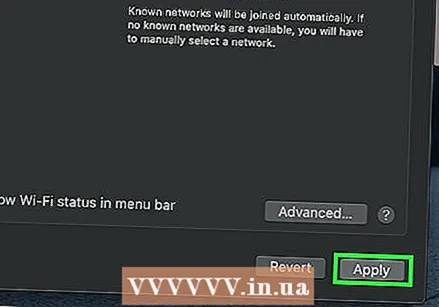 click on To apply. This button is located at the bottom of the page. By clicking on it, the settings are saved and the adjustments to your current WiFi network are made.
 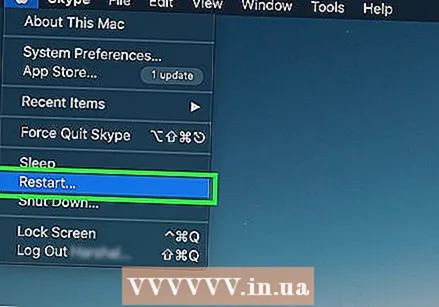 Restart your computer. When your computer has restarted, you can test your network connection. If it works now, the problem was caused by your computer's preferred DNS server.
 - If your computer can connect, consider calling your ISP to tell them about your DNS issues.
- If you still can't connect, move to the next method.
Part 5 of 5: Reset the router
 Find your router's reset button. This button is usually located on the back of the router.
 - You usually need a needle, a paper clip, or similar thin object to press the reset button.
- Resetting the router will disconnect all devices connected to the router.
 Hold down the reset button. Press and hold the button for at least 30 seconds to ensure that the router is completely reset.
  Connect to your network. Use the default password on the bottom of the router to connect.
  Try to go to the website you were having trouble with. If you still can't connect to the internet or the website you want to use, then it's time to contact your internet service provider to tell them about the DNS issues you are having.
 - If resetting the router helps resolve the DNS issues, consider buying a newer router if your router is several years old.
Tips
- Regularly resetting your router is a good way to avoid DNS problems.
Warnings
- After emptying the DNS cache, websites load a little slower the first time you open them. This is because your computer creates and verifies a new DNS address for every website.


