Author:
Charles Brown
Date Of Creation:
2 February 2021
Update Date:
1 July 2024
Content
- To step
- Method 1 of 3: Germinate pepper seeds
- Method 2 of 3: Repot the seedlings
- Method 3 of 3: Transfer pepper plants to the garden
- Tips
Growing a pepper plant from a seed can be a fun and easy activity! Germinate the seeds in a warm, consistent temperature and use a light compost to get seedlings. Gently repot a seedling to its own pot and keep it warm and moist. As it grows, give the plant a larger pot, or move it to your garden when the weather is warm enough. Regularly pick peppers from your plant as a tasty addition to your meals!
To step
Method 1 of 3: Germinate pepper seeds
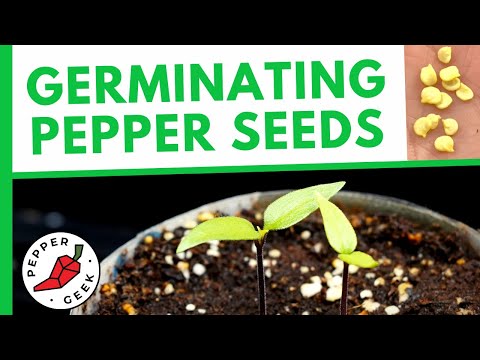
 Place the seeds between two moist kitchen towels. Moisten two kitchen towels. Spread your pepper seeds on one paper towel and place the second on top. Place the seeds in a resealable plastic bag and close it.
 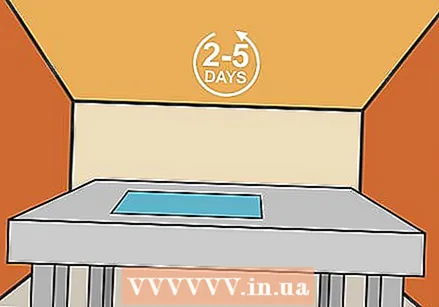 Place the seeds in a warm place for two to five days. Pepper seeds should usually be kept at a temperature of 23-30 degrees Celsius. Place the seeds in a place where it is constantly warm (e.g. on a heat pad) for two to five days until they swell or sprout. Make sure the heat source is not hot enough to melt the plastic bag containing your seeds.
 - Germinating the pepper seeds in this way before planting them in compost will give them a better chance of successful germination.
- In warmer climates, the seeds can be left outside to germinate, provided the temperature does not drop below 15 degrees Celsius.
 Fill the planter. Fill a large planter or business container to the brim with light compost or potting compost. Break loose large lumps. Push the compost 1-2 mm and water it.
 - The soil should be watered just before you plant the seeds and then very little until the seeds germinate.
 Spread and cover the pepper seeds. Place the individual pepper seeds on top of the compost, about 5 cm apart. Cover them lightly with more compost. Lightly press the compost and mist lightly with a spray bottle.
  Cover and germinate the seeds. Place plastic wrap over the seed tray to conserve heat and moisture. Place the tray in the same warm spot where you originally placed the seeds. You can also purchase an electric grow mat or tray (at a garden center) that will keep your seedlings at a warm, steady temperature.
  Keep an eye on the seedlings. Keep an eye on the seed tray to keep up with growth and ensure the quality of the compost. The compost should be moist, but not wet, and should not be watered unless it feels particularly dry to the touch. Sprouting should start after about two weeks.
Method 2 of 3: Repot the seedlings
 Remove the seedlings from the tray. Once the seedlings are about two inches tall and have five to six leaves, repot them to a larger area so their roots don't entwine. Carefully lift them out of the tray. Make sure to touch the roots as little as possible.
 - Water the seedlings before removing them to make sure the compost does not disintegrate during repotting.
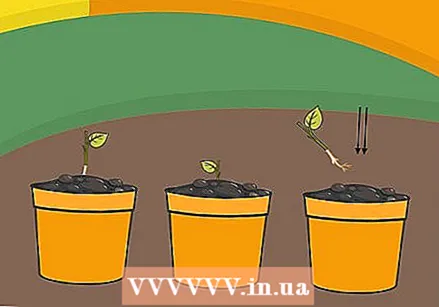 Plant one seedling per pot. Find a pot that is about 7 cm in diameter and fill it with compost. Lightly water the compost and make a dent in the center. Carefully place the seedling in this dent and place more compost around it.
 - If you live in a cooler climate, plant the pepper seeds in pots and keep them indoors. Place them under grow lights in a warm room.
- Pepper plants can be moved from a pot to the garden when the weather and the soil is warm enough.
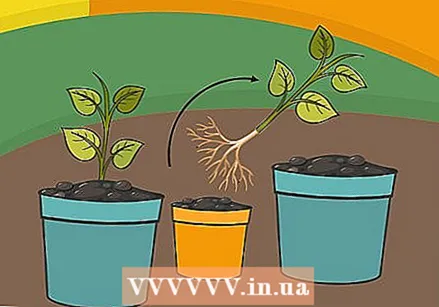 Always give a larger pot as needed. As your pepper plant grows, keep repotting it to a larger pot. Prepare a larger pot by filling it with compost and making a dent in the center. Dig out the plant carefully and leave a large clump of compost around the roots to protect them. Then place the plant in the larger pot.
 - If you want to keep the pepper plant small, let it sit in a smaller pot to limit further growth.
- The standard progression of pot sizes goes from a diameter of 7 cm, to about 15 cm and finally to about 20 cm.
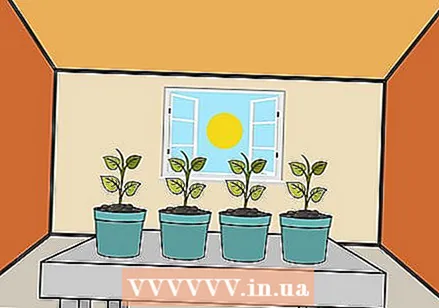 Make sure your plant gets warmth and light. Place your pepper plant near a window or outside to get adequate sunlight. Just make sure to put it back inside when the temperature drops. The amount of light the plant receives is directly related to the speed and degree of growth.
 - If you keep the plant indoors in a home that doesn't get much natural sunlight, buy a mini greenhouse or artificial light bulb (available on the Internet or at garden centers).
Method 3 of 3: Transfer pepper plants to the garden
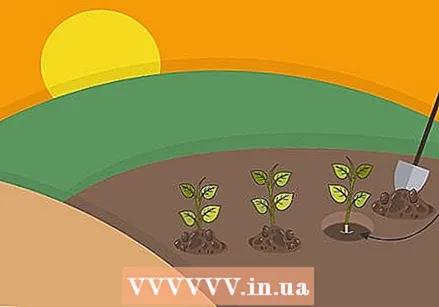 Plant the pepper plant. Find a sunny spot in your garden that gets at least six to eight hours of sunlight per day and dig a hole large enough to contain the seedling or plant. Use a garden fork to gently loosen some soil at the base of the hole and rake in a handful of compost. Then place the plant carefully and fill the space around it with an even mixture of soil and compost.
 - Plant the pepper plants at least 18 inches from other plants to ensure they have plenty of room to grow.
 Water and feed the plant regularly. In a warm and sunny climate, you should water the plant daily to keep it hydrated. Avoid overwatering by making sure the soil is moist, but not muddy. Feed the plant with a general liquid fertilizer (available for purchase at garden centers) every two weeks.
  Keep your plant warm. Pepper plants should only be planted outdoors in warm climates or areas with a very long summer season. In the latter case, it is best to place them outside in June. Buy a garden dome (a protective dome that is placed over the plant and dug into the soil around it) to cover the plant in case of unusually cold weather.
Tips
- Pick peppers from the plant as often as possible to ensure that the plant continues to produce them and to prevent the weight of the peppers from overturning the plant.
- Tie the plants to stakes as soon as they start to droop to prevent them from falling over.
- Before putting pepper plants in the garden, acclimate them to the outdoor climate by putting them outside for several hours a day for two weeks.


