Content
- To step
- Part 1 of 3: Lacing the corset
- Part 2 of 3: Getting your corset around your body
- Part 3 of 3: Necking the corset
- Tips
- Warnings
Corsets may remind you of fashion from long ago, but they never really went out of style. Not only are they a sexy fashion accessory, but they also provide posture correction and support benefits. However, they are a bit tricky to put on. By starting with the right way to lace and tighten, you will be more comfortable in a corset than you ever thought possible.
To step
Part 1 of 3: Lacing the corset
 Check that the corset is pre-laced. Some corsets may already be laced at the time of purchase. If this is the case, then you do not need to worry about threading the corset unless the corset is fastened incorrectly. It should resemble how a shoe is laced (crossed), but with the laces in the center of the back instead of at both ends.
 - If your corset came pre-laced, make sure the laces meet in the middle. The two laces should form an "X" crossing in the center of your spine.
 Start at the top grommet if you need to lace your corset. If you have an even number of grommets (the hole that the digestor goes into), start by pulling the lace through the bottom of the top grommets. If you have an odd number of grommets, thread from bottom to top
 - The laces must come with the corset at the time of purchase. If not, do not use a ribbon if you plan to tie your corset securely. You have to use laces for this.
 Make crosses with the laces. Grab the right lace and pull it to the left. If the first grommet has laces coming out through the top of the hole, pull it down through the top of the hole on the other side. If the laces go down into the hole at the first grommet, pull the laces through the bottom of the hole on the opposite side. Repeat on the left after the right side is done.
 - Keep the laces the same length. Make sure to keep the ends of the laces the same length as you pull the laces through the eyelets.
 Baste down to the center. When the cross is complete, keep moving along the line until you reach the center. You should have crosses that alternate between "top" and "bottom" on the corset.
 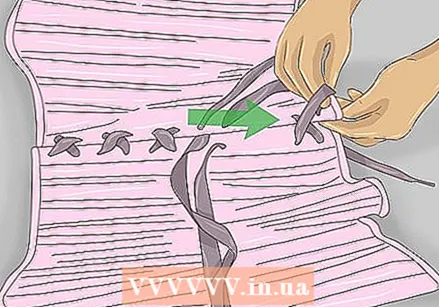 Start again from the center and repeat. When the top section is done, repeat the same process with the second set, but start in the middle. Continue until you reach the bottom of the corset.
Part 2 of 3: Getting your corset around your body
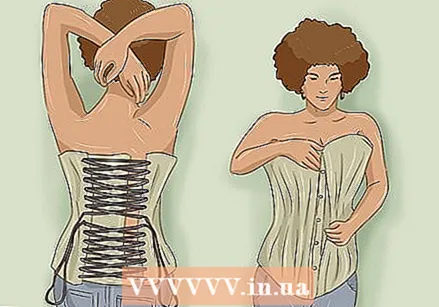
 Stand in front of a mirror to put on the corset without assistance. It's great, of course, and it certainly makes it easier if you have someone to help you put on the corset. Yet it is also possible to put on a corset yourself. Use a mirror if you are putting on the corset on your own.
 - It is preferable to have a few mirrors nearby so you can see exactly what you are doing.
"For an elegant event, wear your corset under a scarf or jacket, along with a very wide long skirt."
 Put something on under your corset to protect it. For daily use you need something under the corset itself. This is to absorb moisture and dirt from your skin and protect your corset. If you're using a corset lining, buy one made of cotton or some other breathable material. Anything made from lycra or spandex will only make you sweat more.
 - Most places that sell corsets also sell liners. You can also make your own if you have basic sewing skills as it's basically just a tube.
- You don't have to wear anything under your corset if you're wearing it as a lingerie.
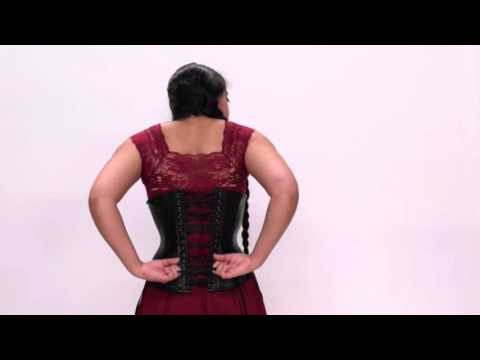
 Make sure you are wearing the corset in the correct direction. The side with the laces is the back. The side with the holes and buttons is the front of the corset. When preparing to put it on, the so-called "busk" (front) of the corset should be open and the laces should be closed at the back.
 - If you have an underbust corset, it can be difficult to know which side is the top or bottom. Usually the top of the back is straighter than the bottom, but this is not always the case.
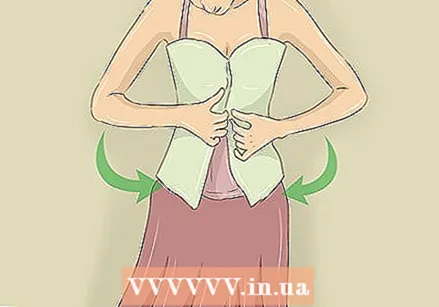 Wrap the corset around you. Start by closing the front. You may need to make some adjustments. You should be able to close the front busk fairly easily, although some resistance is good. You shouldn't have to take a deep breath to get it closed.
 - Some people like to have to pull harder to close the front. Others find that it is easier to close the front if the back is a bit looser. Experiment to find what works well for you.
 Adjust the "fashion style panel" if it is not flat on your back. The fashion style panel is a rectangle of fabric that will most likely be tied to the left side of your corset at the back. When putting on the corset, make sure that the fashion style panel lies flat on your back and faces the other side of the corset.
 - Slide the corset into place by starting with the side where the corset is diagonally opposite the modesty panel and turning it to the side of the modesty panel.
- As you tighten the laces, you'll likely need to pull the fashion style panel back in place a few times.
 Close the busk. The busk consists of the metal pieces on the front of the corset with the buttons and holes. You are now ready to attach the busk by inserting the buttons into the holes. However, this is more difficult than it seems. Here's how to do it:
 - First fasten the second fastener from the top or the middle fastener. Just put the button through the hole.
- Squeeze the button side of the busk. Now squeeze the hard part of the button side of the busk with your thumb and forefinger.
- Fasten the rest of the closures.
- Recover everything that has been undone.
Part 3 of 3: Necking the corset
 Tighten the laces so that the corset is secure. Make sure the laces are tight enough to hold the corset in without having to hold it up. You just need to pull the sides together and gently pull on the long ends of the lace.
  Go through it a second time to adjust the tightness. Now that you've done most of the tying, you can do it again to get all the laces as tight as possible. While tightening, adjust the tightness of each crotch so that the two sides remain straight and parallel. With the crotch tightened properly, tug on it one last time with all four laces in the middle. This pulls in the waist.
 - Squeeze the center of the crosses and pull them away from your back, starting at the ends and moving towards the center. This is the easiest way to tighten the corset to fit your body.
- How tight you can make the corset depends on the quality and fit of your corset.
 Tie or tie the corset. Now that the corset is nice and tight, tie all four laces together in a bow or knot. They may be a bit loose, but that's okay. Make sure to double-knot them and you'll be fine.
 - If you are left with long laces at the ends, you can get a smoother look by looping the laces around your stomach and then tying a smaller bow or knot at the back.
 Check if you need to adjust the corset. Now that you are in it, you can look at yourself in the mirror. First of all, make sure it is somewhat comfortable. A corset should not clamp in your side, pinch you, or be anything but noticeably firm. You must be able to breathe. You should also look at the lacing at the back and pay attention to the shape of the opening.
 - A well-fitting corset should have an opening at the back with sides that are perfectly parallel.
- If the opening is wider at the bottom or top, you may need a custom corset. If there is a curvature in the middle, you probably need a larger corset.
Tips
- If your natural waist is less than 95 cm, use a corset that is 10 to 15 cm smaller than your waist size.
- If your waist is more than 95 cm, buy a corset that is 6 to 10 inches smaller than your waist size.
- Popular corset materials are satin, mesh, cotton, leather and brocade.
Warnings
- You must be able to breathe. If you can't or if you feel very uncomfortable then you have threaded it wrong or you bought the wrong size.


