Author:
Tamara Smith
Date Of Creation:
20 January 2021
Update Date:
1 July 2024

Content
- To step
- Method 1 of 4: Laying the Basics
- Method 2 of 4: Building walls
- Method 3 of 4: Laying the Roof
- Method 4 of 4: Finishing your doghouse
- Tips
- Necessities
As much as you love your dog, you probably don't want to let him sleep in your bed. A hutch of your own is a good way to give it its own dry, warm place to sleep and to keep your own bed fur-free. Follow the step-by-step plan below to build a cage that is exactly right for your dog.
To step
Method 1 of 4: Laying the Basics
 Decide what you want to use the base for. Different dogs have different needs, but almost every dog needs: an isolated, dry place that can withstand both heat and cold. When building a dog house, keep in mind the following factors:
 - Insulation. The base is the foundation of the entire loft and by creating space between the ground and the floor, you provide an insulation layer. If you don't leave any space between the ground and the floor, the loft will be freezing cold in winter and scorching hot in summer.
- Specific elements that can influence the base. If it often rains in your place of residence, it is wise to use non-toxic, water-resistant materials and to make the base high enough to prevent the loft from flooding.
 Use a wooden frame and a pencil to create the drawing you made of the doghouse. Cut a sturdy wooden slat into quarters; two pieces grow to about 60 centimeters long; two grow to about 65 centimeters long. If your dog is on the large side, you can add about ten centimeters to this.
  Use the pieces of wood to create a rectangle. Make sure that the narrow side of the slat is on the ground. Use a countersink bit to predrill holes. Then use long, galvanized screws to join the planks together.
  Use plywood for the floor of the hutch. Mark the size that connects to the base and saw this piece out.
 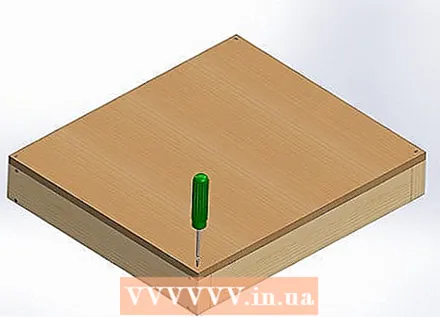 Use short, galvanized screws to attach the plywood to the base.
Method 2 of 4: Building walls
 Use solid wood to ensure the hutch is insulated and can be used in all seasons. Even if you use fairly thin wood, this makes a huge difference to plywood, for example. Make the opening at the front of the hutch as small as possible (although it should remain comfortable for the dog) to keep heat in in the winter.
 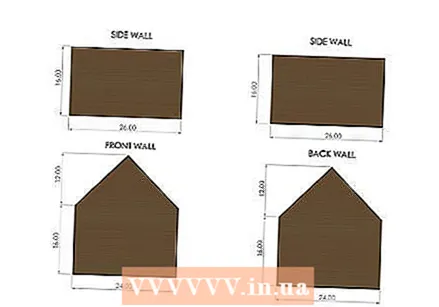 Draw the outline of the walls of the house on the wood. How long the walls will be, of course, depends on the size of your base.
  Draw an opening about 12 "by 12" in the front of the house. If you do not want a square, but a round opening, use a plate or bucket to draw the circle shape.
  Cut out all necessary parts with a jigsaw. Use 2x4 pieces of wood to support the walls and roof. You will need four pieces of about 40 centimeters and four pieces of 50 centimeters to do this. If you have adjusted the size of the base, you will of course also have to change the length of these parts so that the parts fit together properly.
  Use 5 centimeter galvanized screws to attach the supporting pieces of wood to the base. Then place the walls and fasten them with long, galvanized screws.
  Also place the front and back walls of the hutch. Make sure you use a screw about every 5 centimeters so that the walls are securely fastened.
Method 3 of 4: Laying the Roof
 Try to build a triangular sloping roof. This way you ensure that no water or snow remains on the roof and your dog also has more space to move around.
  Draw on the wood what you need to make the roof. Two boards of about 70 centimeters long will be enough. How wide the boards need to be depends on the size of the base of the doghouse.
 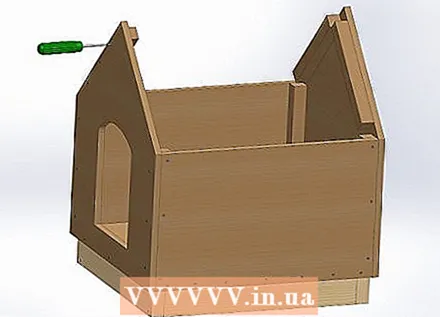 Attach four pieces of wood to the inside of the hutch. These will support the actual roof. Use 4 x 3 galvanized screws of about 5 centimeters for this.
  Place the roof on the doghouse. Make sure that the two boards fit closely together, but that the boards extend a few centimeters over the walls of the hutch. Use a 2-inch galvanized screw every 2 inches to secure the panels.
Method 4 of 4: Finishing your doghouse
 Give your doghouse a personal touch by painting it. Only use non-toxic paint for this. For example, you can match the loft to the colors in your garden or turn it into a unique work of art. Do you have small children? Then maybe you can turn painting into a fun family activity!
  Make the roof more sturdy. To keep your dog dry, you can cover the roof with impregnated roofing material. You can also use some roof tiles to give the loft a more chic look.
  Decorate the inside of the loft. Make the loft comfortable by, for example, placing a basket, cushion or carpet in the loft. If you choose carpet, you can glue it on. However, you can also choose to use double-sided tape so that you can easily replace the carpet.
 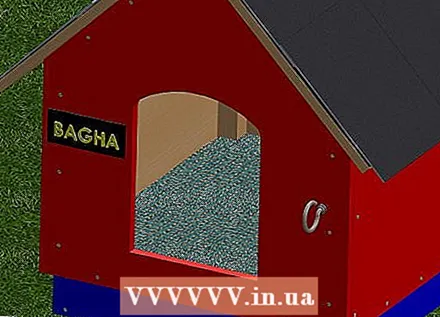 Add fun accessories to make the loft cozy.
- Hang a name sign above the entrance to the hutch. You can make these yourself, but you can also order them online. Attach the plate with a short nail or possibly with wood glue. Make sure that you do not hit the nail through the wood.
- Attach small hooks to the outside of the hutch to hold toys and leashes, for example.
Tips
- Make sure the roof is sloping so that rain and snow do not settle on it.
- You can replace the roof with plexiglass so that your dog can see out from his kennel.
- Make sure the wood you use is suitable for outdoor use.
- Use untreated wood and non-toxic paint.
- If you want to paint or cover the inside of the dog house, do this before you have attached the roof.
- Buy a large piece of wood so that you can cut all the parts in one piece.
- Gluing down carpet in the doghouse is probably not a good idea. After all, the loft is outside, so the carpet will quickly get wet and dirty and will need to be replaced.
Necessities
- 4 thick slats; two of 60 centimeters and two of 65 centimeters.
- 1 large piece of plywood.
- 4 pieces of cedar wood; two of 50 and two of 45 centimeters.
- Drill or screwdriver
- Galvanized screws of about 5 centimeters
- Galvanized screws of about 10 centimeters
- Hooks for straps and the like (optional)
- Paint (optional)
- Nameplate and small nail (optional)
- Basket for the dog (optional)
- Eating and water bowls (optional)
- Toys (optional)


