Author:
Judy Howell
Date Of Creation:
25 July 2021
Update Date:
19 June 2024
Content
This wikiHow teaches you how to graph data in a Google Sheets spreadsheet on the full Google Sheets desktop website.
To step
 Open the Google Sheets page. Go to https://sheets.google.com in your browser. This will open the Google Sheets dashboard if you are signed in to your Google account.
 - If you are not signed in to your Google account, you will need to enter your email address and password when prompted before proceeding.
 click on Empty. It's at the top left of the page. This will open a new blank spreadsheet.
 - If you already have a spreadsheet of data, click on it and proceed to the step "Select your data".
 Create your headers. Click on cell A1, enter the label for the x axis, and click cell B1 and enter the label for the y axis.
 - For example, if you want to document the number of cups of coffee you drink during the day, you can enter "Hours" in cell A1 and "Cups of coffee" in the cell B1 put.
- Depending on the type of chart you are creating, the placement of the label may differ slightly.
- You can add additional headers in C1, D1and so on if your chart contains more than two data sets.
 Enter your data. Type your x-axis data in the cells of the a column, and type your y-axis data in the cells of the B. column.
 - If you need to fill in more than two columns of headers, enter information for that as well.
 Select your dates. Click on cell A1 and hold ⇧ Shift while clicking the bottom cell in the rightmost data column. This will select your entire dataset in blue.
  click on Insert. This is a tab at the top left of the page. A selection menu will appear.
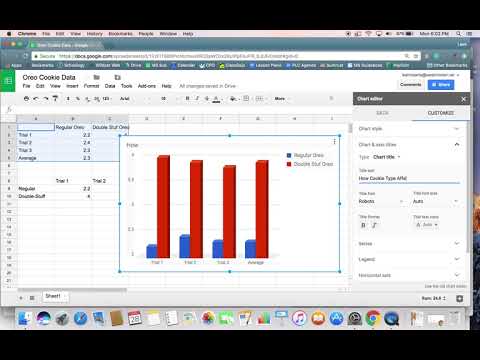
  click on Chart. You will find this option in the middle of the selection menu Insert. Clicking on it will create a standard graph of your data, and a window will appear on the right side of the page.
 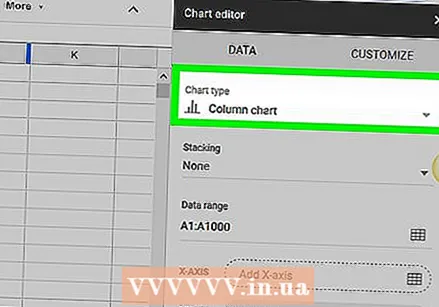 Select a chart type. Click the "Chart Type" box at the top of the window and click a chart type in the drop-down list that appears. The graph in the center of the page changes according to your selection.
 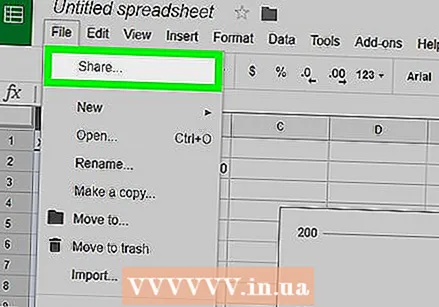 Share the chart. click on File, click on Part… from the drop-down menu, enter a name and click Save when prompted, and enter an email address (or range of email addresses) and click Send .
 - You can click on the tab first TO ADJUST at the top of the chart window to customize the appearance of the chart, labels, and so on.
Tips
- When creating a pie chart, you only need to use one column for numeric data.
Warnings
- Google Sheets are automatically saved, but only when you are connected to the Internet. If you close a Google spreadsheet before it says "Saved" at the top of the page, changes may be lost.


