
Content
- To step
- Method 1 of 4: Using gas detectors
- Method 2 of 4: Check for signs of natural gas in your home
- Method 3 of 4: Detecting a natural gas leak in your pipes
- Method 4 of 4: Take precautions if you suspect a leak
- Warnings
- Necessities
- Using gas detectors
- Detecting a natural gas leak in your pipes
Gas leaks can be dangerous and life-threatening if you leave them alone in your home. There are many signs to tell if you have a leak, or you can use gas detectors to easily detect levels. If you know roughly where the leak could be, you can test the spot with soapy water. When you are sure where the leak is, shut off the gas pipe and leave the house, so that a professional can fix it for you.
To step
Method 1 of 4: Using gas detectors
 Place carbon monoxide alarms in your home. Carbon monoxide (CO) is a colorless and odorless gas that is toxic to the body. Plug the carbon monoxide detectors into an electrical outlet at knee height or lower, as CO is heavier than air.Place at least one detector on each floor of your house.
 - Never block a carbon monoxide alarm with furniture or curtains, as these can obstruct the air flow.
- If you have pets or children in the house that could reach the detectors at knee height, plug the devices into sockets at chest level.
Tip: Sometimes you can get a combination of smoke and carbon monoxide detectors. Look for one at a hardware store.
 Use a portable natural gas detector to find the source of the leak. Portable gas detectors can detect the gas concentration in certain places in your home. Walk around your house with the gas detector while keeping an eye on the meter on the display. When the detector detects too high a concentration, an alarm will sound to let you know that the area is not safe.
 - You can buy a gas detector at a hardware store.
 Set up a radon detection test on the bottom floor of your house. Radon is a natural gas that is odorless, colorless and tasteless and occurs naturally in the soil. Place a short-term test kit in the bottom floor of your home where people spend time and leave it there for 90 days. Use the envelope included in the kit to send the test to a lab where they can calculate the radon content. If it comes out 4 pCi / l (picocuries per liter) or more, you will need to call a contractor to install a mitigation system in your home.
 - Do not perform radon tests in places that get damp, such as the kitchen, bathroom, or laundry room.
Tip: Use long-term radon tests if you want to know the change in radon levels over a period longer than three months.
Method 2 of 4: Check for signs of natural gas in your home
 Find out if your home smells like rotten eggs or sulfur. Natural gases from your appliances have the added chemical mercaptan, which gives the gas an unpleasant odor, making it easier to detect. If you notice the odor in your home, you may have a gas leak near your stove, water heater, or other appliance.
 - Check the gas stove burners to make sure they are off properly.
- Immediately turn off the gas supply line and leave the building if there is a strong odor.
 Listen for a hissing or whistling noise near the devices or pipes. You may hear gas leaking from loose connections. If you hear a faint hiss or whistle that you haven't heard before, walk around your house and listen for the change in volume. The hiss or whistle gets louder the closer you get to the potential leak.
 - The gas will hiss or whistle as it escapes through a narrow space, which means that not all gas leaks will make a sound.
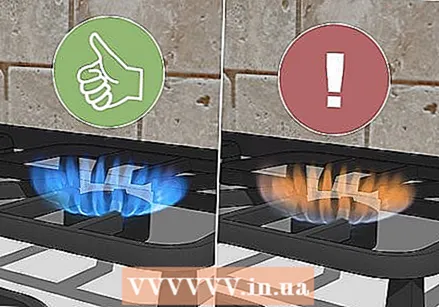 Check to see if the flames on your gas stove are orange or yellow instead of blue. Gas stoves are supposed to have blue flames, which means they have enough oxygen for complete combustion of the gas. If there are yellow or orange flames, the natural gas will not burn completely and may contribute to a gas leak.
 - Gas stoves can have orange or yellow flames when they are first lit. Don't worry until the flame is constantly orange or yellow.
 Look for a white cloud or dust moving near the gas lines. While natural gas is usually colorless, a leak can stir up dust and create a small cloud near the pipes. Be on the lookout for a mist or clouds for which you have no explanation.
  Watch for your houseplants to wilt. Plants need carbon dioxide to survive, and gas leaks can limit the amount your plants receive. If you notice that your plants are wilting or yellowing, even if you tend to them regularly, gas could be leaking into your home.
 - Keep plants in places where gas leaks can occur, such as in your kitchen or near a fireplace.
 Check your gas bill to see if it is higher than normal. Compare your gas bills over a two to three month period to see if there is a significant change in costs. If you notice a spike in your bill, check with your utility company first to make sure your bill is correct. If everything is fine on their end, let them know that you may have a gas leak in your house.
 - Consider any changes in your lifestyle. For example, if it is winter and you have used your heating more, your gas bill may be higher. Compare accounts for the same time of the year to see a more accurate change.
 Write down any physical symptoms you have while at home. Inhaling natural gas or carbon monoxide limits the amount of oxygen your body receives. If you start experiencing body aches, headaches, lightheadedness, or nausea for no apparent reason, check your gas lines and appliances to see if there are any problems.
 - Other symptoms may include, but are not limited to, loss of appetite, breathing difficulties, fatigue, and eye and throat irritation.
Method 3 of 4: Detecting a natural gas leak in your pipes
 Mix 250 ml of water with 5 ml of dish soap. Fill the cup with water and squeeze a small amount of detergent into it. Stir the detergent and water together into a soap suds.
 - It doesn't matter what kind of detergent you use to test for a gas leak.
- If you don't have detergent, you can use a liquid detergent instead.
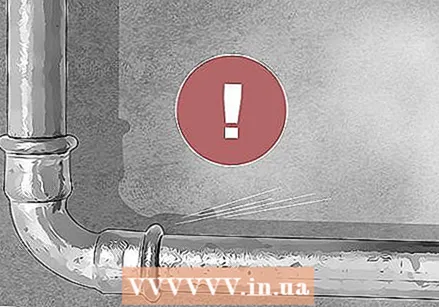
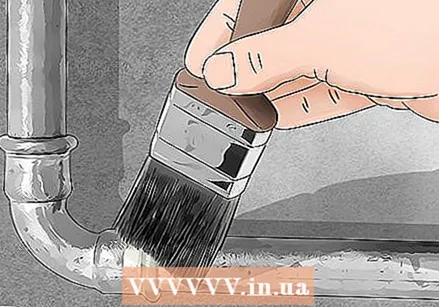 Brush the soapy water on your pipe connection. Dip a small paintbrush in the soapy water so that the bristles are completely wet. Paint a thin layer of the water around the pipe connections where you think there may be a leak. Brush the water around the entire connection point so that it is saturated.
 Common places for gas leaks
Check the fittings between 2 pipesas the insulation ring may be damaged or old.
Look near the shut-off valves to see if they are slightly open or loose.
Find where the connect gas pipes to your appliances to determine if the connections are loose or damaged.
 Watch for air bubbles where you applied the water. The gas leaking from the pipe connections will make air bubbles in the soapy water. If no air bubbles form at the connection, the gas leak is elsewhere in the pipes. Continue to apply water and keep an eye out for air bubbles until you locate the source of the leak.
  Mark the spot on the pipe so that a professional can come and fix it. With a pencil or marker, mark the spot on the pipe where you found the gas leak. When you're done with that, contact the utility company and let them know that you have a leak in your house so they can fix it.
 - Do not try to repair gas pipes yourself if you are not experienced in this.
Method 4 of 4: Take precautions if you suspect a leak
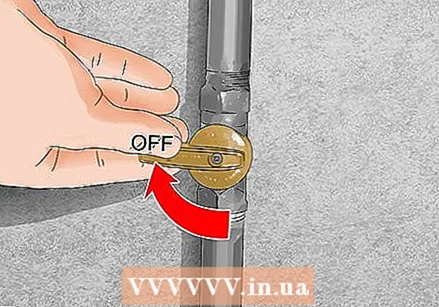 Turn off the gas line and pilot lights. Find the main gas shut-off valve near your main gas meter, which is often on the side of your building or in a closet inside. Turn the tap so that it is perpendicular to the gas lines to turn it off. By turning off the gas, the pilot flames must also go out.
  Open the windows to ventilate your home. If possible, keep all your windows and doors open so that the gas in your house can escape. That way there is a less dangerous concentration in your home and the chance of sparks or explosion is smaller.
 - Even if your windows are open, you shouldn't stay in your house if the gas leak hasn't been fixed yet.
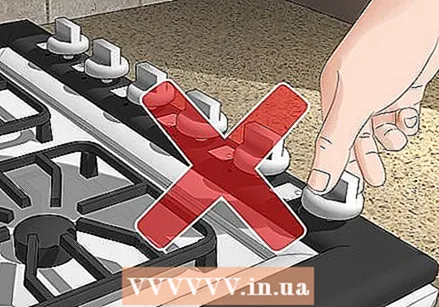 Do not use appliances or electronics indoors. Anything electrical creates a spark that can ignite a high concentration of natural gas. Do not turn on any switches, electronics, or gas devices if you suspect a leak.
 - Do not use lighters or anything with an open flame.
- Do not look for a gas leak with a flashlight or other light source.
 Get out of your house and call the fire department. Evacuate your home as soon as you can once you determine that there is a gas leak. Go across the street and away from your house in case of an explosion. Once you are at a safe distance, contact the fire department and let them know that there is a gas leak.
 - Do not use a landline or cell phone while you are still in your house.
Tip: Provide a regular meeting place for your family in case of an emergency. For example, you can specify a house or landmark across the street where you can all gather.
Warnings
- In the event of a gas leak in your home, do not use anything that could cause a spark and leave your home immediately. As soon as you are outside, call the fire brigade or your utility company's emergency line from your mobile phone.
Necessities
Using gas detectors
- Carbon monoxide detector
- Portable detector
- Radon test kit
- Postage stamps
Detecting a natural gas leak in your pipes
- Mixing cup
- Water
- Liquid dish soap
- Paintbrush


