Author:
Tamara Smith
Date Of Creation:
26 January 2021
Update Date:
2 July 2024

Content
- Ingredients
- For a simple cake
- For simple buttercream icing
- For the decorations
- To step
- Part 1 of 3: Making the body
- Part 2 of 3: Assembling the dinosaur
- Part 3 of 3: Finishing the cake
- Tips
- Warnings
- Necessities
Your child will love you when you surprise him or her with a fully developed, beautiful looking dinosaur cake. If your child loves dinosaurs, making a dinosaur shaped three-dimensional birthday cake is an excellent way to surprise him or her on his or her birthday while also saving some money by making the cake yourself.
Ingredients
For a simple cake
- 400 grams of sugar
- 225 grams of butter
- 4 eggs
- 4 teaspoons vanilla extract
- 375 grams of flour
- 3 ½ teaspoons of baking powder
- 250 ml of milk
For simple buttercream icing
- 450 grams of salted butter
- 6 teaspoons vanilla extract
- 800 grams of icing sugar
- 8 tablespoons of whole milk or heavy cream
- 4 teaspoons meringue powder (optional)
- Green and blue food coloring
For the decorations
- Fondant; look for fondant in multiple colors at a baking supplies store. You can also make your own fondant.
- Sweets for the eyes
- Triangular candies for the spines on the tail
- Pieces of chocolate for the toenails
- Toasted coconut for the prehistoric grass
To step
Part 1 of 3: Making the body
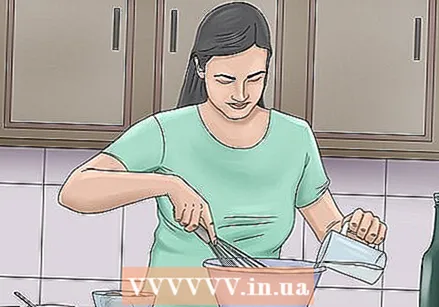 Prepare the batter for the cake. Cakes made from homemade batter are fuller and stronger than cakes that use baking mix.
 - Using the list of ingredients above, mix sugar and butter and beat in the eggs and vanilla extract. Mix the flour and baking powder, then mix the dry ingredients with the sugar, butter and eggs mixture. Use the milk to thin the batter.
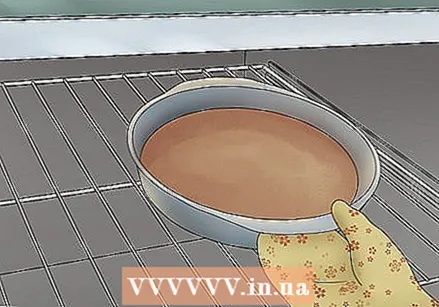 Bake the cakes. Put the batter in two greased cake tins with a diameter of 22 centimeters and put them in the oven that you have preheated to 180 degrees Celsius. Let the cakes bake for about 30 to 40 minutes.
 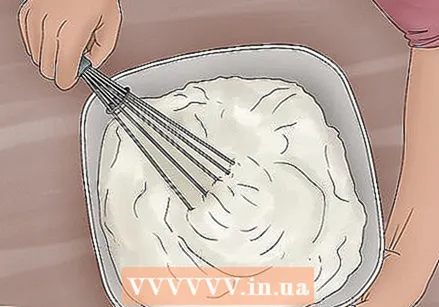 Make your buttercream icing while the cakes are cooling. Following the list of ingredients above, use a hand mixer to mix and beat the butter with the vanilla extract. Slowly add the icing sugar. Add the meringue powder to make everything firm, then slowly pour in the milk until the icing has the thickness and firmness you want.
 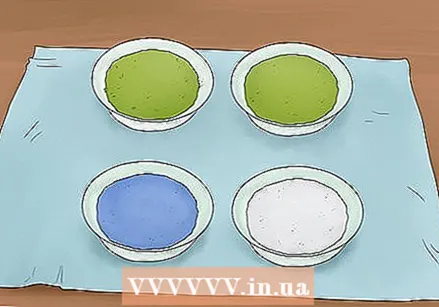 Divide the icing into 4 quantities. Make 2 quantities green, a quarter make white and a quarter blue.
 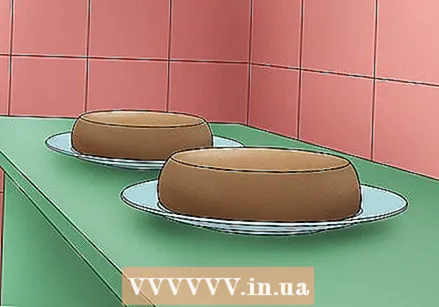 Let the cakes cool completely. If you have time, freeze the cakes before assembling the dinosaur. This way the cakes will crumble less quickly when you apply the icing.
Part 2 of 3: Assembling the dinosaur
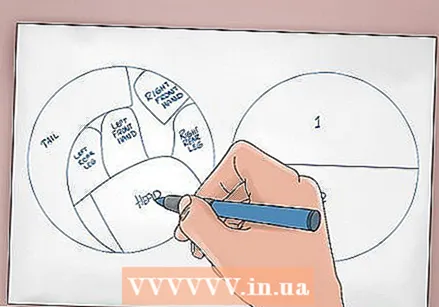 Create a paper template based on the image above (click to enlarge the image). If you have a printer that can print in A3 size, you can print a template large enough for a cake measuring 22 centimeters in diameter. Otherwise, take a sheet of thin craft cardboard and draw the template by hand. The circle should be 22 inches in diameter to match your cake.
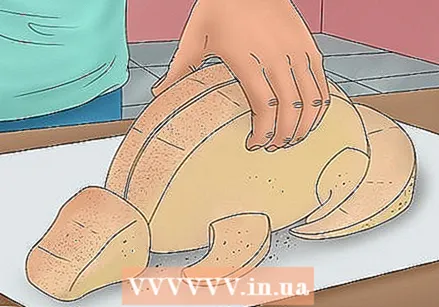
 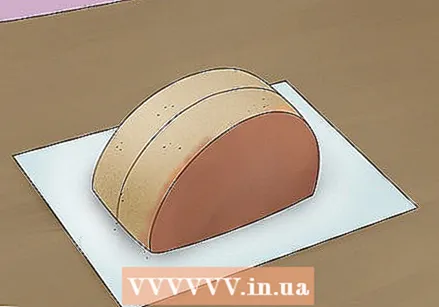 Cut out the dinosaur's body. Find the center of the first cake. Cut the cake in half with a serrated edge knife. Place the two pieces upright against each other on the cake stand with the cut edges next to each other. This will be the dinosaur's body. Put the plateau away.
 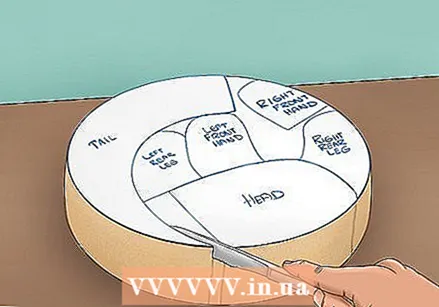 Cut out the other body parts. Cut out the different parts of the paper template along the lines, place them on the second cake and cut the cake according to the template.
 - Before cutting the cake into pieces, you can lay out the pieces of paper to see what it looks like. If you still have to make adjustments, you can now take this into account.
 Assemble the dinosaur on the cake stand. Look at the image above to see how to do this. Attach the two halves of the body together with white icing. Add the body parts by stacking them close to the body.
 - Using some toothpicks, put the cup on the body (write down where they are so they don't accidentally end up in a piece of cake later). Cut the corners and squares of the legs and shoulders if you prefer. However, the corners will no longer be a problem when you apply the frosting to the cake.
Part 3 of 3: Finishing the cake
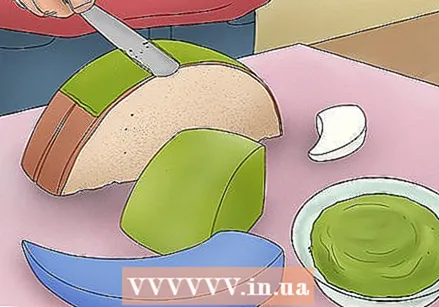 Spread a thin layer of green icing on the cake with a spatula. This is also called the crumb layer enough for good reason, as many of the crumbs loosen up and end up in the icing. Apply the icing very lightly to the cut surfaces of the cake. These are the places where you benefit from your homemade batter, because with baking mix your cake crumbles a lot more and is more difficult to work with.
 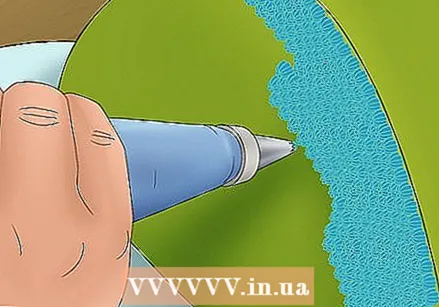 Give the dinosaur scales. Use a syringe with a star spout to apply the green icing and add blue stars on the back and cup.
  Roll out the fondant to a thickness of 3 millimeters. Using a small knife, cut the fondant into diamond shapes for the spines on the dinosaur's back. Work them with a toothpick to give them ridges. Make as many or as few spines as you want for the dinosaur's back.
 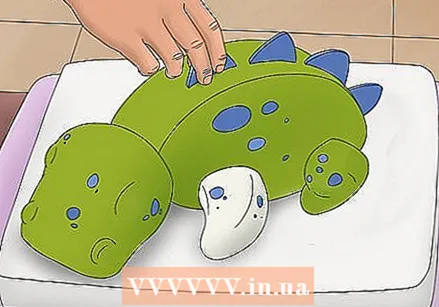 Add the spines. Stick the diamond shaped pieces of fondant in the back. If the spines don't stay in the icing properly, insert a toothpick into the spine and then stick it into the cake.
 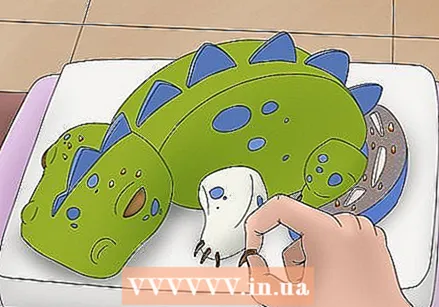 Add candy to finish the cake. Use triangular candies for the spines on the tail, round candies for the eyes and small pieces of chocolate for the toes. You can also use other candies to beautify the tail and head.
 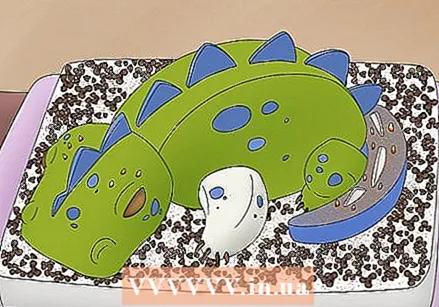 Decorate the cake stand. You can use green glaze to spray grass on the plateau for your herbivorous dinosaur to graze on. You can also apply a layer of icing on the platter and sprinkle toasted coconut flakes on top to create rocky terrain.
 - Make palm trees from rolled waffles (for the trunk) and chunks of parsley (for the leaves) to make it look like your dinosaur is in a forest.
- You can also place small plastic dinosaurs if you have one.
Tips
- Make sure the cakes are completely cool before you try to turn them into a dinosaur. Otherwise, the cakes will crumble and be difficult to cut into pieces. They will also quickly disintegrate.
- Adjust the amounts of the ingredients to make a larger or smaller dinosaur pie. With a smaller cake you will be less likely to see that it is a dinosaur.
Warnings
- Make sure to use different nozzles for the different colors of glaze, or the colors will mix.
- With every toothpick you use, you poke another hole in the cake, so don't use too many. Use as few toothpicks as possible to keep the cake together. Try to remember where you used toothpicks so you don't accidentally give someone a piece of cake with a toothpick hidden in it.
- The head can fall off the body if it is too big or not supported enough. If this is a problem, use some of the extra cake to make something to support the head (a bush, a tree, a house, another dinosaur, etc.).
Necessities
- A cardboard cake tray measuring 46 by 23 centimeters
- Piping bags and nozzles; use a star-shaped nozzle
- Non-stick small rolling pin
- Two cake pans with a diameter of 22 centimeters


