Author:
Frank Hunt
Date Of Creation:
13 March 2021
Update Date:
1 July 2024
Content
- To step
- Method 1 of 3: Burn an audio CD
- Method 2 of 3: Burn a data CD
- Method 3 of 3: Burn a disc image
- Tips
- Warnings
You can burn CDs on a Mac without any additional software. You can create data CDs with a backup of your files, you can burn music to a CD to play in a CD player or you can make copies of CDs (disc image). Read this article to learn how.
To step
Method 1 of 3: Burn an audio CD
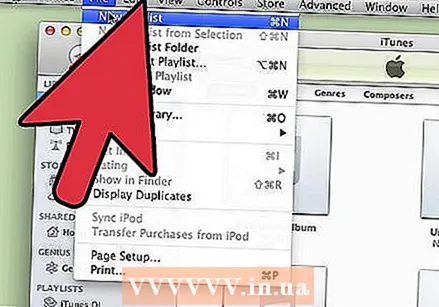 Open iTunes. Create a new playlist by clicking File> New> Playlist.
 - You can rename the playlist in the "Source List", which is the column on the left. The name of the playlist becomes the name of the CD.
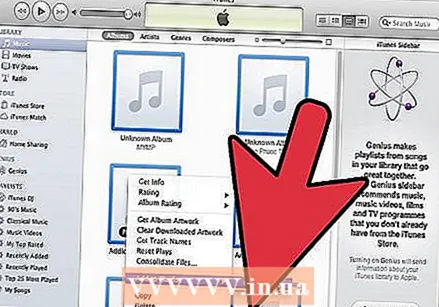 Add songs to the playlist. Click and drag the desired songs into the playlist. You can also add an entire album at once by clicking on the cover and dragging it into the playlist.
 - A normal audio CD can hold 80 minutes of music. iTunes indicates this at the bottom of the screen with 1.2 or 1.3 hours. This method is not very precise, sometimes iTunes indicates 1.3 hours and then it appears that you have selected too much music.
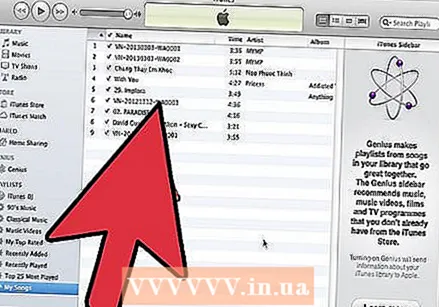 Place the playlist in the order you want. You can sort the list in several ways or you can sort them manually yourself.
  Place a blank CD in the CD tray. Click File> Burn Playlist to Disc. If the list is too long, you can use multiple CDs for burning or shorten the playlist first.
 - If you don't know how to open the CD tray: click on Controls> Remove Disc. The CD tray will now open whether there is anything in it or not.
- You usually need a CD to burn an audio CD. There are DVD players that can play audio, but they are rare.
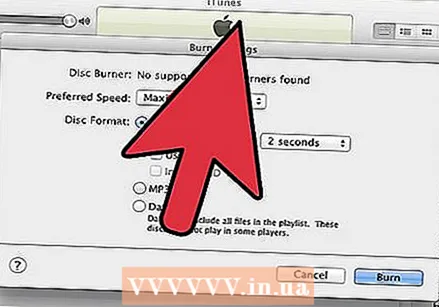 Choose the desired burning settings. Burning will begin immediately in iTunes 10 or earlier. In iTunes 11, a window appears in which you can adjust the settings before burning starts.
 - Adjust the burning speed. Higher is faster, but the quality is less, a risk when playing on older CD players or when using cheap CDs.
- Choose whether to add a pause between songs.
- Select the format. Audio CD is most common that works in all CD players. MP3 CD only works in some CD players. Only do this if the format of your songs is MP3 and not, for example, AAC.
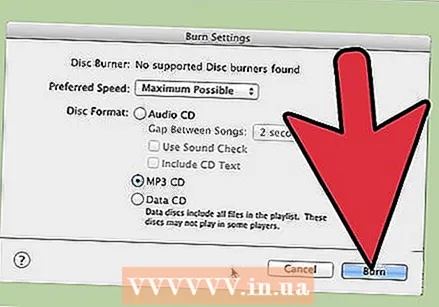 Click the Brand button. iTunes will indicate the burning progress. There will be a sound when the CD is ready.
Method 2 of 3: Burn a data CD
 Place a blank CD in the CD tray. A CD-R can be written to once, add or remove data on a CD-RW.
 - The following steps also work with DVDs, if your computer supports DVDs.
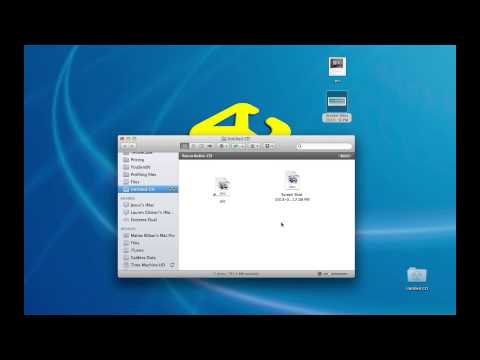
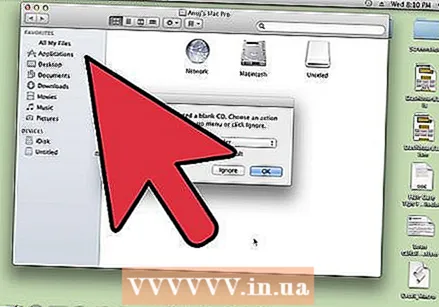 Choose the option "Open Finder". If you put an empty CD in the tray, after a few moments you will be asked what you want to do with the CD. Choose "Open Finder" so that you can easily drag and drop files to the CD.
  Look for the blank disk in the left column of the finder menu. It says: "Unnamed CD". Click to get to the Writable CD window.
 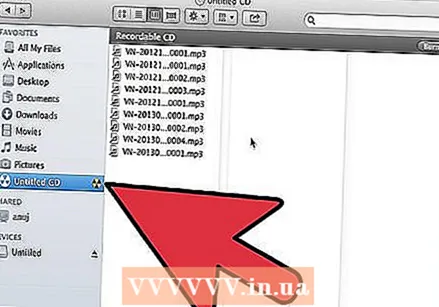 Drag the folders or files you want into the window. If necessary, rename folders and files before you start burning. You cannot change names after burning.
 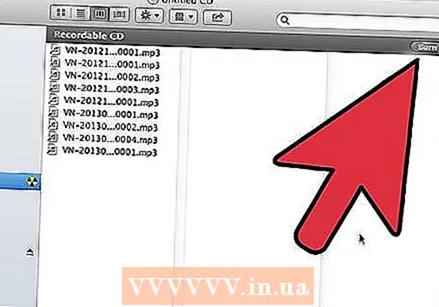 Start burning. Click File> Burn Untitled CD. Now you can give the CD a name. This name will appear when you put the burned CD in the computer.
 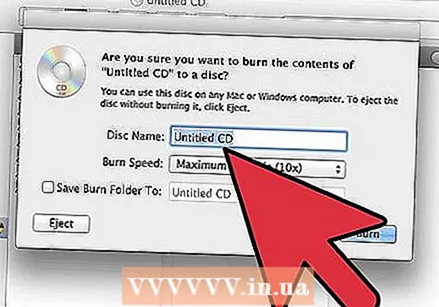 Click on Brand. The files are written to the CD. This process can take a few minutes to an hour, depending on the size of the files.
 - To use a CD-RW again, first erase the data on the CD and repeat the steps above.
Method 3 of 3: Burn a disc image
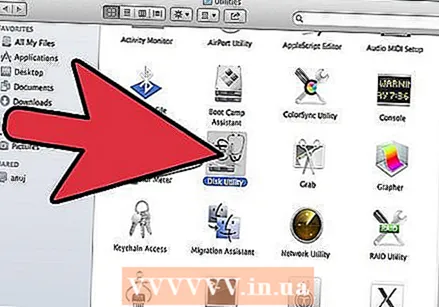 Open Disk Utility in the Utilities (/ Applications / Utilities) folder. A disk image is an identical copy of a CD or DVD on another CD or DVD. The new CD will behave exactly like the original.
 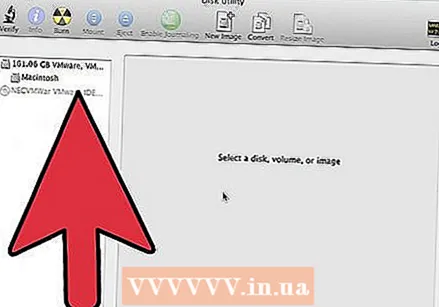 Insert a blank CD or DVD into the computer's optical drive. On a CD you can usually store a maximum of 700 MB, a DVD normally fits 4.7 GB.
 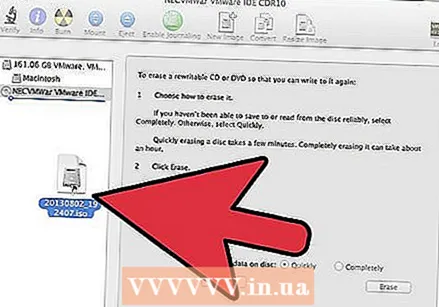 Add the disk image file. Look for the disk image file on your computer. The file must have the extension .iso. Drag the iso file into the Disk Utility sidebar.
 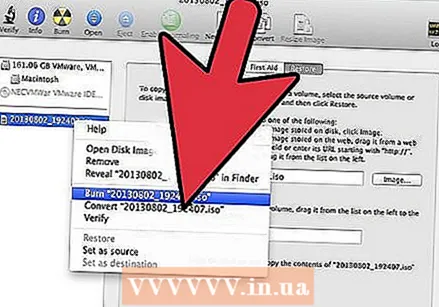 Burn the disc. Click on the disk image in the sidebar and click "Burn" at the top of the screen.
 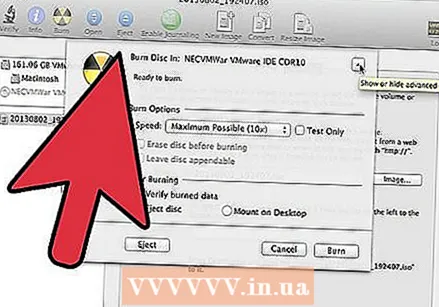 Adjust the settings. If you clicked "Burn" you can click the button with the arrow to adjust the burning settings. Make sure the option "Verify burned data" is checked. Click on "Brand" again. Wait for the process to finish.
Tips
- These steps also work with DVD-R, DVD + R, DVD-RW, DVD + RW or DVD-RAM. More data fits on DVDs than on CDs.
- Do not choose the MP3 CD option if you have multiple types of sound files. In that case you will have to convert everything to mp-3 first.
Warnings
- Only use clean and undamaged CDs for burning.
- PCs may not recognize the data on the CD. That depends on the type of file.


