Author:
Frank Hunt
Date Of Creation:
19 March 2021
Update Date:
1 July 2024
Content
- To step
- Part 1 of 3: Crushing a can
- Part 2 of 3: How it works
- Part 3 of 3: Helping students learn from the experiment
- Tips
- Warnings
- Necessities
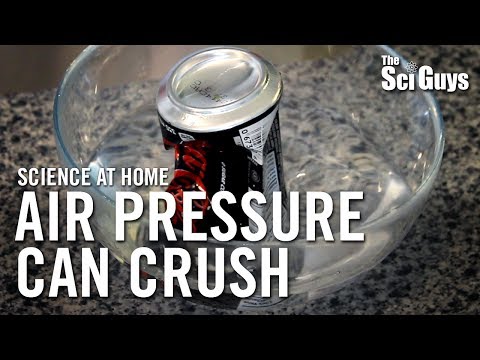
You can compress a soda can with nothing but a heat source and a bowl of water. This is a great demonstration of a number of physical principles, including air pressure and the concept of a vacuum. The experiment can be done by a teacher as a demonstration, or under supervision, by students.
To step
Part 1 of 3: Crushing a can
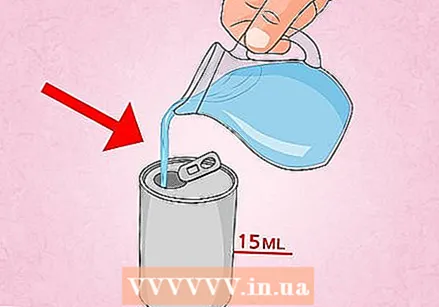 Put some water in an empty soda can. Rinse the can with some water, then add about 15–30 ml (1–2 tbsp.) Of water to the can. If you don't have a scoop, just put enough water in the can to cover the bottom.
 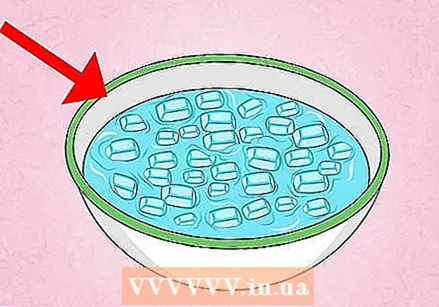 Prepare a bowl of ice water. Fill a bowl with cold water and ice, or with water that has been chilled in the refrigerator. To do this, use a bowl that is deep enough to perform the experiment, but this is not necessary. A clear bowl makes it easier to see the can being compressed.
  Put on safety glasses and use pliers. In this experiment, you heat a can until the water in the can boils, then submerge the can under water. Everyone nearby should wear safety glasses in case hot water splashes on. You also need tongs to pick up the can, without burning yourself, and immerse it in the water. Practice picking up the can a few times to make sure you have a firm grip.
 - Only proceed under the supervision of an adult.
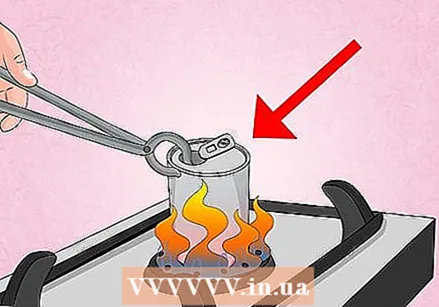 Heat the can on the stove. Place the can upright on a small burner and turn the heat to low. Bring the water to a boil and let it boil for about 30 seconds.
 - If you smell something strange or metallic, skip right to the next part. The water may have boiled dry, or you may have the heat set too high, causing ink or the aluminum in the can to melt.
- If your stove does not have a base for a can, use a hotplate, or use tongs with a heat-resistant handle to hold the can over the fire.
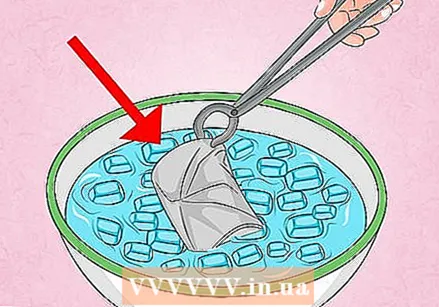 Use the tongs to turn the can over in the cold water. Hold the pliers with your palms facing up. Use the tongs to pick up the can, then quickly turn it over the cold water, then submerge the can in the bowl.
 - Don't be alarmed, because compressing the can can make a lot of noise!
Part 2 of 3: How it works
 Air pressure. The air around you presses against your body on all sides, with a pressure of 101 kPa at sea level. This alone is enough to squeeze a can, or even you and me! This does not happen because the air in the can (or the material in your body) pushes out with the same amount of pressure, and because the air pressure cancels itself, because it acts on an object from all angles with the same amount of pressure.
 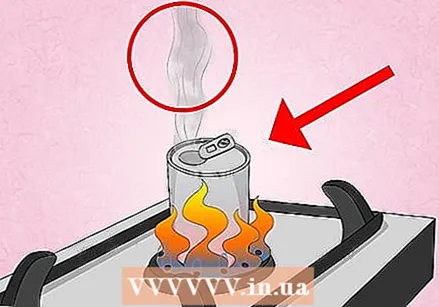 What happens when you heat the can with water. When the water in the can boils, you can see that steam begins to form. This will push some of the air in the can out to make room for the growing cloud of water droplets.
 - Although the can now has less air on the inside, it will not be compressed yet, because the water vapor has taken the place of the air.
- In general, the more a liquid or gas is heated, the more it will expand. If it is a closed container, the pressure will continue to increase because the air cannot escape.
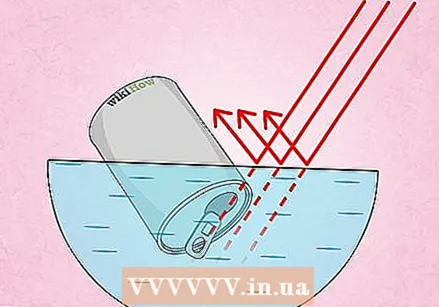 Why the can is compressed. If the can is turned upside down, the situation changes in two ways. First, no more air can flow into the can, because the entrance is blocked by water. Secondly, the water vapor in the can will cool down quickly and therefore take up less space, and eventually return to the initial state, the little bit of water that we put in the can first. Suddenly most of the space in the can is no longer occupied by air, but has become a vacuum! The air that presses on the can from outside is now no longer compensated, causing the can to fail.
 - Room where there is no air is called one vacuum.
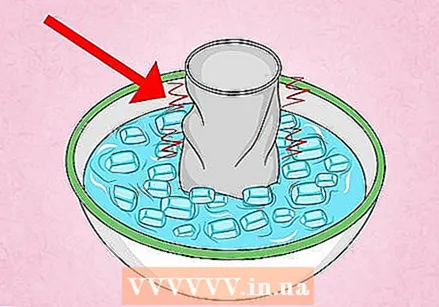 Look closely at the can to see another effect of the experiment. Preventing a vacuum in the can has another effect, besides compressing the can. Pay close attention to the can when it is placed under water. You will see a small amount of water being sucked into the can and then dripping back out. This is because the water is pressing against the opening, but just hard enough to fill the can a bit before the aluminum is compressed.
Part 3 of 3: Helping students learn from the experiment
 Ask the students why the can is being compressed. See if the students have an idea of what happened to the can. Do not confirm or refute any of the ideas at this point. Don't put any idea aside and let the students explain how they thought about it.
 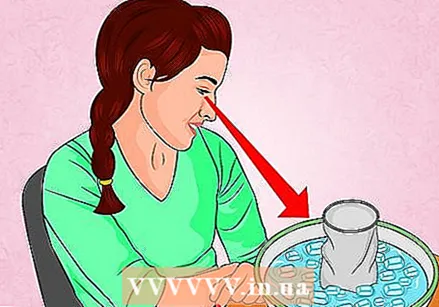 Help the students come up with variations on the experiment. New experiments to try out their own ideas, and ask them to predict what's going to happen before they start. If they have a hard time coming up with something, here are some possible variations to suggest:
 - If a student thinks the can is being compressed by the water, not the vacuum, have them fill a can completely with water and see if it is compressed.
- Try the same experiment with a more sturdy container. If the material is heavier it will take longer to compress, causing more ice water to enter the container.
- Try to let the can cool before placing it in the ice water. This will result in more air in the can, which will reduce the compression.
 Explain the theory behind the experiment. Use the information in the How It Works section to explain to students why the can is compressed. Ask if the outcome of the experiment agrees with their own reasoning.
Tips
- Do not drop the can into the water, but use the tongs to submerge it.
Warnings
- The can and the water in it will be very hot. As soon as you place the can in the cold water, allow spectators to distance themselves to avoid injuring someone from splashes of hot water.
- Older children (12+) can perform this experiment themselves, but only if an adult is there to supervise! No more than 1 person should be engaged in this experiment at any one time, unless there are several adults to assist.
Necessities
- Empty soda cans
- Tongs long enough to hold the hot cans well, from a distance
- Hob, hot plate or Bunsen burner
- Come with ice cold water


