Author:
Frank Hunt
Date Of Creation:
19 March 2021
Update Date:
2 July 2024

Content
- To step
- Method 1 of 3: Make an image file smaller
- Method 2 of 3: Enlarge an image
- Method 3 of 3: Make an image larger (Windows 7)
Sometimes you get a message that an image needs to be resized in order to upload that image. You may need to make the images larger or smaller, or increase the file size without compromising on quality.
To step
Method 1 of 3: Make an image file smaller
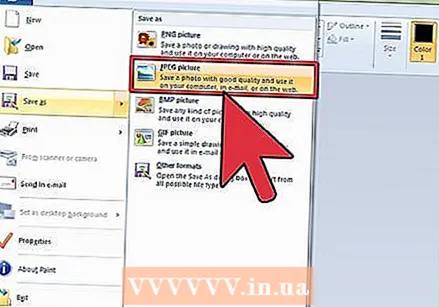 Compress the image using image editing software. One of the fastest ways to reduce the file size of an image is to compress it to a different file format. Open your file in an image editing program (even Paint will do) and save it as a compressed file type. The best known compression method for an image is JPG.
 - JPG will result in a smaller file size but with a noticeable drop in quality. Many image editing software such as Photoshop offers the possibility to indicate what the quality of the JPG should be. The lower the quality, the smaller the file size will be.
- Every time a JPG image is compressed further, the quality will deteriorate.
- There are several programs and online services that can compress images without installing a full featured image editing suite.
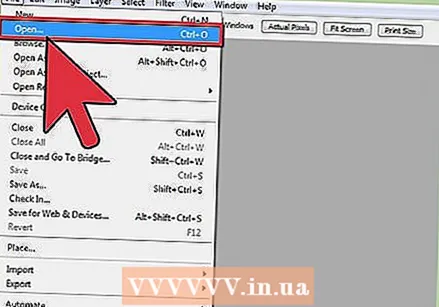
 Adjust the size of the image. Open the image in an image editing program. Paint is fine, but you can also use more advanced software such as Photoshop. Once the image is loaded, select Resize (or Image Size) from the Image menu. This will open the Image Size window.
 - Make sure you keep the aspect ratio of the image by checking the appropriate boxes.
- Select the Percentage option and start reducing your images in small steps. For example, replace 100 with 90 to reduce the image by 10%. Repeat this until the image is the desired size.
- If the image becomes smaller, the quality will decrease. This becomes especially evident when you try to return the image to its original size.
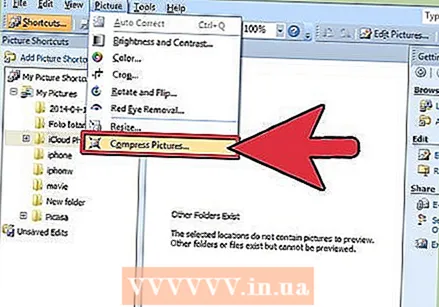 Compress the image with Microsoft Office. You need Office 2010 or earlier to do this (this feature was removed in Office 2013). Open the picture with Microsoft Office 2010 Picture Manager. Click the Picture menu and select Compress Pictures. Choose a compression setting from the list of options in the box on the right:
 - "Documents" will slightly reduce the image size and is intended for inserting an image into a Word document. "Web Pages" shrinks the image more and results in a smaller file size than Documents. "Email messages" will reduce the image the most and result in the smallest file size. The image will be noticeably smaller.
- All three options will change the actual size (pixels) of the image, in addition to the file size.
Method 2 of 3: Enlarge an image
 Open the image in an image editing program, such as Photoshop. Increasing the actual image will always result in a loss of quality and an increase in pixelation. There is no way to enlarge a JPG, PNG or BMP image without losing quality.
  Open the image size tool. You can find these in the image menu of your editing program. A window will open showing the current size of the image.
 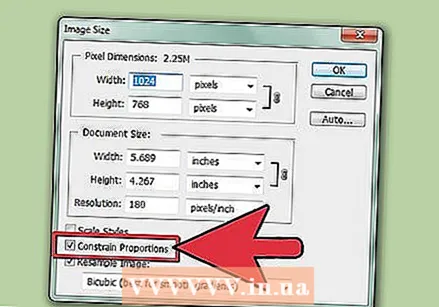 Check the box to keep the aspect ratio. This ensures that the length and width remain in the correct ratio (aspect ratio). Also check the Resample box, which will add more pixels, in an effort to keep the image intact.
 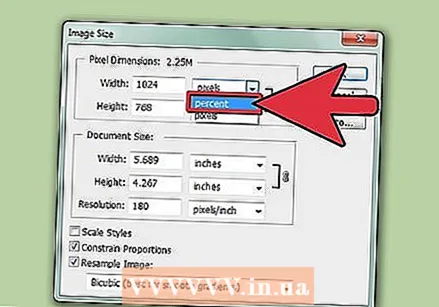 Change your units from Pixels to Percentage. In the image size window you can change the values determined by the measurement units. By default this is set to pixels. Use the drop-down menu to change this to Percentage.
  Enlarge the image up to 10%. You do this by increasing the percentage from 100% to 110%. Click OK. The image size will increase slightly and you will notice that the image will become a bit grainier.
 - Repeat until the image size is acceptable compared to the quality reduction. At some point, the image will become too grainy to be usable and you will not be able to enlarge it without making it look worse. Experiment with your image until you find an acceptable balance between size and quality.
Method 3 of 3: Make an image larger (Windows 7)
 Go to the image you want to enlarge. You are going to add text information to the file to make the file take up more space on the hard drive. This method only works with JPG files, not PNG files.
 - Adding text to the image file has no effect on the quality of the image.
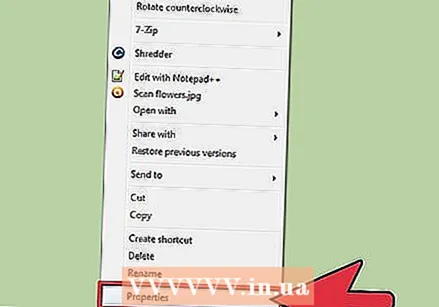 Right-click on the image and click Properties.
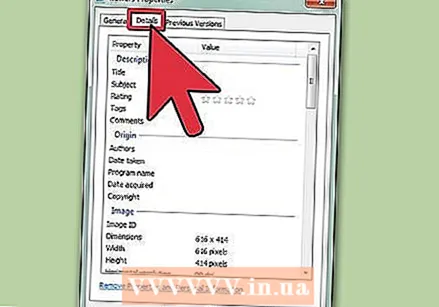 Click the Details tab.
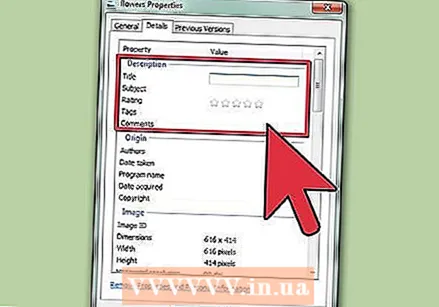 Type something in the appropriate text fields. This can be a Title, Subject, Tags, Comment, Authors, etc. The more text you add, the larger that file will be.
 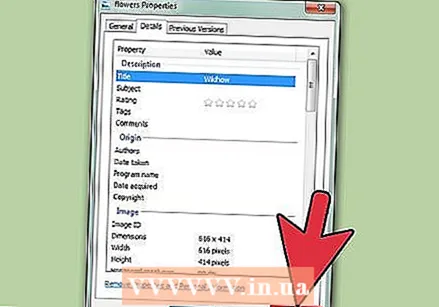 Click Apply. The new text is saved in the image and you will see what the new size is in the General tab. The file should have increased by several KB.


