
Content
- To step
- Method 1 of 2: Testing with a pear
- Method 2 of 2: Check the grounding with a multimeter
- Tips
- Warnings
- Necessities
- Using a test pear
- Check the grounding with a multimeter
Grounding is a process where the discharged energy from a device is directed directly to the ground, so you don't get a shock if there is a faulty wire. Although grounding is required today, sometimes older homes are not grounded. If you want to check if the house is properly grounded, you can try plugging the wires at the base of a light bulb into the holes of an outlet to see if the pear lights up. If you want to check more accurately, use a multimeter to take measurements.
To step
Method 1 of 2: Testing with a pear
 Screw a 100 W bulb into a fitting. Look for a bulb with a wattage of 100 W. Then look at a DIY store for a loose fitting to screw in the bulb. Choose one that already has two wires so you don't have to add it yourself. Place the end of the bulb in the socket and turn it clockwise to secure it in the socket.
 - Make sure the socket is for use with 100W pears. If the current value is high or low, the test may not work.
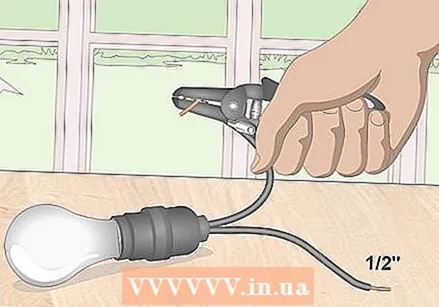 Remove one inch of the wire covers from the wires on the fitting. Use a cable stripper and find the size that matches the size of the wires on the fitting. Clip one of the wires into the slot so that about one centimeter is sticking out on the other side. Slowly pull the wire towards you through the insulation and strip it so that the wires are exposed. Repeat the process for the second wire on the other side of the fitting.
 Tip: if you don't have a cable stripper, you can grab the end of the wire between the halves of a pair of scissors. Pull the wire in the opposite direction of the part you want to remove to remove the insulation. Be careful not to squeeze the scissors hard or you could cut through the wire.
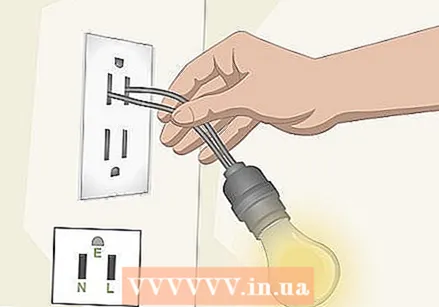 Push the wires from the fitting into the openings of an electrical outlet. Take one of the wires from the fitting and push the exposed end into the phase hole of your outlet, usually the right hole, but not in all cases. Take the second wire from the fitting and insert it into the neutral, which is usually the left hole, next to the phase. If your outlet is working properly, the bulb should light up immediately.
 - The bulb will not light up if the outlet you are checking is not connected to the power supply.
Warning: never hold an exposed wire or a wire with cracked insulation while plugged in, as this could cause a shock or electrocute yourself.
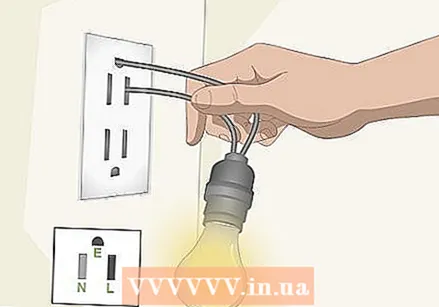 Insert the wires into the phase and ground holes to see if the pear lights up. To begin, pull both wires out of the socket. Then insert one of the wires into the ground hole, which is usually the third hole in the top or bottom. Then place the second wire back into the phase opening and see if the pear lights up. If the bulb has the same light intensity as in the first test, then the socket is properly grounded. If the bulb does not light up at all, the outlet is not grounded.
 - If the bulb burns less brightly than in the first test, then the outlet is grounded, but the grounding may be defective. Contact an electrician to check your electrical system to find the source of the problem.
Method 2 of 2: Check the grounding with a multimeter
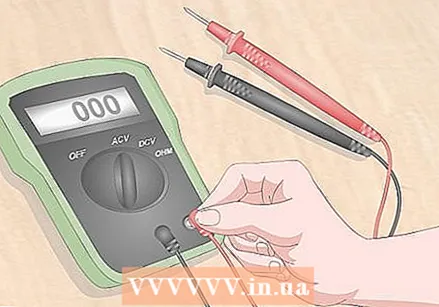
 Set up the multimeter to measure AC voltage. Multimeters can check various electrical parts for voltage, current and resistance. If you are using an analog multimeter, turn the knob to the letter V with wavy lines next to it, which is the symbol for AC voltage. If you have a digital multimeter, use the buttons to select AC voltage. Choose the highest voltage threshold on the meter to get an accurate reading.
 - You can buy a multimeter on the Internet or at a DIY store.
- Some multimeters do not list threshold values. In that case, you just set it to AC voltage and continue.
 Plug the red and black wires into the matching terminals on the multimeter. Your multimeter has black and red wires that plug into the bottom of the device. Attach the end of the red wire to the terminal marked "V", "Ω", or "+" and attach the black wire to the terminal marked "COM" or "-" so you can check the outlet.
 - Avoid connecting the wires in reverse, as this can cause a short circuit in the device.
Warning: do not use wires that have cracks, damage, or exposed wiring as you may be electrocuted when checking the outlet.
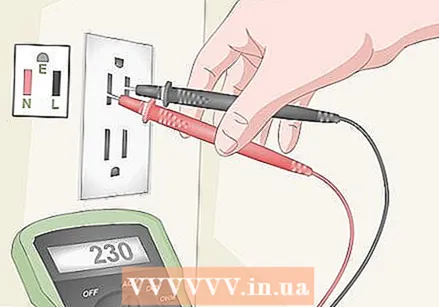 Take a measurement with the wires in the phase and neutral openings of the outlet. Hold the wires to the insulation that surrounds them so you don't get a shock while you work. Push the pointed end of the red wire into the neutral hole on the outlet, which is usually the left hole. Then push the end of the black wire into the phase hole, which is usually the right hole. Read the measurement on the multimeter and write it down.
 - Start by testing the multimeter on an outlet that you know is working so you can see what a normal reading looks like.
- The openings where you insert the wires may look different depending on the type of outlet you have. For example, on a type D or M outlet, the phase aperture is at the bottom right, while the neutral aperture is at the bottom left.
 When the wires are in the phase and ground holes, check the voltage. Take the red wire from the neutral hole and carefully insert it into the ground hole. This is usually a hole at the top or bottom of the outlet. Read the measurement to see how many volts are moving between the openings. Write down the measurement so that you can compare the measurements.
 - If your house is grounded, the measurements should be the same, with a margin of five volts.
- If the reading between the phase and ground openings is close to zero, the outlet in question is not grounded.
- If the outlet does not have a grounding hole, then no ground is connected, so the outlet is not grounded.
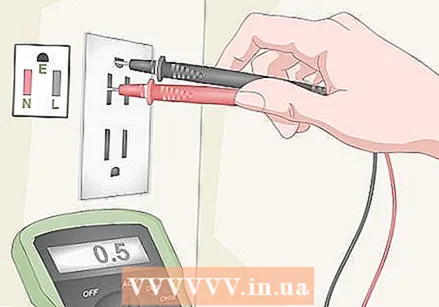 Check the voltage between the neutral and ground holes. Insert the red wire into the neutral hole and the black wire into the ground hole to check the reading. The number of Volts displayed on the multimeter is low compared to the other measurements. Write down the third measurement so that you know how much electricity is moving between the openings.
 - You do not need to check the neutral and ground holes if you have already determined that the outlet is not grounded.
 Calculate the total earth leakage value of the socket to see if it is less than two volts. The earth leakage value is the number of volts that run from the earth hole to the outlet. Subtract the first reading (phase to neutral) from the second (phase to ground). Then add the number of volts from the third measurement. If the value is higher than two, your grounding may be defective. If not, the socket is safe to use.
 - For example, if the first reading was 230 V and the second reading was 231 V and the third reading was 0.5 V, then the formula would be (231-230) + 0.5, which would add 1.5 V.
- If the ground is faulty, contact a licensed electrician to review your electrical system and find the problem.
Tips
- Power outlets that have only two openings are not grounded.
Warnings
- Call a trained electrician if you do not want or dare not check the grounding yourself.
- Never use an uninsulated wire or multimeter, as it can cause severe shock or be electrocuted.
Necessities
Using a test pear
- 100 Watt pear
- Basic fitting
- Cable stripper
- Electric outlet
Check the grounding with a multimeter
- Multimeter
- Electric outlet


