Author:
Christy White
Date Of Creation:
10 May 2021
Update Date:
1 July 2024
Content
- To step
- Part 1 of 4: Preparing to install Android
- Part 2 of 4: Root your Kindle Fire
- Part 3 of 4: Download installation files
- Part 4 of 4: Install Android
- Tips
- Warnings
This wikiHow teaches you how to replace your Kindle Fire tablet's operating system with a more flexible version of Android. While the Fire OS that comes with your Kindle Fire is technically a version of Android, a replacement allows you to do things like download apps from the Google Play Store and install custom themes. You have to empty your Kindle Fire and void its warranty to do this, so do it at your own risk.
To step
Part 1 of 4: Preparing to install Android
 Make sure your Kindle Fire can be rooted. Kindle Fires with FireOS 5.3.1 and older can be rooted. Swipe down from the top of the screen to check your Kindle Fire's operating system. Tap on Settings, tap on Device options, tap on System Updates and view the operating system number to the right of the heading "Your device is running Fire OS".
 - If your Kindle Fire is running a newer operating system, you cannot root your Kindle Fire, so you cannot install Android on it.
- You cannot install Android on a 2017 generation Kindle Fire.
 Back up files you don't want to lose. Since you will be emptying your Kindle Fire, make sure you have photos, files, or other work stored in your Amazon account or on a computer.
  Download the SuperTool zip. Do the following on a Windows or Mac computer:
 - Go to http://rootjunkysdl.com/files/?dir=Amazon%20Fire%205th%20gen/SuperTool in your computer's web browser.
- click on AmazonFire5thGenSuperTool.zip in the "Files" section.
 Install Android Studio on your computer. You can install Android Studio, which installs the command line "adb", on both Windows and Mac computers:
 - Go to https://developer.android.com/studio/ in your computer's web browser.
- Check the box "I have read and agree ..." and then click the blue "DOWNLOAD" button.
- Double click on the downloaded file.
- Follow the instructions on the screen.
- Open Android Studio and follow all on-screen prompts.
 Enable debugging on your Kindle Fire. This will give you access to the Kindle Fire on your computer:
 - Swipe down from the top of the screen and tap Settings.
- Tap on Device options.
- Enable the developer options by pressing the header seven times Construction number tapping.
- Tap on Developer options.
- Tap on USB computer connection.
- Tap on Camera (PTP).
- Go back one page and tap the "Enable ADB" switch.
Part 2 of 4: Root your Kindle Fire
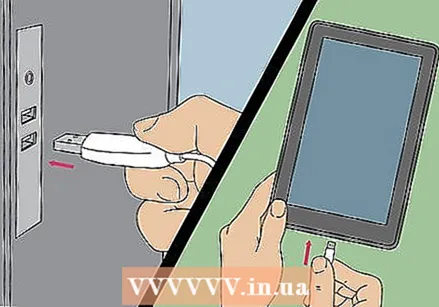 Connect the Kindle Fire to your computer. Plug one end of your Kindle Fire USB cable into your computer and the other end of the cable into the Kindle Fire port.
  Extract the SuperTool zip folder. Double-click the downloaded SuperTool zip folder and click Unpacking at the top of the window, click Unpack everything in the toolbar and click Unpacking. The extracted folder will be opened when the extraction is complete.
 - On a MAC, double click on the downloaded SuperTool ZIP folder and wait for it to be extracted.
 Add the SuperTool files to your Windows ADB folder. Skip this step on a Mac. To add these files to the ADB installation folder, follow these steps:
 - Open the extracted folder and then open the "AmazonFire5thGenSuperTool" folder.
- click on Ctrl+a to select all folders and files in this folder and press Ctrl+C. to copy them.
- Go to the folder where you installed ADB (in most cases this will be the folder "C: Program Files (x86) Android android-sdk platform-tools").
- Paste your copied files by clicking Ctrl+V. to click.
 Open SuperTool. If you are using Windows, double click on the 1-Amazon-Fire-5th gen file in the ADB folder. Mac users should do the following:
 - Open the "_MACOSX" folder in the extracted SuperTool window.
- Open Terminal (type terminal in Spotlight, and double-click Terminal).
- Type chmod 755 sh and click the space bar.
- Drag the file "._3-Amazon-Fire-5th-gen-linux-mac.sh" from the "_MACOSX" folder to the Terminal window. If you don't see this file, open the "AmazonFire5thGenSuperTool" in the "_MACOSX" folder to find it.
- click on ⏎ Return.
 Run the "Root device" option. Press 2 on your computer, then press ↵ Enter and follow all directions on the screen.
 - This process can take more than an hour.
 Run the "Google Play Store" option. Press on the button 1 on your computer, then press ↵ Enter and follow the instructions on the screen.
  Install FlashFire. This app allows you to install a custom ROM on your Kindle Fire. To do this, press 6 and press ↵ Enter and follow the instructions on the screen.
  Disconnect and remove your Android. When you are done installing the various packages on your Kindle Fire, it should be rooted; at this point you can disconnect it from your computer and download the required installation files.
Part 3 of 4: Download installation files
 Open your Kindle Fire's web browser. You need to download two ZIP folders from different pages: the Google Apps package and the Android operating system ROM.
  Open the GApps page. Go to https://opengapps.org/ in your Kindle Fire's web browser.
  Check the box 5.1 On. This is in the column "Android". This is the operating system used by the ROM you will download.
  Check the box "nano". This is stated in the column "Variant". This ensures that you don't get more than the apps you need, which is important given the Kindle Fire's often limited storage capacity.
  Tap the "Download"
  Open the Android Nexus ROM page. Go to https://androidfilehost.com/?w=files&flid=48493 in your Kindle Fire's web browser.
 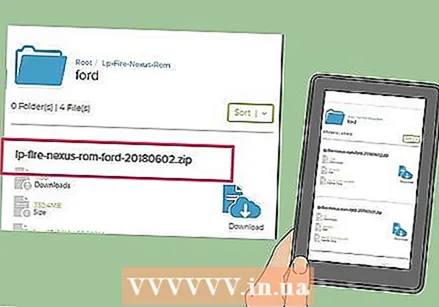 Scroll to the most recent version. It is the last ROM title on the page.
 - As of September 2018, the most recent version will be called "lp-fire-nexus-rom-ford-standalone-20180602.zip".
 Tap on Download. It's to the right of the ROM title.
  Tap on click here to start downloading. This green button is located in the center of the page. The ROM ZIP file will be downloaded to your Kindle Fire.
  Wait for both files to finish downloading. After both folders have been downloaded into your Kindle Fire's "Downloads" folder, you can proceed with the actual installation of Android.
Part 4 of 4: Install Android
 Make sure your Kindle Fire is charged and plugged in. For best results, your Kindle Fire should be 100 percent charged and plugged into an electrical outlet before attempting to install Android.
  Open FlashFire. Tap the FlashFire app icon which resembles a white lightning bolt on a red background.
  Tap on
 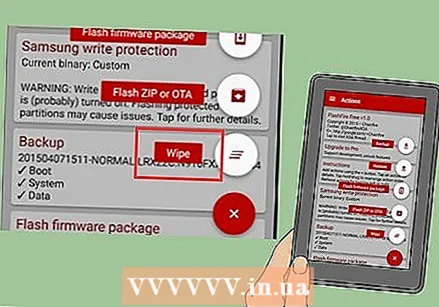 Tap on Delete in the menu. A pop-up menu will appear.
  Check the necessary boxes. You must check each of the following boxes if they are not already checked and uncheck all other boxes on the page:
 - System data
- Third party apps
- Dalvik cache
 Tap on
  Tap again
  Select the ZIP folder of the ROM. Go to the location where you downloaded the ROM ZIP folder and tap the ZIP folder to select it.
 - You may need to get on Choose or OK to select this folder.
- You can usually find the ROM in the "Downloads" folder.
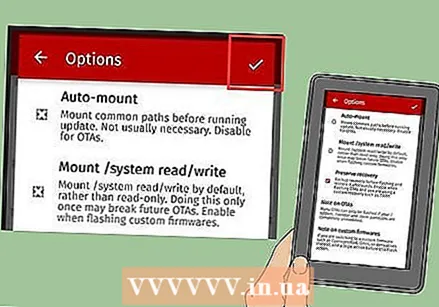 Set the installation options for the ROM. Uncheck the box for "Auto-mount" and "Mount / read / write system", then tap
  Tap again
  Select the GApps ZIP folder. Go to the location where you downloaded the GApps folder and select it there.
  Uncheck the "Auto Link" box. It's in the menu.
  Check the "Mount / read / write system" box. This option is in the menu. Unlike the ROM folder, this option should be checked.
  Tap on
  Wipe the Delete option to the top of the list. This ensures that your tablet is erased before the other menu items are placed.
 - You may need to get on
 Tap on FLASH. It's in the center of the page. This will prompt your Android ROM to start installing on your Kindle Fire.
  Wait for your Kindle Fire to finish flashing. This can take a few minutes to over an hour, so leave your Kindle Fire connected to the charger until it's ready. Once you see the Android lock screen, you can start using your Kindle Fire as an Android tablet.
- You may need to get on
Tips
- Always backup the data and archive the books you have on your Kindle Fire before installing any ROM. Flashing erases all data from your device's storage memory.
Warnings
- Trying to downgrade your Kindle Fire's operating system will make your Kindle Fire completely useless.
- This article is for demonstration and instruction purposes only. Flashing or modifying your Kindle Fire's ROM violates the terms and agreements and will void Amazon's warranty on your Kindle Fire.


