Author:
Judy Howell
Date Of Creation:
27 July 2021
Update Date:
1 May 2024
Content
- To step
- Method 1 of 4: Excel 2003
- Method 2 of 4: Excel 2007
- Method 3 of 4: Excel 2010
- Method 4 of 4: Excel 2013
- Tips
- Warnings
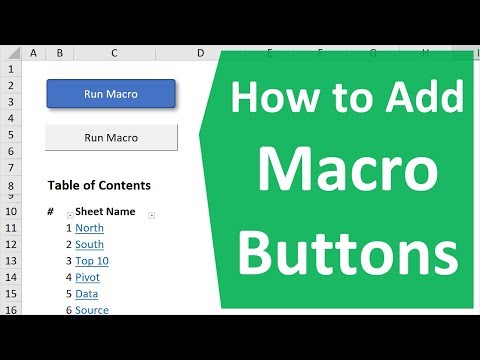
Macros in Excel can save you a lot of time when it comes to tasks with a highly repetitive character. By assigning macros to custom buttons, you can save even more time by removing your macro just a click from its execution.
To step
Method 1 of 4: Excel 2003
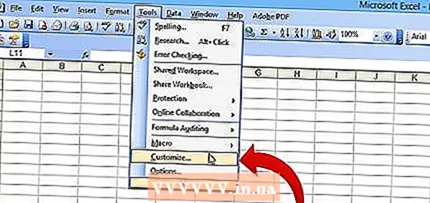 click on Tools → Customize.
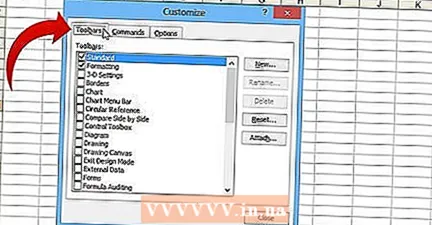 Click the Toolbars tab.
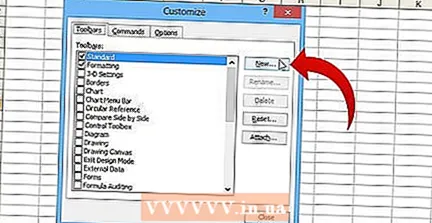 Click the New button.
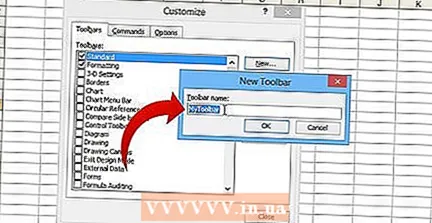 Enter a name for your new toolbar.
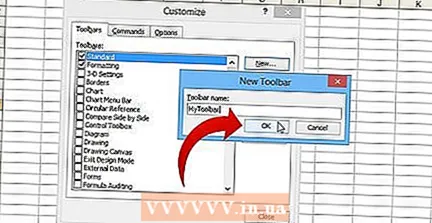 Click OK.
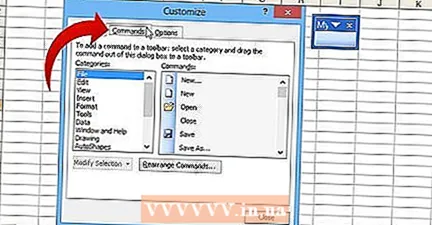 Click the Commands tab.
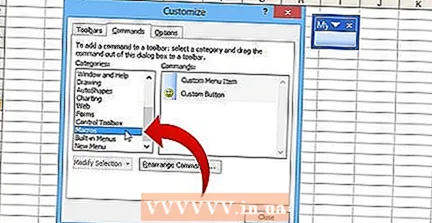 Select Macros from the list on the left.
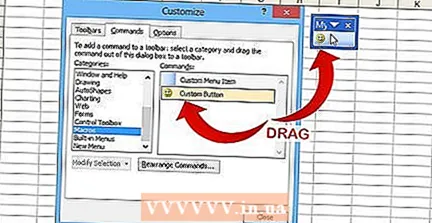 Click and drag the icon Custom button from the list on the right, to your new toolbar. The new button is indicated with a smiley.
 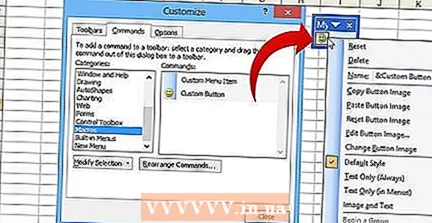 Click the right mouse button on the newly added button.
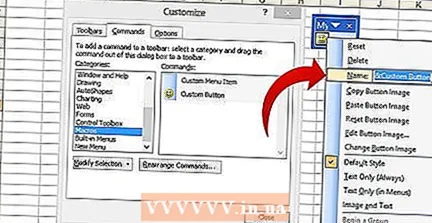 Rename the button to your preference or use the default name in Name: text box.
 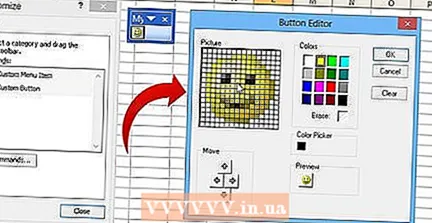 click on Change button area... and possibly change the image of your button. The Button editor has controls similar to Windows Paint.
 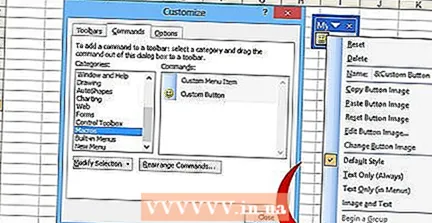 Click on "Assign Macro.’
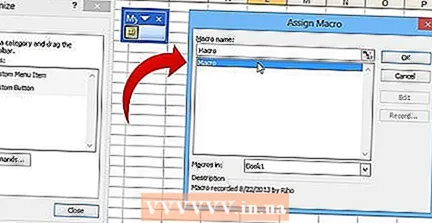 Select a macro you created from the list.
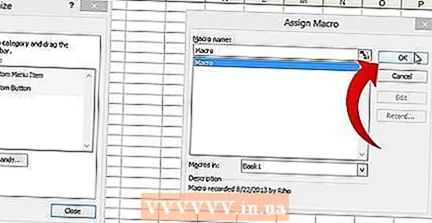 Click OK.
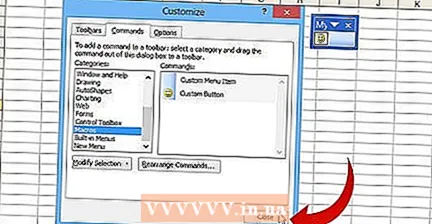 Click Close in the Customize dialog box.
Method 2 of 4: Excel 2007
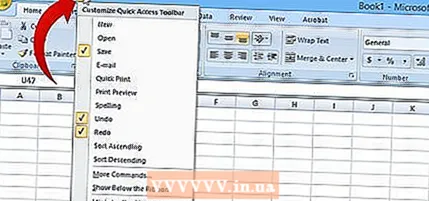 Click the small down arrow on the Quick Access Toolbar.
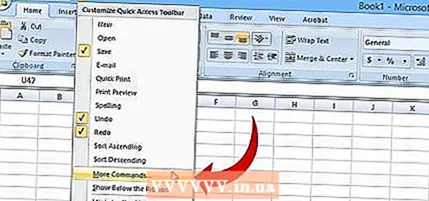 click on More assignments.
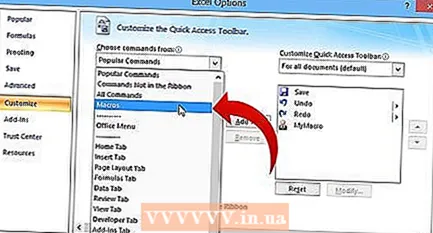 Select Macros from the drop-down list Choose assignments.
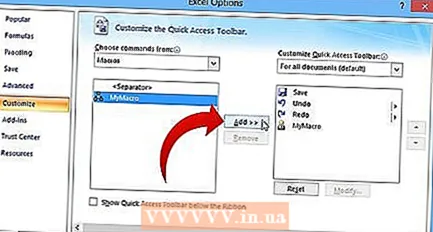 Select your macro from the left column and click the Add button.
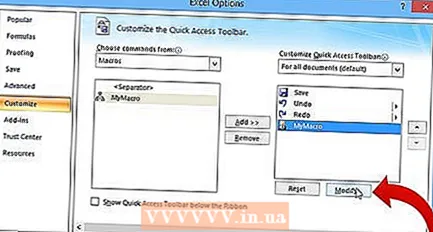 Select the macro you just added from the column on the right and click the Modify button.
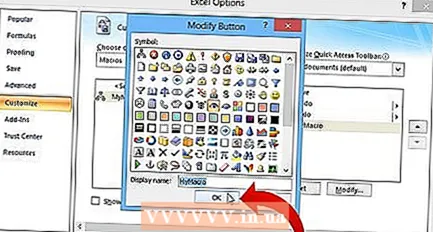 Click the button image you want to use as the representation of the macro, type the display name in the text box Display name and click on "OK'.
Method 3 of 4: Excel 2010
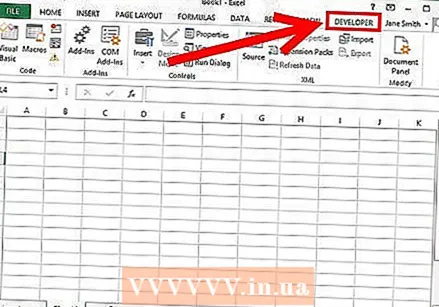
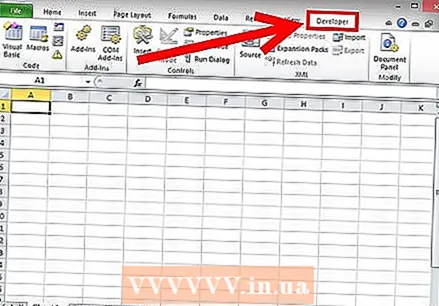 Make sure the Developer tab is visible. The Developer tab can be found in the Ribbon at the top of Excel. If this is not shown, follow the directions below:
 - Click File → Options → Customize Ribbon.
- Locate and click the Developer checkbox in the Main Tabs box. Click "OK" when you are done.
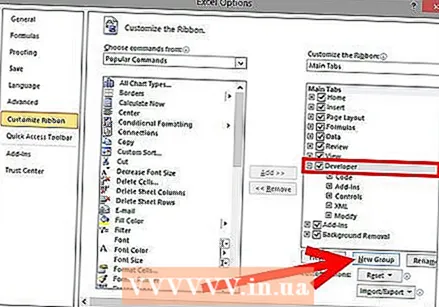 Add a "New Group" from the Developer tab to create a custom group for the command / button that will be created.
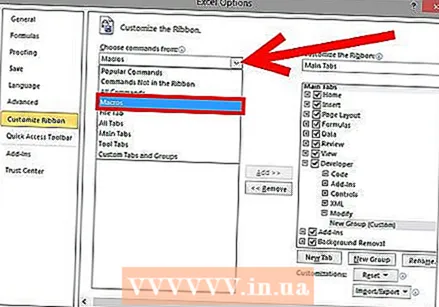 Still in Customize Ribbon, click the drop-down menu to choose an assignment. Select Macro. After that, all recorded macros will appear in the left box.
 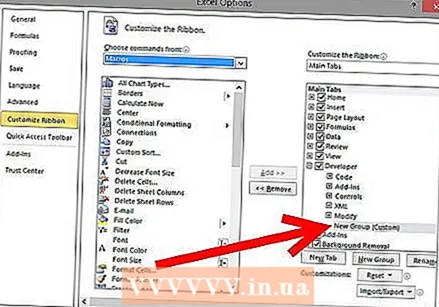 Select the desired macro for creating a button (make sure the newly created group is selected). You will know if the macro has been added when it appears in the right box below your new group.
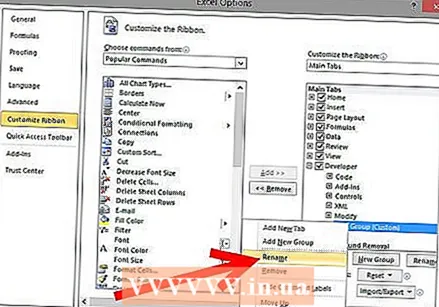 You can now customize your button. Right-click on it and select Rename.
  When everything is ready, click on "OK"
Method 4 of 4: Excel 2013
 Make sure the Developer tab is visible. The Developer tab can be found in the Ribbon at the top of Excel. If it is not shown, follow these directions to display it:
 - Go to Excel → Preferences → Ribbon (Under Sharing and Privacy)
- Under Customize, check the Developer tab and then click "OK"
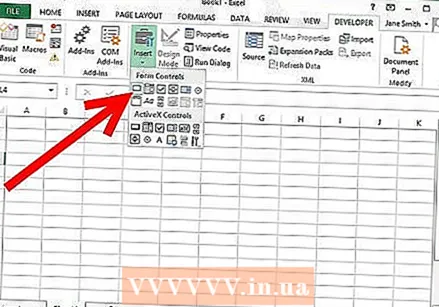 Click the Developer tab and click Command Button. The button icon is found in the Controls group in the Developer tab and looks like a rectangular button.
 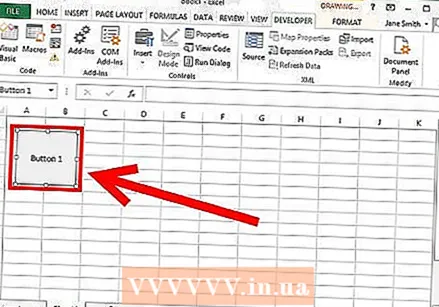 Place the button. Place your cursor where you want the button to be and drag to adjust the size of the button. You can make the button as big or small as you want, depending on what you want. If you wish, you can move the button after placing it.
 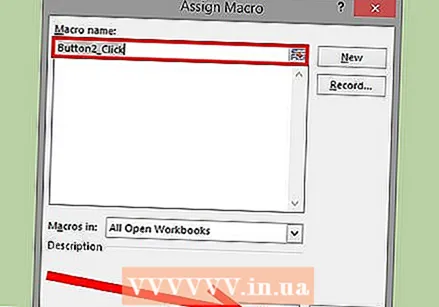 Assign a macro when prompted. Excel should automatically ask you to assign a macro to your button after you place it. Once you have selected the macro, click "OK."
 - If you are unfamiliar with what macros are or how to record them, read how to do that elsewhere. You will have to create a macro first before creating the button.
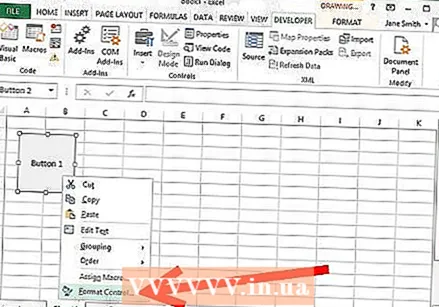 Format the button. Right-click on the newly created button and select "Format Control." Select Attributes → Displacement and Format unrelated to cells → OK. This will help preserve the size and placement of your button. If you haven't chosen this attribute, the size and placement of your button will change when you add or remove cells with it.
 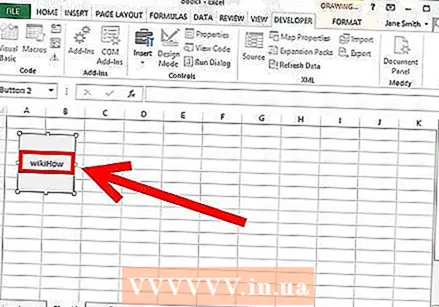 Rename the button. Change the text in the button to whatever you want.
Tips
- Try to use the Excel 2003 method for older versions as well.
- You can also add your macro button to existing toolbars, in Excel 2003 and earlier.
- If you prefer, you can assign a shortcut in the dialog box. This can prevent injuries to your wrist and save time.
Warnings
- The user interface for versions earlier than Excel 2003 may differ from the method listed.
- If you want a different button image than what Excel 2007 offers, you will need to download additional software specifically for customizing user environments in Microsoft Office.


