Author:
William Ramirez
Date Of Creation:
15 September 2021
Update Date:
8 May 2024
Content
- Steps
- Part 1 of 3: How to Grow Bell Peppers from Seeds
- Part 2 of 3: How to care for bell peppers
- Part 3 of 3: Dealing with Common Problems and Pests
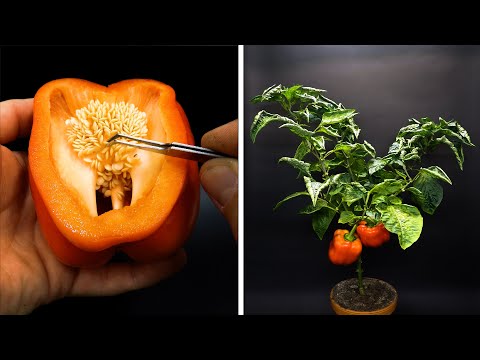
Bulgarian pepper (Capsicum annuum), also known as vegetable or bell peppers, are great for adding to many dishes. If your family loves this healthy vegetable and you have to spend significant amounts of money to buy it, think about whether it will be easier to grow pepper with your own hands. Bell peppers can be grown from seeds or purchased as seedlings. Follow our advice and soon you will have delicious, juicy bell peppers that you can proudly show off to your friends and acquaintances.
Steps
Part 1 of 3: How to Grow Bell Peppers from Seeds
 1 Try growing bell peppers from seeds. Although many greenhouse farms sell ready-made seedlings that can be planted in the ground, you can easily grow peppers from seeds. Most often, gardeners and gardeners grow pepper varieties that have green, red, yellow or orange fruits. However, you can find plant seeds that are dark brown or purple in color.
 - If you choose early varieties of pepper, then two months after planting you will be able to remove the first fruits. If you buy a variety with a long growing season, it will take more than three months for the plants to bloom.
 2 Select a planting time based on the climate in your area. In most regions of our country, peppers are first grown indoors, so planting should be done two months before the date of the last spring frost in your area. If you live in a southern region with a long growing season, you can wait until warm and plant your seeds directly in the open field. However, keep in mind that in this case you will be able to harvest the peppers no earlier than the second half of summer - the time of the beginning of fruiting directly depends on the time of planting.
  3 Sprinkle the pepper seeds with a thin layer of loose soil. Spread the seeds over the surface of the soil, sprinkle with a thin layer of soil, then sprinkle with water. The first shoots should appear one to two weeks after planting the seeds.
  4 Make sure the pepper seeds get enough heat. Bell pepper is a heat-loving vegetable, so warmth is needed for seeds to germinate. To achieve good seed germination, provide an environment where the ambient temperature is about 27 ° C and the soil temperature is slightly higher.
 - If the seeds do not germinate well, try raising the soil temperature with a seedling heating mat.
- Be aware that if the ambient temperature is below 13 ° C, the pepper seeds may not sprout at all.
 5 Try to prevent the seedlings from growing too thin and tall. If you are growing your seedlings indoors, you need to provide the plants with enough light, otherwise the shoots will grow thin and very tall. To get strong, healthy plants, it is necessary to provide the conditions for their proper development at an early stage, immediately after germination of the seeds. In addition, overgrown plants do not tolerate transplanting well.
 - If the seedlings have become too thin and tall, despite your best efforts to provide them with optimal conditions, make props for them with wooden or bamboo skewers and tie the stems to the support with cotton threads.
 6 Temper the seedlings before replanting them outdoors. If the climatic conditions in your region do not allow planting seeds in open ground, it is recommended to gradually "harden" the plants, and only then transplant the seedlings. Move the seedlings outdoors when the night temperature is consistently above 16 ° C. Leave the plants outdoors gradually for longer and longer periods.
  7 Transplant the seedlings into pots when the plants release their first true leaf. Bell peppers grow well in pots. Adult plants form bushes up to one meter high, and about the same is the diameter of the deciduous part. Consider this when choosing pots for planting - the depth of the pot must be at least 30 cm, otherwise the plants will be too crowded.
  8 Make sure you create optimal conditions for young plants to grow. For full development, pepper needs a place well lit by the sun and loose, fertile soil. These plants tolerate a lack of water well, unless they are planted in too small pots.
Part 2 of 3: How to care for bell peppers
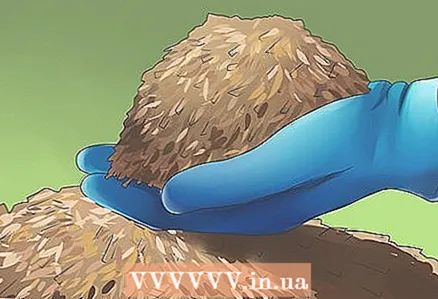 1 Use black cover film, spunbond or mulching to keep weeds out. In addition, the covering material helps speed up the vegetation of plants in cooler climates.
 - If your region is characterized by hot, dry summers, it is better to give preference to mulching - a layer of mulch will help retain moisture in the soil and protect plant roots from exposure to high temperatures.
 2 Feed the peppers. For feeding bell peppers, it is recommended to use complex granular fertilizers of prolonged action (for example, "Osmokot") or organic fertilizers, for example, based on fish emulsion or alfalfa.
 - Please note: if you have healthy plants with lush green foliage, but fruit does not set on them, you must stop feeding with nitrogen fertilizers. The fact is that this chemical contributes to the formation of abundant green mass and prevents the formation of fruits.
 3 Wait for the peppers to ripen before harvesting. The fruits of all varieties of bell peppers are initially green in color, and it takes about two weeks for the fruits to ripen and acquire the color characteristic of the variety. Keep in mind that some varieties have a longer ripening period and the fruit will take on its characteristic color after a month.
 - If you are growing a tall variety of peppers, you will need to install plant supports. This will provide additional support for the fruit, and the plants will not fall to the ground under the weight of the ripening peppers.
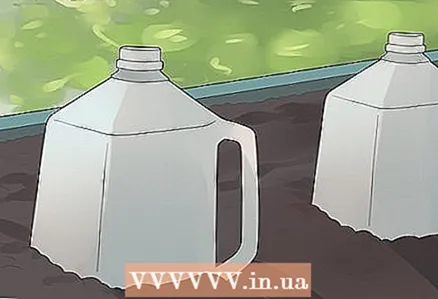 4 Protect plants from sudden drops in temperature. The American magazine for gardeners Mother Earth News recommends building a kind of "mini-greenhouse" - wire frames covered with plastic wrap to protect tomato seedlings immediately after planting in open ground. You can also make these pepper guards. In addition, you can protect young plants from the effects of low temperatures by covering them with protective glass "hoods". Traditionally, such devices were made of glass, and even now many gardeners cover seedlings of peppers with glass jars. In addition, protective "caps" can be made from plastic bottles for drinking water and carbonated drinks.
 - Since a significant part of Russia belongs to the so-called zone of risky farming, which is characterized by low night temperatures until early June, many gardeners and gardeners prefer to grow bell peppers in greenhouses or plant seedlings in greenhouses and keep them there until stable warm weather.
 5 Save the pepper seeds for growing later. Pepper seeds remain viable for two years if stored properly.This means you don't have to buy seeds every year if you store leftover seed in a dry, dark place where the seeds won't germinate prematurely.
  6 Remove the plants at the end of fruiting. After the first fall frost, collect the remaining fruits and dig the shoots out of the ground. If the plants are free of pests and traces of disease, they can be used to make compost.
 - If the plants are affected by any disease, they should be placed in tight plastic bags and thrown into the trash to prevent further spread of the disease.
Part 3 of 3: Dealing with Common Problems and Pests
 1 Use magnesium sulfate (also known as magnesia, Epsom salt, or Epsom salt) to stimulate fruit formation. If in warm weather your plants do not set fruit well, it will be useful to feed the pepper with a solution of magnesium sulfate. Simply dissolve 1 teaspoon of Epsom salts in 1 quart of water and spray on the peppers.
 - Alternatively, you can simply sprinkle a teaspoon of Epsom salts at the base of the plant's stem and sprinkle with moist soil on top so that the roots of the plant absorb the magnesium ions.
 2 Apply calcium to get rid of top rot. If you notice that the fruit has started to turn black at the ends, it is likely that your plants are lacking calcium (a deficiency of this element is the cause of the fruit defect known as top rot). In order not to lose the entire crop, you need to take action as soon as possible to replenish the calcium deficiency in the soil. The easiest way to do this is to water the plants with rotten fruits with any dairy product (check the refrigerator - it may have expired milk).
 - If you don't have enough sour milk to water all the plants, you can dilute it with water to the desired volume.
 3 Spray the plants with water or an insecticide solution to get rid of the aphids. Aphids are a pest that often infects garden and horticultural plants. You can get rid of aphids for a while if you water the green part of the plants with plenty of water. If you are a proponent of natural insecticides, spray the affected plants with a spray prepared with pyrethrin (Pyrethrum) or azadirachtin (neem fruit oil) (Nimazadir).
 - Most likely, after a while the aphids will reappear, and you will have to periodically repeat the treatment (it is very difficult to get rid of these garden pests until the end).
 4 Protect plants from both extreme cold and high temperatures. If the temperature drops below 18 ° C or rises above 35 ° C, this can cause the peppers to stop bearing fruit. However, if the plants have not been at extreme temperatures for very long (for example, it was a short cold snap or a short period of abnormal heat), fruiting will resume when the plants are back in normal temperature conditions.
 - Keep in mind that cold temperatures are extremely dangerous for bell peppers. If the ambient temperature drops to freezing, the peppers may suffer too much and will not be able to recover to their normal state. We recommend that you bring the peppers indoors and keep them there until it gets warm again outside.


