Author:
William Ramirez
Date Of Creation:
20 September 2021
Update Date:
8 May 2024
Content
- Steps
- Method 1 of 3: Choosing sandpaper
- Method 2 of 3: Hand sanding
- Method 3 of 3: Grinding with an electric sander
- Warnings
- What do you need
Sandpaper refers to an important means of processing wood and crafts from it. If you use the sandpaper correctly, the wood surface will become flat and smooth, which will allow it to be painted in the desired color. However, if you use the abrasive paper incorrectly, unsightly scratches can appear on the wood. Learning how to choose the right sandpaper for a specific project and remembering the proper technique can help you create beautifully crafted wood crafts.
Steps
Method 1 of 3: Choosing sandpaper
 1 Choose the best abrasive for your project. Sandpaper is made from a variety of materials. Each of them is better suited to a specific type of sanding. All possible options are listed below.
 - Garnet... Pomegranate is a natural abrasive that is used for sanding any type of untreated wood. Pomegranate is versatile but wears off faster than other types of sandpaper.
- Silicon carbide... Silicon carbide is best suited for sanding the caulking compound (a thick substance that is used to cover gaps, for example, in drywall) and removing dust particles that have stuck in the varnish of wood.
- Aluminium oxide... Aluminum oxide can be used for sanding wood, metal and paint. It is less abrasive than silicon carbide, but more abrasion resistant.
- Ceramic abrasive... Ceramic sandpaper is mainly used for sanding with grinders. Ceramics is one of the most durable and expensive abrasives.
- Zircon corundum... It belongs to hard and resistant abrasives.Use zirconium corundum in combination with a disc or belt sander.
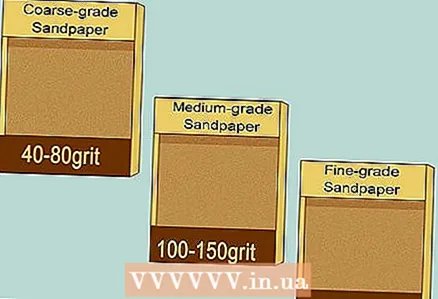 2 Buy the sandpaper you need in three grain sizes. Sandpaper can be conditionally divided into three groups: coarse-grained, with an average grain size and fine-grained. In Russia, the marking of sandpaper according to ISO-6344 has been adopted, according to which the grain size is indicated by the letter P and a number. The higher the number, the smaller the grain size (the number itself indicates the number of sieve wires per inch) and the smoother the surface will become after sanding with such paper. Check the information on the package of sandpaper for information on grit size. Buy sandpaper in different grit sizes (coarse, medium and fine) for your project.
 - Coarse sandpaper for rough processing, it is marked with a number from 40 to 80. In this case, fine-grained P80 paper should be quite sufficient, unless there are significant defects on the surface to be treated that need to be ground off.
- Medium grit sandpaperused for primary grinding is marked with numbers from 100 to 150.
- Fine-grained sandpaper is intended for final sanding and is marked with a number between 180 and 220. This will ensure that the P220 sandpaper is fine enough to sand your project smoothly. However, there is also an even finer grit (and high number) sandpaper that can be used to polish the surface.
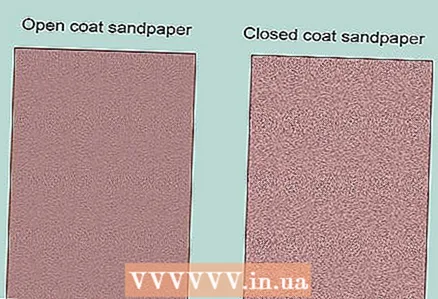 3 Use a tougher open-grit sandpaper or a heavier closed-grit sandpaper. The base of the closed sandpaper is completely covered with grain, which makes it a more powerful abrasive. Open sandpaper has fewer grains, so it is not as effective, but the space between the grains prevents the sandpaper from clogging up with processing waste, which extends its life. Use closed grit sandpaper for harder surfaces and open grit sandpaper for softer surfaces.
Method 2 of 3: Hand sanding
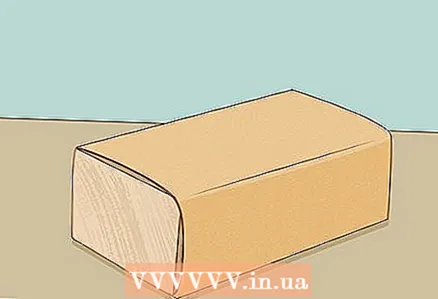 1 For the fastest and best results, use a last when working. The block is a block around which sandpaper is wrapped. The last can be made from anything, including a stiff sponge, as well as blocks of wood and cork. Sandpaper the pad with sandpaper so that the abrasive side is facing outward, and then fix it with glue or a construction stapler. You can also purchase a ready-made sandpaper shoe from a hardware store if you don't feel like making it yourself.
 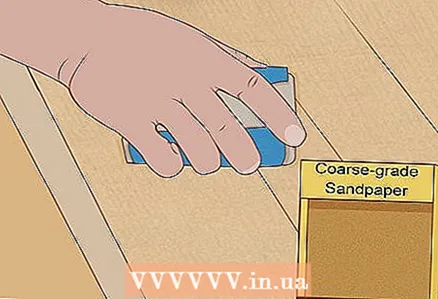 2 Start with the smallest number of sandpaper in the mark to remove obvious imperfections from the surface. This will be the coarsest sandpaper you will buy. But do not use sandpaper with too low a number in the marking for surface treatment unless absolutely necessary.
 - For example, there is no need for P40 sandpaper if minimal imperfections are required from the surface. In this case, it is better to start work with P80 sandpaper. Save very coarse sandpaper for surfaces with imperfections such as large dents and bumps.
 3 Apply sandpaper to the surface to be sanded. Press down on the sandpaper or sanding pad with your hand. If you are standing up, place some of your body weight on the hand holding the sandpaper. You can even try using both hands to increase the pressure.
 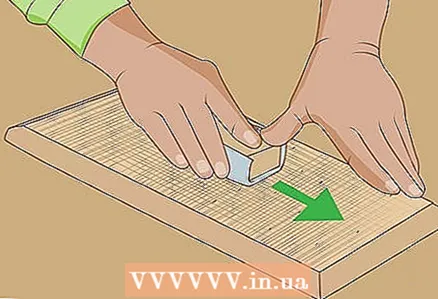 4 Run the emery paper over the surface. When working on wood, make sure you are walking in the direction and not across the wood grain. The grain direction of wood can be determined by the lines and patterns on its surface.
 - For example, if you are sanding the surface of a wooden countertop with pattern lines running from the front to the back edge, then you need to sandpaper from the front edge of the countertop to the back and back again.
- Sanding across the grain or sanding in a circular motion will create unnecessary scratches on the wood surface.
 5 Rub the surface in a straight line, back and forth. Continue to apply pressure to the sandpaper with your hands and do not pry it off the surface until you need to rest. Sand the entire surface gradually. Soon you will notice how mounds of cut off dust begin to form on the surface.
 - Remember to grind off any sharp edges. When you get to the edges of the work surface, stop and take the extra time to grind off sharp edges and corners.
 6 When finished, vacuum up any accumulated dust. Don't worry if the surface you are processing still shows scratches or imperfections. Then you sand them with a finer grit sandpaper.
 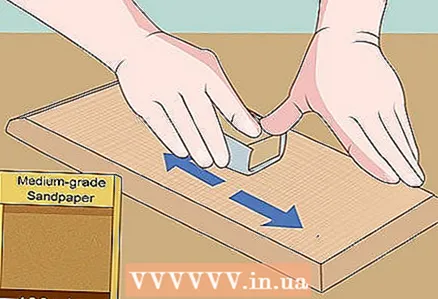 7 Switch to medium grit sandpaper. Attach paper to the block if using one. Repeat steps four through six. Be sure to sand all surfaces you are cutting, including sharp edges.
  8 Finish sanding with the finest grit sandpaper. The surface to be treated should now be completely flat without any scratches or flaws. If at this stage there are still visible scratches on the surface or you are unhappy with its smoothness, repeat the entire process again, starting with coarse sandpaper.
Method 3 of 3: Grinding with an electric sander
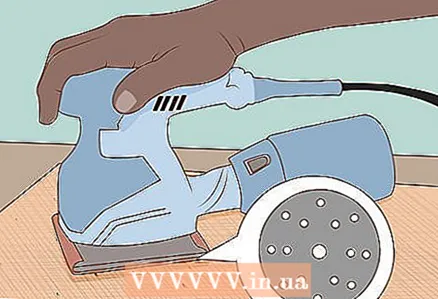 1 Use an eccentric orbital sander for fast results and less labor. The eccentric orbital sander is a special power tool that moves sandpaper across a flat surface in randomly selected directions. All that is required of you is to attach the sandpaper to the grinder, take it by the handle and start driving the device over the surface to be treated. Also, eccentric orbital sanders are usually equipped with a dust collector, where all dust that occurs during operation gets. This type of orbital sander can be purchased at your local power tool store or ordered online.
 - The eccentric orbital sander requires round sheets of sandpaper with special mounting holes. You can buy them in the same place as the grinder itself. Remember to pack each type of sandpaper: coarse, medium, and fine.
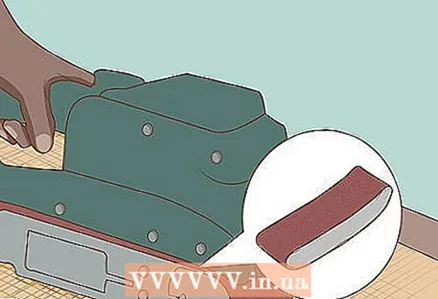 2 Use a belt sander for larger jobs. Belt sanders use a fast moving sandpaper belt for surface treatment. Belt sanders are indispensable when you need to grind off a lot of irregularities from the surface and do it quickly. Attach a tape of sandpaper of the desired grit to the sander and, grasping the handle, run it along the surface to be treated. The belt sander can be purchased at your nearest power tool store or ordered from the online store.
 - Be aware that you will have to buy sandpaper made specifically for belt sanders.
- Belt sanders are very powerful devices that grind surfaces quickly. Do not use belt sanders on small objects, otherwise you risk ruining them.
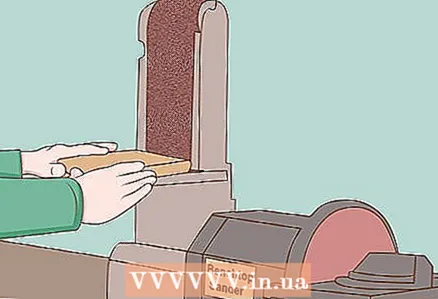 3 Use a sander to quickly finish curved edges. The grinding machine is a fairly large device with a rotating grinding disk, which is attached to the device body on an axis perpendicular to it.There is usually a small shelf next to the disc, on which you can put the object to be processed and turn it with the right side to the disc with sandpaper. With a grinding machine, you can easily process objects with complex or curved contours. The sander can be purchased from a power tool store or ordered from an online store.
Warnings
- When sanding the surface with sandpaper, be sure to wear a face shield to keep dust out of your lungs.
- Wear safety glasses when using an electric sander.
What do you need
- Coarse sandpaper
- Medium grit sandpaper
- Fine-grained sandpaper
- Wooden block
- Electric sander


