Author:
Eric Farmer
Date Of Creation:
8 March 2021
Update Date:
22 June 2024
Content
1 Wash the apples under clean running water. Turn on the tap, place an apple under the running water and rub it lightly with your fingers to wash away any dirt. When the apple is clean, wipe it off with a paper towel or clean rag.- Don't forget to remove the manufacturer's stickers from the apple as well.
 2 Peel the apples with a potato peeler. Be careful not to rush: start at the stem and work your way along the surface of the apple. Peel the apple completely to prepare it for slicing. Peel any apples you are about to freeze.
 - If you don't have a potato peeler, you can use a fruit knife.
3 Remove the core with a sharp knife. Cut the apple into quarters along the stem. Using a sharp knife, carefully cut the core out of each quarter with a sharp knife so that no seeds remain in the apple. - It is easier to cut an apple on a cutting board.
4 Cut apple quarters into smaller wedges suitable for freezing. While the number of slices is a matter of personal preference, it is usually convenient to cut the apple into 8-12 slices. You can use either a special apple knife (it also allows you to remove the core) or a regular knife. - To cut apple quarters, place them on a cutting board.
- Cut the apple into wedges suitable for apple pie, or into cubes that work well for making smoothies.
Part 2 of 3: Process the apples
- 1 Immediately after peeling and cutting apples, treat them with preservatives. In this case, they will not darken too quickly. Choose a suitable product, such as lemon juice, salt water, or fruit preservative.
- 2 Use lemon juice to keep the sliced apples from darkening. Pour 4 cups (1 liter) of water and 2 tablespoons (30 ml) of lemon juice into a bowl and stir well with a spoon. Place the apple wedges in a bowl and soak them in the solution for 5 minutes.
- Make sure that all slices are completely submerged in the solution.
- After soaking the apples in an aqueous vinegar solution, the taste should not change much.
- The ascorbic acid contained in lemon juice prevents apples from darkening.
- 3 To keep apples fresh, soak them in salted water. Pour 4 cups (1 liter) of lukewarm water into a bowl and add 1 tablespoon or about 20 grams of salt (regular table salt will work). Stir the water to dissolve all the salt and add the apple slices. Soak the apples for a few minutes, then remove from the salt water.
- Make sure the salt water soaks the apple slices on all sides to keep them fresh.
- Salt acts like a preservative and lengthens the time that the apple wedges will not deteriorate or dry out after freezing.
- Apples may taste slightly salty after soaking in salt water. To avoid this, rinse them under clean running water.
 4 Sprinkle fruit preservative on the apple slices to keep them stored longer. Get a fruit preservative from your supermarket and follow the directions on the package. Usually these preservatives are sold in powder form - sprinkle it evenly over the apple wedges so that it covers both sides.
 - The fruit preservative shouldn't change the taste of apples.
Part 3 of 3: Freeze the apples
- 1 If you have soaked apple slices, transfer them to a colander to drain off excess water. If the sliced apples have been in the liquid for a few minutes, transfer them from the bowl to a colander and drain the remaining water. Shake the colander lightly to drain all the liquid.
- Do not wash the apple wedges after processing, or you will remove the lemon juice, salt water, or preservative from them.
- 2 Place the apple slices on a baking sheet. To prevent the apples from sticking to the bottom of the baking sheet, line it with parchment paper. After that, place the apple slices in an even layer on the paper so that they lie on their side and do not touch each other.
- The slices should not touch each other, otherwise they will stick together after freezing.
- 3 Place the baking sheet in the freezer for 1-3 hours. It should be level so that the apple slices do not slide to one side.If you have cut the apples into very thin slices, leave the baking sheet in the freezer for an hour or so longer. If the slices are quite thick, freeze them for 3 hours.
- Freezing the apple slices separately from each other will prevent them from sticking together when you transfer them to a bag and place it in the freezer.
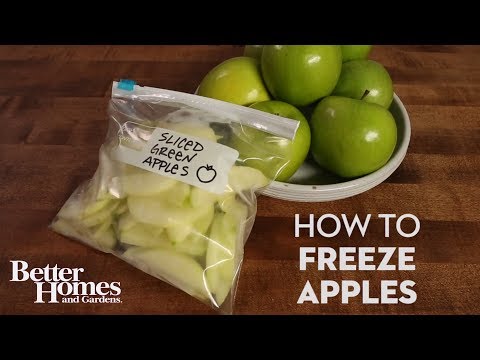
- 4 Remove the baking sheet and transfer the apples to a tightly sealed container. After you freeze the apple wedges individually, transfer them to a freezer-safe plastic bag or food container. Try to release as much excess air from the bag or container as possible to prevent the apples from drying out prematurely.
- Before placing a bag or container in the freezer, write the date it was frozen and write “apples” or “apple slices” so you don't forget what's in there.
- Use your fingers or a kitchen spatula to peel the apples off the parchment paper.
- 5 Store apple wedges in the freezer for up to one year. In a tightly sealed container, apple slices can be stored from several months to one year. To keep the taste of the apples, try to use them before they start to dry.
- To defrost apples, keep the bag or container with them in the refrigerator for at least 6 hours, or put it in a bowl of water for about 1 hour.
- If you want to use only part of the apples, remove the amount you need from the freezer so that you do not defrost them whole.
Tips
- After freezing apples, their taste and texture will change. Some apple varieties are better for freezing than others. Sweet varieties such as Fuji and Gala retain their flavor more fully than sour varieties, while baked apples such as Golden Delicious and Granny Smith retain texture better than softer varieties (such as Red Delicious).
- Do not freeze apples with multiple bumps or rotting spots.
- Frozen apples are great for making smoothies, apple pies, and muffins.
What do you need
- Potato peeler or fruit knife
- Sharp kitchen knife
- Baking tray
- Parchment paper
- Cutting board
- Big spoon
- Large bowl
- Flat scapula (optional)
- Lemon juice (optional)
- Salt (optional)
- Fruit preservative (optional)
- Freezer-friendly plastic bags or containers


