Author:
Ellen Moore
Date Of Creation:
11 January 2021
Update Date:
1 July 2024
Content
1 Maintain cleanliness. Any seasoned brewer will tell you that 80% of success comes from purity. Anything that might be needed during beer production must be thoroughly cleaned and disinfected.The easiest way is to use the dishwasher on high water temperature or use a powdered detergent like PBW (Powdered Brewery Wash).- Do not use a scraper when using this product as it will scratch the surface. In such microdamages, pathogenic microorganisms multiply, from which it is almost impossible to get rid of it later. Rinse well, then soak for a while with chlorine bleach or iodine solution.
 2 Rinse everything well. Rinse off the bleach before using the container with very clean or distilled water. Do not assume that tap water is suitable for disinfecting brewing equipment.
 - If you use bleach to disinfect, dilute 30 ml of bleach in 19 liters of cold water, then add 30 ml of white vinegar. Do not mix bleach and vinegar before adding to water! The vinegar will increase the acidity of the water, which will help the bleach to disinfect the container better.
- Do not rinse out the iodine solution, but dry the equipment instead.
- Please note that chlorine bleach can cause off odors in the beer, so rinsing is required, which can introduce microorganisms on your sterile equipment. If you want to sterilize your equipment properly, use a food grade detergent or disinfectant, such as one that does not require rinsing, or an iodine solution, such as BTF Iodophor.
- Remember that in brewing you can do whatever you want and add any ingredient you want, but proper sanitization is the MOST important process. Take the time and energy to get it right.
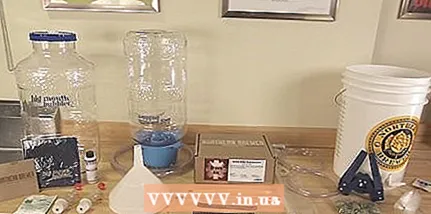 3 Prepare everything you need before starting. This includes cleaning and disinfecting as above, and having all the ingredients available to prepare and measure in advance.
 Method 2 of 3: Brewing
 1 Take notes. Before you start brewing, take a notebook and write down everything you intend to do, from the cleaning process, the type of yeast used, the amount and variety of malt, hops, and information about the special grains and other ingredients that you will use. when brewing beer.
 - This will allow you to subsequently re-reproduce any recipe, and will also serve as a basis for experimentation and skill improvement.
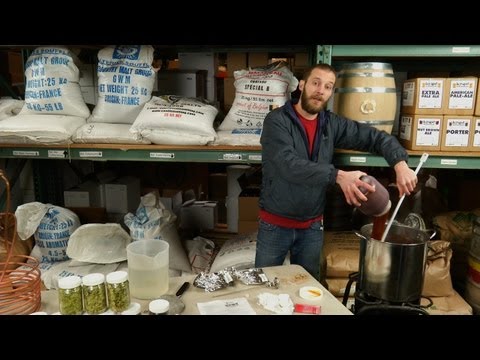
 2 Soak the malt. Place the malt in a bag (mesh type, similar to a tea bag, only large) and infuse for about 30 minutes in a large container of hot water, about 10 liters in volume and about 66 ° C.
 - Remove the beans and let the water drain from the bag into the container. Do not squeeze the bag, as you can end up with tannins that give your beer an astringent taste.
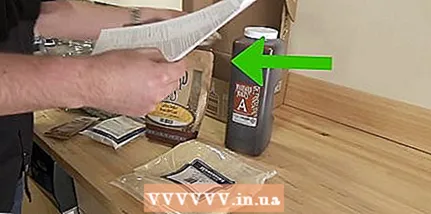
- 3 Add malt extract and bring to a boil. Hops are usually mixed at different intervals to add flavor and bitterness to the beer, but the exact times will be indicated in the brewing instructions for your beer.
- Usually added at the beginning of the boil, the hops contribute to the bitterness that arises from the flavor and aroma. The added hops at the end of the boil will give the beer a more pronounced flavor and aroma, but will not contribute to the appearance of bitterness in the beer.
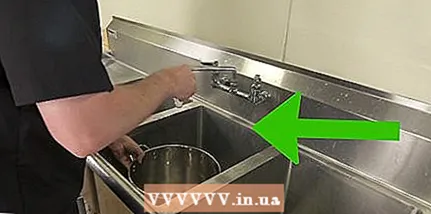
- 4 Chill the resulting wort. After you've boiled the liquid (now called wort), you need to chill it as soon as possible. The easiest way to do this is to place the container in a sink or tub that is filled with ice water.
- You can gently stir the wort to speed up the cooling, but be careful not to splash or oxygenate the liquid while it is hot (this can give the beer an unusual flavor).
- After the wort has cooled to 27 ° C, you can pour it into the fermenter.
- 5 Pour the chilled wort into the fermenter. After cooling and before the start of the fermentation process, there is the only time when agitation is encouraged. Yeast needs oxygen, and as you pour the wort into the fermenter, you have the opportunity to saturate it.
- Once the fermentation process has begun, you must minimize the supply of oxygen, as this can lead to the volatilization of odors and aromas from the raw materials.
- Remove the hops using a large strainer (the cheapest one can be purchased at restaurant supply stores) - you've already got everything you need out of it. (If you are using a bottle, then strain it first before pouring the wort.)
- Add as much water as you end up with 20 liters of liquid. You are now ready for the next "step" - adding yeast. Some yeast needs to be stirred in warm water first, while others can be added right away. Although, presumably, those that do not need to be diluted will enter the process faster than those that require mixing with water, it does not require much effort on your part.
- Close the fermenter with a lid (or stopper if you have a glass bottle) and attach it to the water seal. Place the fermenter in a dark, constant room temperature (ales and lagers require refrigeration to ferment properly). After about 24 hours, you should hear air coming out with a whistling airlock; if such a reaction has not occurred after 48 hours, most likely you are faced with the problem of dead yeast.
Method 3 of 3: Spill
- 1 Get ready to spill! After about a week, the active release of air from the water seal will come to naught. Leave the beer alone for about two weeks, counting from when fermentation first began. The beer is now ready to be dispensed. Your brewing kit most likely contained a special sugar or dry malt extract. It is used to provide beer with the necessary carbon dioxide after bottling.
- Boil sugar in a little water and then refrigerate. Add it to an empty and sanitized bucket with a faucet, or to your beer that's already fermented.
- 2 Transfer the drink. Use clean and sanitized plastic tubing to gradually pour the beer (to keep air out of it) from the fermenter into the pouring bucket with the sugar solution. Try to do this so that no sediment from the fermenter ends up in the bucket.
- Connect your clean and sanitized spill block to a clean and sanitized siphon and attach the other end of its tubing to the faucet outlet. (If you are using one bucket, then it is very important to let the fermented beer settle after stirring the sugar. This sediment overpowers the flavor of the beer itself).
- 3 Prepare your clean and sanitized bottles. If you are using a tap for pouring, then open it and substitute the bottle. Lower the spout tube to the very bottom and just let the beer drip down it.
- Using a bucket to dispense, fill the tube (supplied with the dispensing unit) with water and lower the free end into the container of beer, then lower the end of the siphon into a sink, glass or bottle, lower it down and let the water drain, dragging the beer with it. Fill each bottle to the top, then squeeze the siphon to leave the ideal headspace at the neck of the bottle. Cap the bottle and repeat the process until all bottles are full.
 4 Let the beer sit for a while! Store bottles for at least a week, preferably at room temperature, then refrigerate.
 - 5 Quench your thirst. When ready, open the bottle and carefully pour the beer into a glass. Leave about half a centimeter of beer at the bottom of the bottle to avoid drinking the yeast-tasting sediment.
 6 Enjoy!
Tips
- Keeping the fermenter low will give you a refined and tasty beer. Try to keep the temperature around 16 - 21 ° C if possible (for ales), or 7 - 13 ° C for lagers (the lower the better). Lowering the temperature too low will bring the yeast to a dormant state, and if you increase it, you will get an unusual "fruity" flavor. The ideal temperature depends on the type of yeast you are using, so the above recommendations are only general advice.
- Most beers only get better after re-fermentation. After the fermentation process has slowed down (the airlock does not whistle or releases a few bubbles per minute), very carefully transfer the beer from one fermenter to another, preferably a glass bottle. It is undesirable to shake the beer at this stage, since oxygen should not get into it. Siphon the beer smoothly. This "secondary fermentation" gives the beer more time to clean up, which means less sediment remains in the bottles and the overall taste is improved.
- Malt extract cans can be purchased at local brew stores or online. They are often sold in different flavors, resulting in variations in the taste of the beer.
- Cleanliness and disinfection! You can repeat it again. Cleanliness and disinfection! If possible, use a dishwasher.
- An excellent choice for beginners will be plastic mineral water bottles with twists. Most home brewers dislike plastic bottles due to their appearance and properties, however they are very convenient. They are cheap, durable and easy to use. When using plastic bottles, be sure to remove the labels from them so that no one picks up the beer, confusing it with a soft drink.
- There are many different types of grains, yeasts, malts and hops. Experiment with different combinations of ingredients and create your own unique drink.
- Start collecting bottles without twists before brewing. You will need about 50 to fill a standard batch. This can be a good reason to start buying premium brand products. Also old recyclable glass bottles (dark beer in a Coke bottle is hard to spot, to put it mildly) and some champagne bottles can often be found at garage sales.
- You will need a bottle brush to clean them. A quality thermometer will come in handy in many more cases.
- DO NOT USE BLEACH! Use special brewing disinfectants like StarSan or iodine-based disinfectant!
- The easiest way to keep the temperature low is to place the fermenter in a deep container of water and wrap it in a large blanket. You can add ice packs or frozen bottles there to bring the temperature down to acceptable levels.
- The large size cooler filled with chlorine water is an excellent device for disinfecting bottles.
- Although glass bottles are more expensive and heavier, they are actually much better suited for brewing if you intend to do this for a long time. Plastic containers will scratch over time, making them harder to clean, and the plastic will eventually allow oxygen to pass through.
Warnings
- Be careful when adding sugar to carbonation bottles. They will explode if you add too much of it!
- Watch out for the vapors when boiling the wort. When boiled, the malt extract goes crazy. The same goes for boiling dry malt extract, which can ignite.
- Do not use Brewer's Yeast, which is sold in various health food stores. This is dead yeast that will be of no use!
- If you are using a glass container, never pour hot wort into it, as the sudden temperature changes may cause it to burst.
- Turn off the heat before adding the extract to boiling water. Stir it thoroughly with very gentle movements, and then light the fire owl. This will help prevent the extract from burning and boiling away.
- Check your country's home brewing laws. Sometimes you may need permission.
What do you need
- Large capacity with a capacity of 12 liters. Preferably with a lid.
- 20-23 liter food grade plastic bucket with airtight lid (or glass bottles). A second bucket with a faucet in the bottom will also come in handy.
- A water trap (available at home brew stores), which can be found at an aquarium store for about RUB 1,000 less.
- A minimum of two sets of 355 ml bottles (preferably without twists). 500 ml bottles can also be used if you plan to drink half a liter of beer at a time (they are only plastic with twists).
- Dispensing unit (plastic tube with a nozzle at one end that prevents the beer from spilling).
- About 1.5 m food grade plastic tube that will fit your dispensing unit (for pouring beer from a bucket / bottle into bottles).
- Bottle capping tool
- Lids


