Author:
Gregory Harris
Date Of Creation:
16 August 2021
Update Date:
1 July 2024
Content
- Steps
- Method 1 of 6: Assembling the parts
- Method 2 of 6: Joining the plates
- Method 3 of 6: Assembling the Battery Frame
- Method 4 of 6: Connect the wires to the battery
- Method 5 of 6: Sealing the frame
- Method 6 of 6: Installing the Battery
- Tips
- Warnings
- What do you need
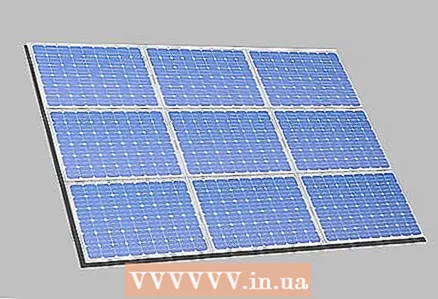
Do you want clean renewable energy? Reduce monthly energy bills? Try to make your own solar panel. For the price it will cost as part of the commercial panels and they work great! Follow the instructions below to create your panel. Either way, compare the cost of the materials you use with those you find on the Internet.
Steps
Method 1 of 6: Assembling the parts
 1 Buy plates. There are several types of solar wafers, but polycrystalline wafers are the best price / performance ratio. How much you need to buy - it will already depend on how much energy / power you want to produce. Specifications must be provided when purchasing plates.
 - Make sure to buy all of the items separately. Such plates are very fragile.
- The most convenient way to buy plates is online, but you can easily get some from your local hardware store.
- If the manufacturer produces plates in wax, then it must be cleaned. To do this, immerse the plate in hot, but not boiling, water.

- Make sure to buy all of the items separately. Such plates are very fragile.
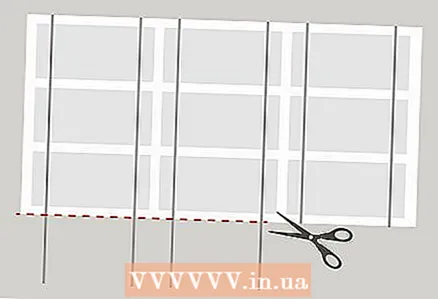
 2 We measure and cut off the backing. You will need a thin, non-conductive backing to attach the plates to. Measure the size of the plates, then make a marking on the substrate to fit the plates and cut the substrate.
 - Step back on both sides of the backing by 2.5 or 5 centimeters. This spot will be used for the wires connecting the rows together.

- Step back on both sides of the backing by 2.5 or 5 centimeters. This spot will be used for the wires connecting the rows together.
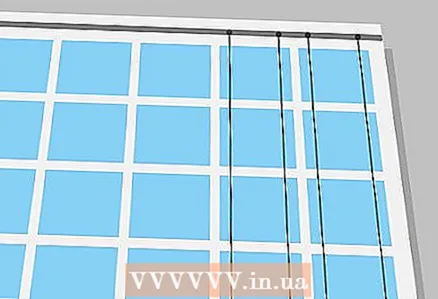
 3 We measure and cut off all your wires. If you look at polycrystalline photocells, you will see a large number of short lines going in one direction (long distance) and two long lines going in the other direction (short distance). You will need to wire the plates along two long lines and connect to the back of the next plate in the matrix. Measure the length of the long row, multiply in half, and cut two pieces for each plate.
  4 Solder the backs of the plates. Use a soldering iron on each of the three squares on the back of the plate, then using silver solder solder the first half of the wire strip and the three squares together.
Method 2 of 6: Joining the plates
 1 Glue the plates to the backing. Apply a small amount of glue to the back of the plates and press them into place on the board. The wires should lie in one straight line, each in its own row. Make sure that the ends of the wires go between the plates and only the two sections glued between the two plates move freely. Remember to lay one row of wires in the opposite direction from the one next to it so that the wire sticks at the end of one row and on the opposite side of the next.
 - You should plan your plates in long rows with fewer rows. For example, three rows, each with 12 panels, are placed long side to long side.
- Remember to leave an additional 2.5 centimeters on either side of the backing.

- You should plan your plates in long rows with fewer rows. For example, three rows, each with 12 panels, are placed long side to long side.
 2 Solder the plates together. Use a soldering iron in two thick rows (pads) on each cell, then take free sections of wires and solder them all the way to the pads. Note: The wire soldered to the back of one plate must in each case be soldered to the front of the next plate.
  3 Connect the first row using a splint. At the beginning of the first row, solder the wires to the front of the first plate. The wire should be approximately 2.5 centimeters longer than the line length and elongate to an additional break on the board. Now solder those two wires together with a piece of busbar the same size as the distance between the thick rows of plates.
  4 Connect the second row. Connect the beginning of the second row to the end of the first with a long piece of busbar that sits between two distant thick wires (the first is at the end of the battery, and the second will be the farthest in the next row). You should prepare the first plate of the second row with the extra wire, similar to the first.
 - Connect all four wires to this bus.
- Connect all four wires to this bus.
 5 Continue connecting rows. Continue joining the rows with the long bus until you reach the end, and then reconnect with the short bus.
Method 3 of 6: Assembling the Battery Frame
 1 Measure your substrate with plates. Measure the space that the substrate will be placed in. You will need a frame that is larger than your matte. Add 1 centimeter on each side to make room for the bezel edges. If there is no space of 2.5x2.5 centimeters in each corner, then after you place the substrate with the panels in the frame, add free space in the corners.
 - Make sure there is enough space at the end for the tires.

- Make sure there is enough space at the end for the tires.
 2 Cut off the bottom plane. Cut a piece of plywood to the size you measured earlier, adding space for the collars. You can use a table saw or sawmill (depending on what you have on hand).
 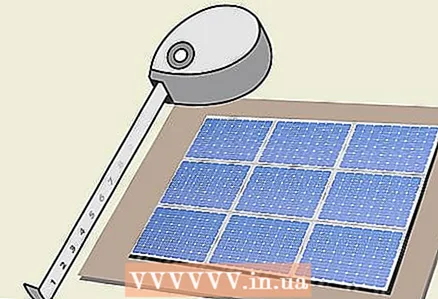 3 Form the bumpers. Measure the two long sides of the base of the frame. Then measure the two sides between the long sides.Cut off the pieces that you measured and secure them with the joinery bolts, butt-joint.
  4 Attach the bumpers. Use the joinery bolts from the top of the bumpers to the base to connect the base of the frame to the bumpers. The number of bolts used depends on the length of the sides, but there should be at least three on each side.
  5 Paint the frame. Paint the frame any color you like. Use exterior paint. This paint will protect wood from the elements and prolong the life of your battery.
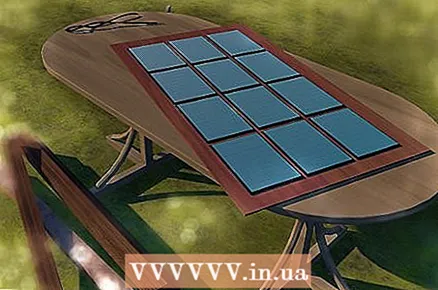
  6 Attach a solar panel. Glue the plate backing to the frame you made. Make sure everything is securely in place, the plates are face up and can absorb sunlight.
Method 4 of 6: Connect the wires to the battery
 1 We connect the last bus to the diode. Take a diode that is slightly larger than the amperage in your battery and connect it to the rail, holding it together with a little silicone. The light side of the diode should point towards your panel.
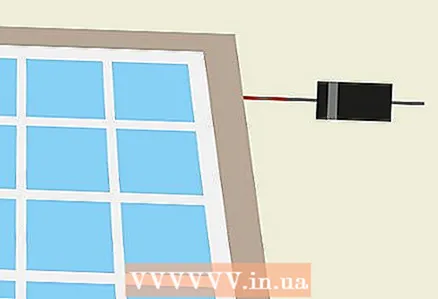
  2 Connect the wires. Connect the black wire to the diode and lead it to the end block that you have to mount on the side of the frame. Then connect the white wire from the short bus to the opposite end of the end block.
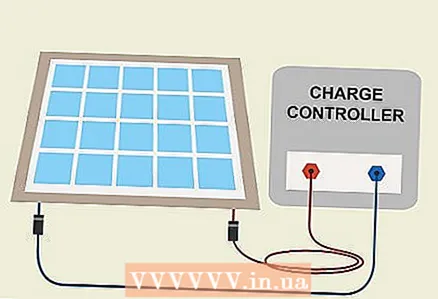
 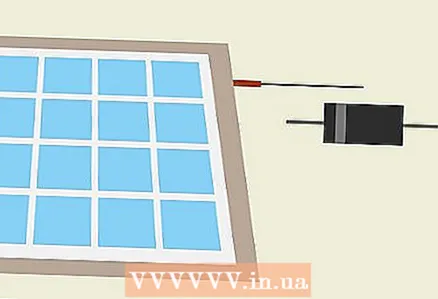 3 Connect your panel to a voltage controller. Buy a controller and attach your panel to it, make sure you attach plus and minus. Run wires from the end unit to the voltage monitor using the color-coded wires to track the charge.
 - When using more than one panel, you might want to connect all the positive and negative wires together in a circle, make sure to connect the two wires first.
 4 We connect the battery to the voltage controller. Buy a battery that will work with your panel size. Connect the batteries to the voltage monitor according to the manufacturer's instructions.
  5 Battery use. Once you have connected the batteries and charged from the panel or panels, you can disconnect your electrical appliances from the food service. Enjoy your free electricity!
Method 5 of 6: Sealing the frame
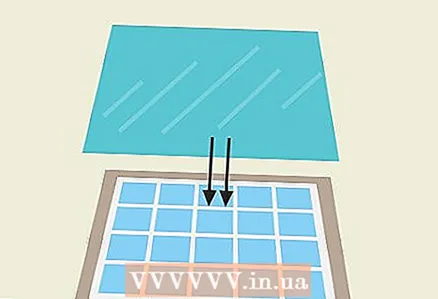
 1 Take a piece of plexiglass. Buy a piece of plexiglass that fits your panel frame. You can buy it at a specialty store or at a regular construction store. Make sure you buy plexiglass and not glass, glass can break or crack easily (hail will be a nuisance for you).
  2 Attach the glass block. Cut 2.5x2.5cm blocks out of the wood to fit in the corners. They should be as taller than the end block as needed, but below the lip of the frame, and slightly thicker in depth than your plexiglass. Glue these blocks in the desired location using wood glue or other material.
 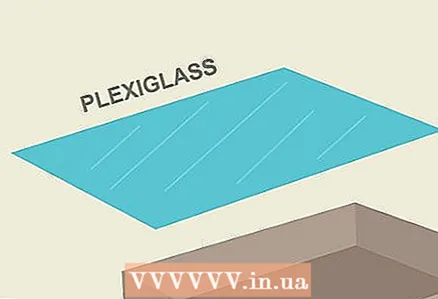 3 Install plexiglass. Lay the plexiglass so that the corners of the glass sink down onto the blocks. Bolt the plexiglass to the blocks.
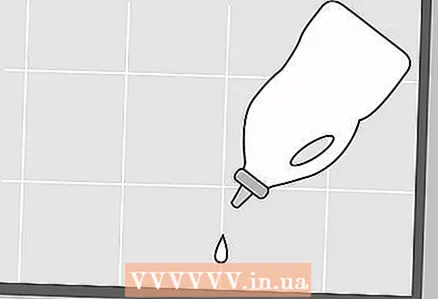
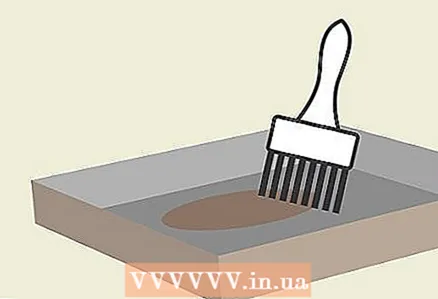
  4 Sealing the frame. Use silicone to seal the edges of the frame. Also insulate any holes you find. The frame should be as waterproof as possible. Read the manufacturer's instructions before using silicone.
Method 6 of 6: Installing the Battery
 1 Place on a cart. The first option is to install your panels on a cart. This will allow you to set the panel at an angle, but force you to reposition the panel surface to increase the amount of sun received per day. You will need to adjust the panel 2-3 times a day.
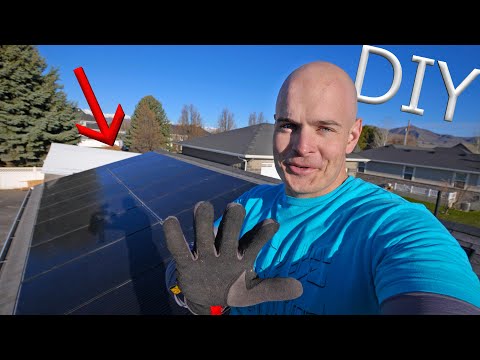
 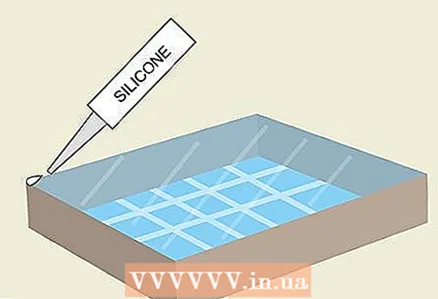 2 Install on the roof. This is the usual way to install the panel, but the tilt angle will have to match the sun's flow, and not matching it can limit the period of operation at certain times of the day. In any case, this method is best if you have a large number of panels and do not have a lot of space to place them.
  3 Place on the satellite stand. The stands used for satellite dishes are also suitable for installing solar panels on them.They can also be programmed to follow the sun. However, this method is only suitable for a small number of panels.
Tips
- The junction box connection cables for panel power output are referred to as “MC4 connector”.
- The equipment is designed as an automatic unit operation, which is characterized by the efficient use of PV plate, current voltage (I-V). I-V objects and PV plates of a calibrated light source are tested to generate electrical currents at various voltages. Using this data, the performance of the insert can be characterized. The system then sorts the PV plates into eight different categories.
- The size of a standard solar battery is 156mmX156mm, sometimes the panels are 125mmX125mm. To make panels of different sizes, the plate must be cut to the specified size. After testing, the plate is cut with a laser in a special machine. This machine is fully automated, the size of the plate is entered into the software of this machine. Some technical specification is CNC machine.
- Solar plate production process
- Cropping and installing
- Solar energy is an inexhaustible source of energy. You must use it not only to your advantage, but also to the benefit of the environment.
- Solar cell testing
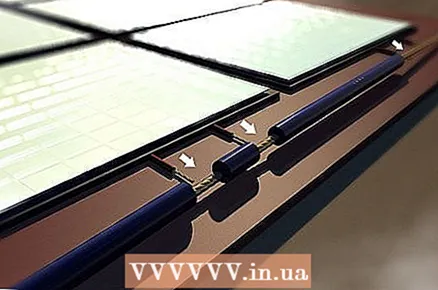
- Wiring and bus connection are two applications that connect solar plates into one solar module (solar array). These applications also transfer solar power to the input power of the junction box. Joining of solar plates occurs when individual plates are connected to a tabular ribbon (also known as a line ribbon), forming a bundle of solar plates. Often referred to as plate tabbing (or stretching). The tab strip carries current to the larger strip, the bus strip, which then transfers power from the plate bundles to the junction box for the final result.
- In this application, silicone adhesive is applied to the back of the junction boxes by hand, then, also by hand, it is fixed to the back of the panel.
- So what are you waiting for? Go to the backyard and bring your ruler and pencil to get started. Making a solar panel with your own hands is very exciting and fun!
- Tabular strips are typically used as parallel stripes that weave the top of one panel with the bottom of the next, connecting the positive and negative sides of the panels in a row. The tape is grounded by a plate that is attached to the TCO. Tabbed joining creates a solar panel cluster. Once all the panels are connected with tabbed tape, they are placed on a substrate, usually glass. Then, when the strip of the strip is soldered, it is connected with a tabbed strip to each solar panel. The tabbed tape collects electrical current from the elements within its cluster and transfers it to the bus tape. The bus strip then transfers the aggregate electricity from all solar panel clusters to a junction box for final output. Imagine a tabbed strip as a road going through solar panels. The bus tape acts as a backbone connecting and tying them together. The cross-section of the tire strip is larger as it transfers more electrical energy.
Warnings
- If you don't know how to handle electricity, call a professional. Don't electrocute yourself!
- Be careful with tools.
What do you need
- Solar plates
- Connecting wires
- Tire
- Soldering iron
- Silver solder
- Soldering tools


