Author:
Marcus Baldwin
Date Of Creation:
22 June 2021
Update Date:
22 June 2024
Content
1 Apply a base coat (white or any other light shade can be used) and let it dry. 2 Cover your fingers with plaster or oil - this is necessary so that the varnish does not get on the skin. Make sure that the patch or oil does not cover your nails, otherwise they will not stain.
  3 Pour some room temperature water into a small bowl. If you are worried about the safety of your dishes, you can take an old and unnecessary bowl. 4 Take 3 or more varnishes of different colors. Place 2 drops of each color in the water.
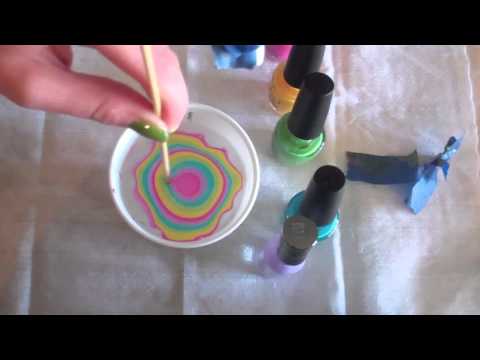
 - Do everything very quickly so that the varnish does not have time to dry on the surface of the water.
5 Use a toothpick or skewer to make stains on the varnish. To prevent the varnish from gathering on the toothpick, it is necessary that only the tip touch the varnish. 6 Dip your nail in water and wait a few seconds - all the varnish should go to the nail.- If you dip one finger at a time, then you can take less varnish.
7 Take out the nail, let it dry. 8 After all nails are painted and dry, apply a top coat with a colorless varnish. 9 Ready.
Method 2 of 2: Using a toothpick
 1 Cover the edges of your fingers with tape and apply a base coat to your nails.
- 2 Apply white polish to your nails.
- 3 Draw a small circle with the first color varnish. This circle should be quite bold and wet, as this circle will then need to be mixed with other circles.
- 4 Next to the drawn circle, draw another circle with varnish of a different color. Again, there should be enough varnish to mix with other colors.
- 5 Continue applying new colors until the entire nail is covered or until you have applied the required amount of colors.
 6 Take a toothpick, insert it in the center of the first circle, and begin to slide it over the surface of the nail. Mix colors the way you like.
  7 After you are done with the design, peel off the patch and, if necessary, clean the cuticles.
- 8 When the varnish is dry, apply a top coat - this must be done in order for the manicure to last longer.
- 9 Ready.
Tips
- Before applying the base coat, coat your nails with a colorless nail polish that will protect your nails.
- In order not to ruin the manicure, do not take too much nail polish remover,
- Don't use similar colors (like blue and cyan). Try these combinations: light pink and dark yellow, white and black, neon, blue and yellow. Don't be afraid to experiment!
- This style will look the best on your toenails.
Warnings
- If you do not have a colorless varnish, then apply a top coat, for example, with a light pink varnish. A top coat is needed to protect the manicure.
What do you need
- Multiple nail polishes in different colors
- Nail polish remover
- Several cotton swabs
- Patch
- Colorless varnish
- Toothpick


