Author:
Gregory Harris
Date Of Creation:
14 August 2021
Update Date:
1 July 2024

Content
- Steps
- Part 1 of 3: Getting Started
- Part 2 of 3: Making the gate
- Part 3 of 3: Finishing the gate
- Tips
- Warnings
- What do you need
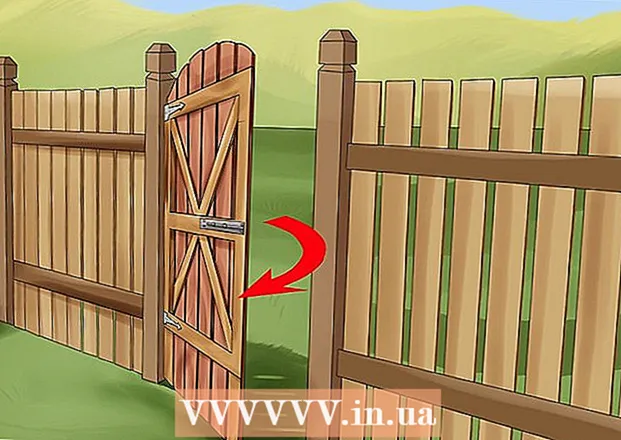
The lopsided gates spoil the general appearance of the house. A serviceable gate, on the contrary, can speak of the hospitality of the owners, and passers-by will have a good impression of the house from afar. If you want to update the gate in the fence around your site or in any other wooden fence, after reading this article, you can learn how to properly plan work, work quickly and reliably handle finished products.
Steps
Part 1 of 3: Getting Started
 1 Get the materials and tools you need for the job. In addition to the fence that will go to the gate, you will need some common, hand-made carpentry tools to start tinkering with the gate. You will most likely need:
 - Screwdriver
- Electric drill
- Assembled machine for cutting water by an angle
- Carpentry level
- Jigsaw to cut decorative details
- Steel-plated wood screws for 7.6 cm long planks to hold the frame together
- Coated or stainless steel 1 ¼ or 1 ⅝ board screws for cladding
- Hinges
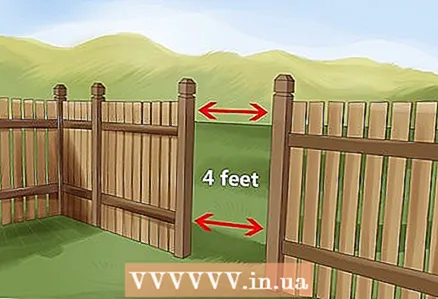 2 Make sure the fence will support the gate. The gate should be no more than 1.22 meters wide. If the gate is wider, you need to make and hang two gates that will meet in the middle.
 - Measure the door opening at the top and sides, as the data may differ. Make the gate rectangular based on accurate measurements. Measure the opening diagonally to check if the opening is square.
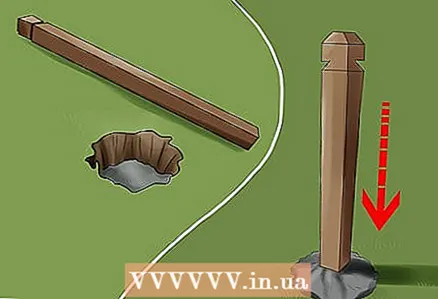 3 If necessary, reinforce and concrete the fence supports. You need to make sure that if you hang the gate, it will not overwhelm the supports. How you will reinforce the supports depends on the size of the fence, but generally speaking, you need to make sure that the supports do not wobble under the weight. If the supports are shaking, the gate will sag. You also need to check that the top and bottom supports are flush.
 - Ideally, a gate with a height of 1.22 m would require 12.7 cm x 12.7 cm pine supports.For a gate with a height of 1.83 m, a support 15.3 cm x 15.3 cm would be required.
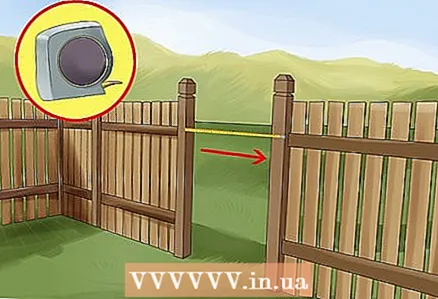 4 Measure the frame. A frame for a regular gate in a wooden fence, it is a regular box with 4 sides. Usually, it is slightly smaller than the gate opening. If you have a 3x5 gate opening, make a 3x4 frame with weather-resistant wood. The frame should be 2-3 cm narrower than the door opening to take into account the hinge clearance and possible expansion of the timber when the door is swinging.
 - Usually, they use the same type of wood that was used for the fence. If you want the color of the gate to be different, then sometimes pine is used for large gates. Whichever breed you choose, buy a little more material to make sure you have enough for the job.
Part 2 of 3: Making the gate
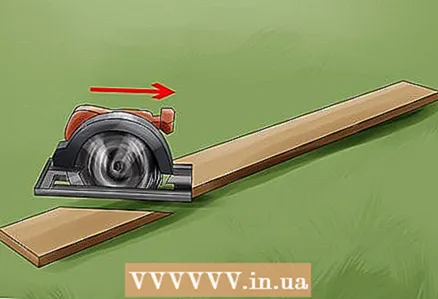 1 Using the sawing machine, cut off pieces of the frame measuring 5.08 x 10.16 cm. Start by cutting the top and side planks to the size you planned. They should be slightly smaller than the opening in the fence. Cut the vertical planks so that they are 7.62 cm less than the height of the gate.
  2 Drill holes in the top and side strips. To prevent the wood from splitting, drill the base holes for the screws before screwing them in. Fasten with screws with a square socket, pre-drill holes for them so as not to split the wood. Measure from the top of the bend to the opposite bottom corner. The distance on both sides must be the same.
 - Usually, when you start assembling a gate frame, it is best to lay it on a flat surface such as a patio or driveway. Attach the top and bottom rails to the side rails and check that the frame is rectangular.
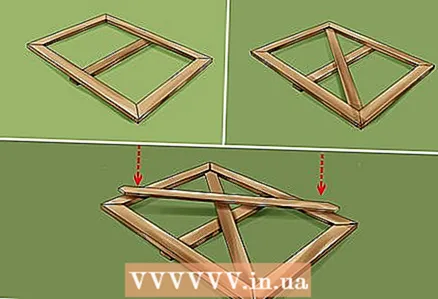 3 Cut off the cross-braces and attach them at an angle to the top and bottom rails. This will help make the gate stronger and more reliable. Attach these spacers to the framing planks that connect to the rest of the fence. As before, drill the holes and secure with the board screws.
 - Use a table saw to cut the tree diagonally. Attach the plank diagonally to the frame and mark with a pencil where you want to cut at an angle.
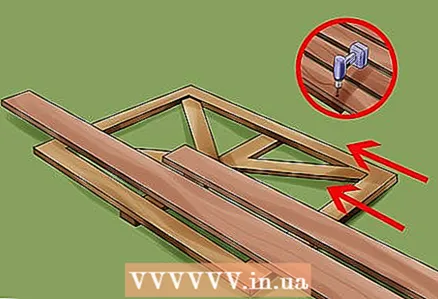 4 Cut and attach the planks. Once you've designed and built the frame, all you need to do is nail the planks straight over the frame to finish making your standard wooden gate. Measure the length of the planks from the top to the bottom of the frame and cut the planks to the appropriate length. Leave a minimum of 8 mm between the planks, taking into account the influence of the weather on the tree.
 - Cut the planks with a table saw and secure with plank screws. To keep the planks clean and tidy, pre-drill holes for the screws.
Part 3 of 3: Finishing the gate
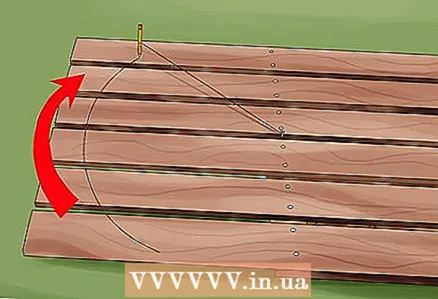 1 Design the appearance of the gate. Many people spend some time trying to design and decorate the gate. They do this with a jigsaw. If you don’t want to, you don’t have to waste time on this, but it’s a great way to give your gate a good look. Usually, popular solutions are beveled collar, printed surname or small decorative markings.
 - First, draw an arch on the top of the gate using a pencil and string. Add decorative curves to your taste. If you are a carpenter, let your imagination run wild. Cut along the line with a jigsaw.
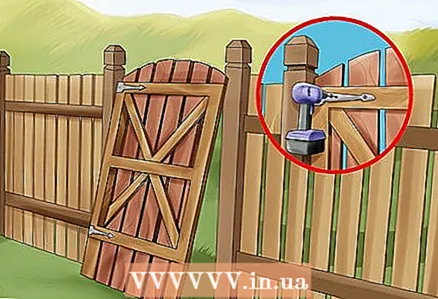 2 Install the hinges and attach the gate to the fence. Attach the gate so that it is 3.75 cm from the bottom plank to the ground. Use a pencil to mark where you want to attach the hinges to the support and lower the gate. Make holes where the screws will go. Support the gate and screw the hinges to the gate, and then attach the hinges to the supports.
 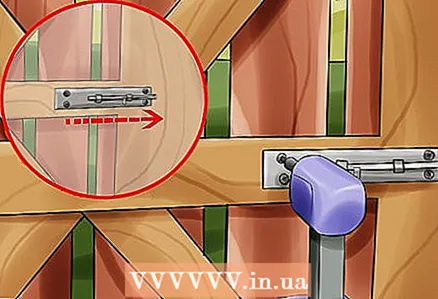 3 Attach the latch. Most handy gates have a latch that you can install after you have hung the gate. Use a pencil to mark where the screws will be screwed in, drill holes and attach the latch. Before finishing the gate, first attach the latch.
 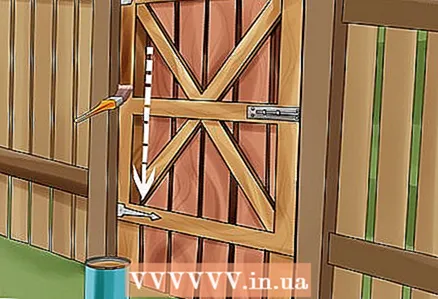 4 Cover the wood with sealant. Try to seal all exposed surfaces with sealant. Apply the sealant with a brush or garden sprayer. Many sellers offer pads, a sponge on a stick, with which you can spread the sealant, if necessary.
 - Try to cover the entire surface evenly. Make sure to cover the edges of the slats, which absorb more moisture than the front of the gate. This part of the gate most often rots and becomes colorless. In dry climates, let the gate dry for a few hours or for a day in humid climates.
 5finished>
Tips
- Put the gate on iron, barn hinges, and they will serve you for years.
- With spring hinges or spring-loaded hinges, the gate is guaranteed to stay closed.
- Seven times measure cut once! Remember, you can always make a piece of wood shorter, but lengthening it if you cut it incorrectly will not work.
- The pine tree is ideal for a nice fence and gate. It is ideally weather resistant and takes on a beautiful shady gray shade over time.
Warnings
- Always wear safety glasses and gloves when working with power tools.
What do you need
- Fence supports
- 5.08 x 10.16 cm, cut to length
- 7.62 cm wood screws per frame
- 5.08 cm fence board screws
- Hinges
- Latch
- A hammer
- Frame or square
- Hand Cross Cut Saw
- Circular or table saw
- Cordless or corded electric drill.


