Content
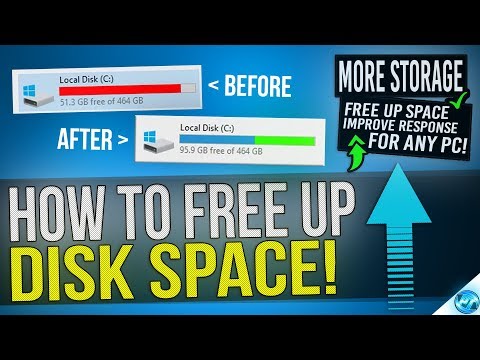
In this article, we will tell you how to free up space on the hard drive of a computer running Windows 7. To do this, you can use the preinstalled disk cleanup program (delete temporary files and other unnecessary items) or simply uninstall unnecessary programs through the control panel.
Steps
Part 1 of 2: Using Disk Cleanup
 1 Open the start menu
  . Click on the colored Windows logo in the lower left corner of the screen.
 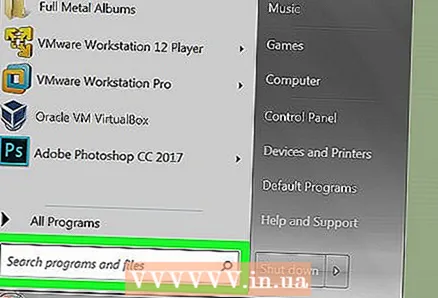 2 Click on the search bar. It's at the bottom of the Start menu.
 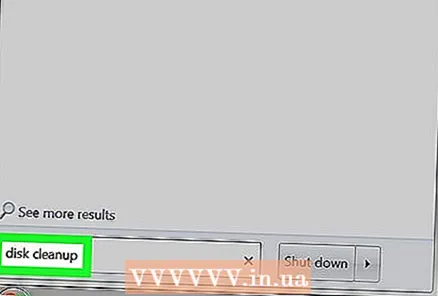 3 Enter disk cleanup. This will search for Disk Cleanup, which is included in all versions of Windows 7. EXPERT TIP
 Try using a third-party program like CC Cleaner to remove junk files, clear cache, and free up hard drive space.

Jeremy Mercer
Computer Repair Technician Jeremy Mercer is a manager and chief technician at MacPro-LA computer repair company in Los Angeles. He has over 10 years of experience in electronics repair, as well as in computer stores (PC and Mac).Jeremy Mercer
Computer repair technician 4 Click on Disk cleanup. It's near the top of the Start menu. The Disk Cleanup window opens.
 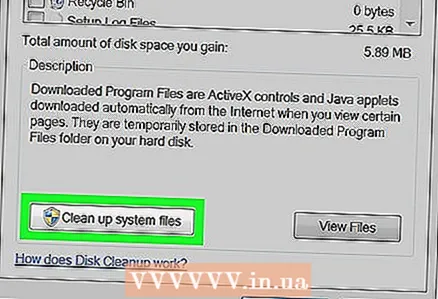 5 Click on Clean up system files. It's in the lower-left corner of the Disk Cleanup window.
 - If you are not logged in as an administrator, you will not be able to clean up the system files. In this case, skip this step and the next.
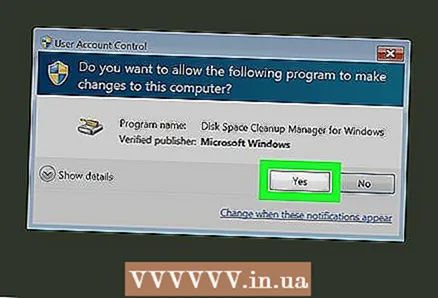 6 Click on Yeswhen prompted. Disk Cleanup will restart with additional options available.
 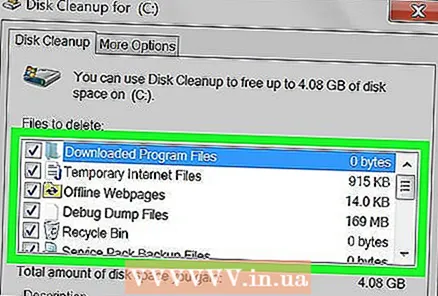 7 Select the items to remove. Check the boxes for each category of files or items that you want to remove; also uncheck the boxes for the items you want to keep. You will see the following categories (there may be more categories):
 - Windows Update - the latest Windows Update files will be deleted (the current update will not be affected).
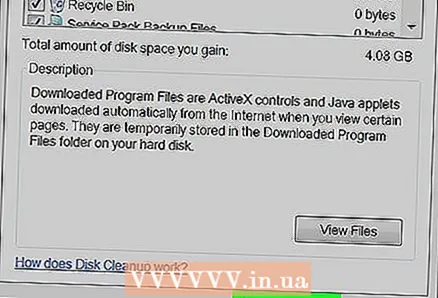
- Downloaded program files - unnecessary program files will be deleted.
- Temporary Internet Files - saved internet files will be deleted.
- System error reporting archives - error reports will be deleted.
- Basket - all files in the trash will be deleted.
- Temporary files - other temporary files created by programs or as a result of using the Internet will be deleted.
- Custom file history - the browsing history will be deleted (for example, search in Windows Explorer).
- All items listed on the menu can be safely deleted, but clearing the Windows Update cache will prevent you from reverting to a previous version of Windows update.
Jeremy Mercer
Computer Repair Technician Jeremy Mercer is a manager and chief technician at MacPro-LA computer repair company in Los Angeles. He has over 10 years of experience in electronics repair, as well as in computer stores (PC and Mac). Jeremy Mercer
Computer repair technicianDelete unnecessary files from the download folder. Open your downloads folder, find unnecessary files in it and delete them. Find and delete files with .mov or .mp4 extensions first, as they take up a lot of space. Send unnecessary files to the Trash and then empty it - otherwise the files will still take up space on your hard drive.
 8 Click on OK. This button is at the bottom of the window.
 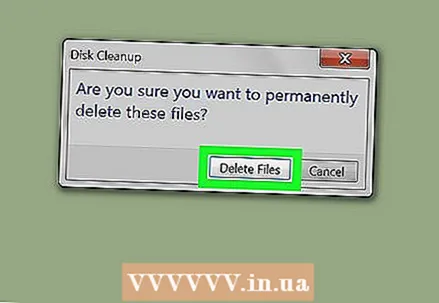 9 Click on Delete fileswhen prompted. Disk Cleanup will begin removing the selected items from your computer's hard drive. When the process is completed, the program window will automatically close.
 - The disk will be cleaned up in a few minutes to an hour.
Part 2 of 2: How to uninstall programs
 1 Open the start menu . Click on the colored Windows logo in the lower left corner of the screen.
 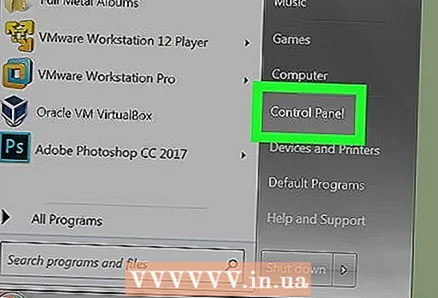 2 Click on Control Panel. It's on the right side of the Start menu. The Control Panel window opens.
 - If there is no Control Panel option in the Start menu, type Control Panel in the search bar at the bottom of the Start menu, and then click Control Panel in the search results.
 3 Open the View menu. You will find it in the upper right corner of the Control Panel window.
 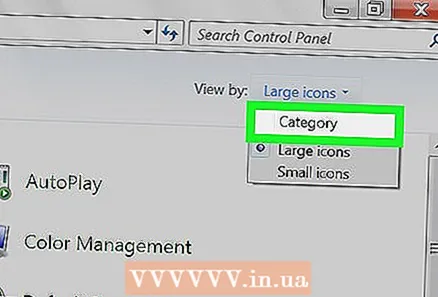 4 Click on Category. This option is on the menu.
 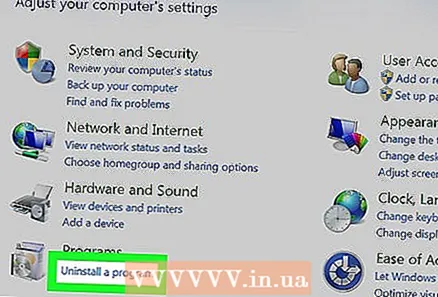 5 Click on Removing a program. It's under the Programs section in the lower-left corner of the window.
 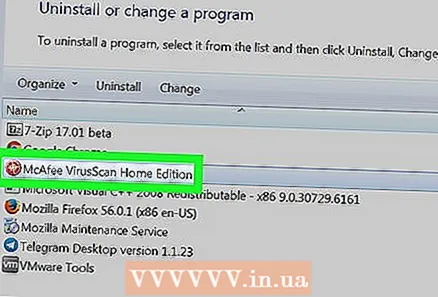 6 Select a program. Scroll down to the unnecessary program and then click on it to select.
 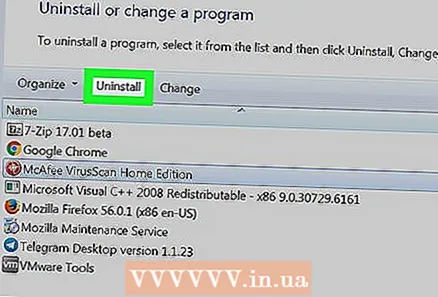 7 Click on Delete. It's at the top of the window.
 - In some cases, you need to click "Change / Remove".
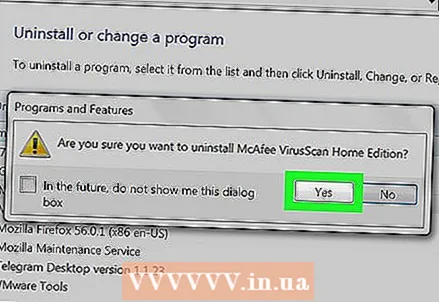 8 Follow the instructions on the screen. Confirm the uninstallation of the program, then follow the instructions on the screen.
 - In some cases, the computer needs to be restarted to completely uninstall the program.
- Some programs will be removed as soon as you click Uninstall.
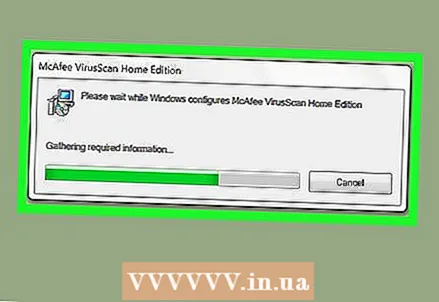 9 Wait while the program is uninstalled. Now uninstall the following program (if needed).
Tips
- To free up space on your hard drive but keep your files, move them to an external hard drive.
Warnings
- Be careful when removing programs from your computer. If the program is marked with the name of your computer manufacturer or Microsoft, do not remove it (unless you know what it is for).


