Author:
Sara Rhodes
Date Of Creation:
9 February 2021
Update Date:
1 July 2024
Content
- Steps
- Part 1 of 3: Using Minehut
- Part 2 of 3: Using Server.Pro
- Part 3 of 3: How to Connect to the Server
In this article, we are going to show you how to create a public Minecraft server on a Windows or macOS computer. Most methods for creating a Minecraft server need to use Minecraft server files and port forwarding, but this is dangerous if you are creating a public server. Therefore, it is better to place the server on free hosting - in this case, outside players who will not know the IP address of your computer will be able to connect to the server.
Steps
Part 1 of 3: Using Minehut
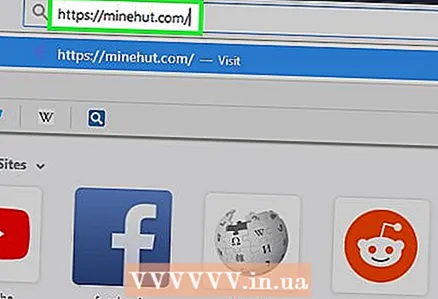 1 Open the Minehut website. Go to https://minehut.com/ in your computer's web browser. Minehut is a Minecraft server that can connect up to 10 players (in case of a free subscription).
 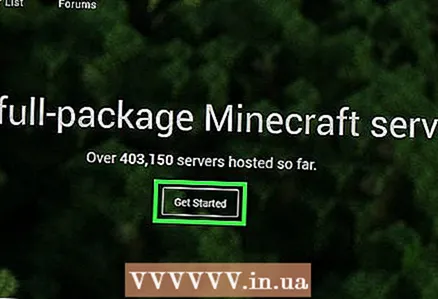 2 Click on Login (To come in). It's in the upper right corner.
 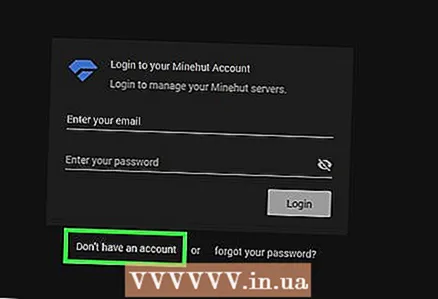 3 Click on Don’t have an account (No account). This link is located below the lines for entering credentials. The account creation form will open.
 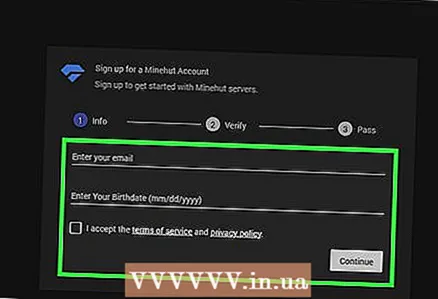 4 Create an account. This is required to host the server.
 - Enter your email address in the "Enter your email" line.
- Check the box next to the option below the line with the email address.
- Click “Continue”.
- Look for the five-digit verification code in the email you received, and then enter the code in the “Enter verification code” line.
- Click “Continue”.
- Enter the password for your account in the "Choose a password" line.
- Click “Continue”.
 5 Enter the server name. Do this on the line in the middle of the page.
 - Server name must not exceed 10 characters.
- The server name must not contain special characters or spaces.
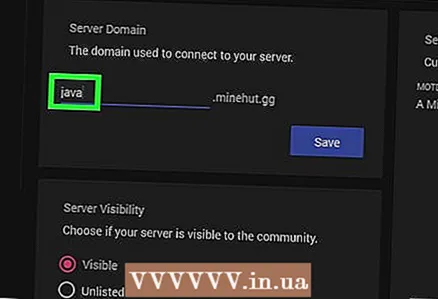 6 Make sure you are using a Java server. In the "Pick a server type" menu, there should be the word "Java". If you see Pocket Edition, open this menu and select Java from it. If you do not see the indicated menu, skip this step.
 - As of June 2018, Minehut does not support Pocket Edition servers and servers for Minecraft Bedrock Edition versions (e.g. Windows 10 or game consoles).
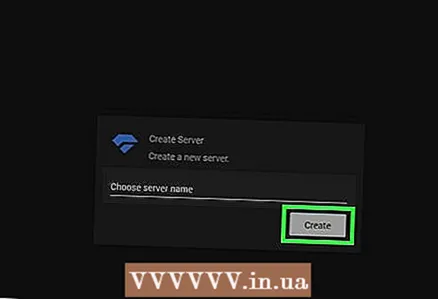 7 Click on Create (Create). This button is located under the line with the server name. The server will be created.
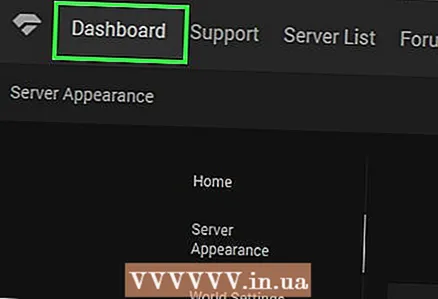
 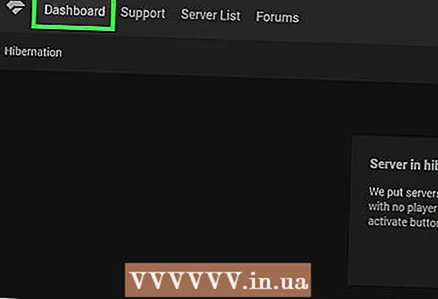 8 Click on the tab Dashboard (Toolbar). It's in the upper-left side of the page. The server toolbar will open.
 - You may instead have to refresh the page by clicking the ⟳ icon in the browser window or by pressing the key F5.
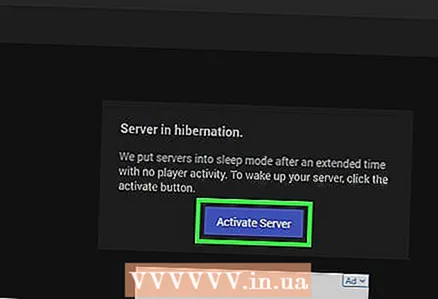 9 Click on Activate (Activate server). This button is in the middle of the page. The server will be activated.
  10 Find out the server address. You will find it on the right side of the page above the "Edit server" button. This address must be entered in the "To address" line in Minecraft.
 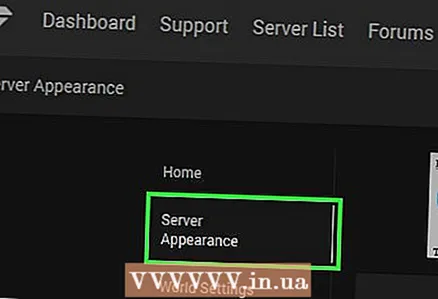 11 Change the server description that players see. To do this, click on “Edit server” on the left of the page, find the “Server MOTD” text box, remove the text from that field, and then enter your description.
 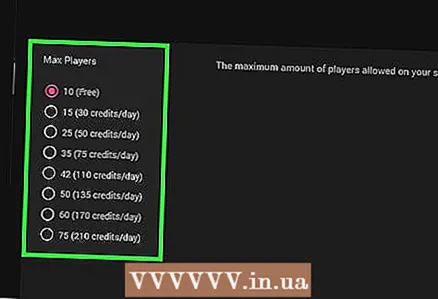 12 Increase the number of players on the server. Up to 10 players can connect to the server for free. To increase this number, buy credits - click "0 credits" in the upper right corner, select a package and enter payment information. Then follow these steps:
 - click on "Edit server";
- click "Max Players";
- choose a number from the menu;
- click “Save”.
 13 Do not close the server panel. In this case, the server will not go to sleep, and you can quickly configure it during the game.
Part 2 of 3: Using Server.Pro
 1 Open the Server.Pro website. Go to https://server.pro/ in your computer's web browser.
 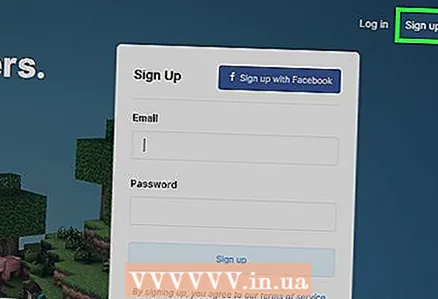 2 Click on Signup (Registration). It's in the top-right corner of the page.
 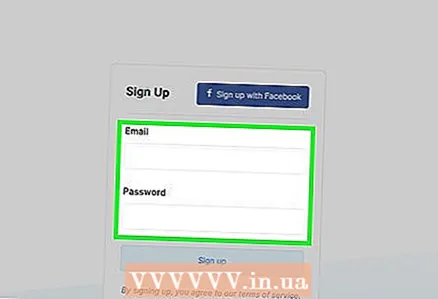 3 Create an account. This is required to host the server.
 - Enter the username in the "Username" line.
- Enter your email address in the "Email" line.
- Enter the password in the “Password” line.
- Click “Signup”.
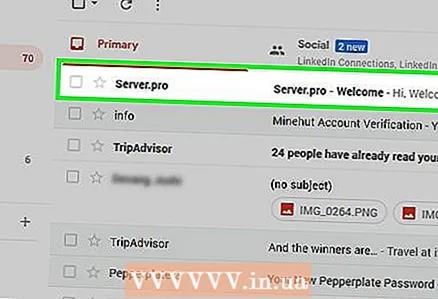 4 Activate your account. For this:
 - Open your mailbox.
- Click on the email with the subject "Server.pro - Welcome". If there is no such letter in your Inbox, look for it in your Spam folder.
- Click “Activate Account” in the middle of the email.
 5 Click on GET YOUR SERVER NOW (Get server). This button is in the middle of the page.
 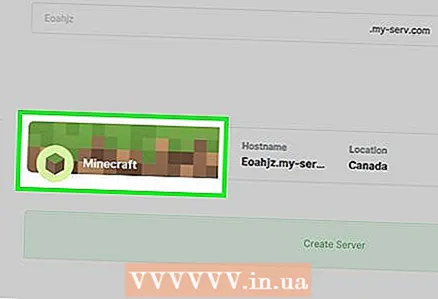 6 Click on Minecraft. You will find this option in the upper left corner of the page.
 - It will not work to host a Minecraft Pocket Edition server on Server.Pro (even if you see the corresponding option).
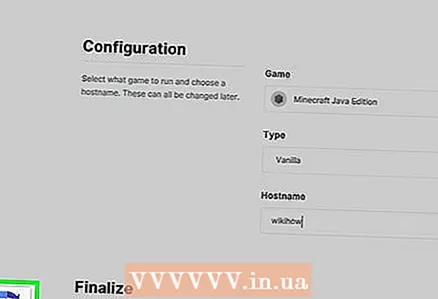
 7 Enter the server name. Do this in the “Choose Hostname” text box at the top of the page.
 - If the name is already taken, enter another one.
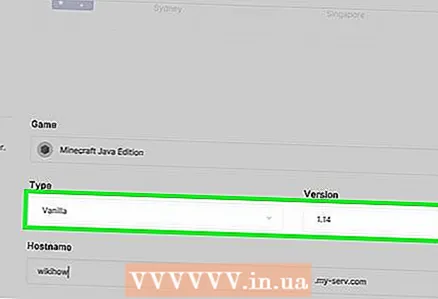 8 Set server parameters. Click on the country you want and then on the left side of the page:
 - Click Vanilla.
- Scroll down and tap "0.5 GB" (0.5 GB).
- Click Hourly.
 9 Scroll down and check the box next to "I'm not a robot." This option is located at the bottom of the page.
 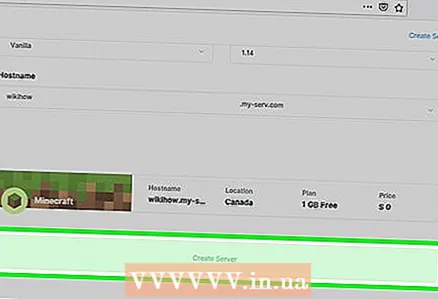 10 Click on Create server (Create server). You will find this option under “I'm not a robot”. The server will be added to the waiting queue.
  11 Wait for the server to become available. Since you created a free server, you will have to wait a few minutes for the server to become available. You now have a minute to confirm that you want to use the server.
 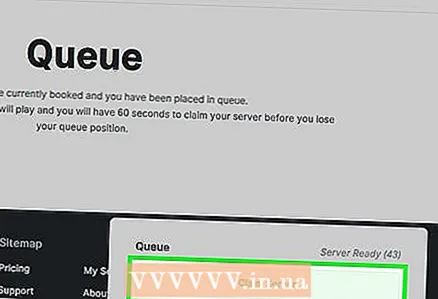 12 Click on Start server (Start the server). This button will appear at the bottom of the page. The server will be created.
 - If you do not press this button within 60 seconds after the beep, the server will be deleted and you will have to recreate it.
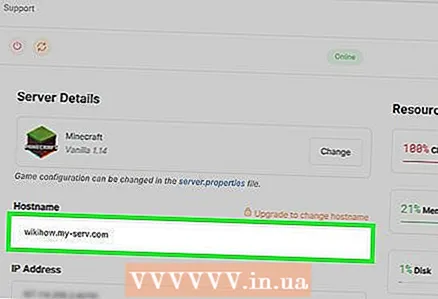 13 Find the server address. It is located on the Hostname line in the upper left corner of the page. This address must be entered in the "To address" line in Minecraft.
 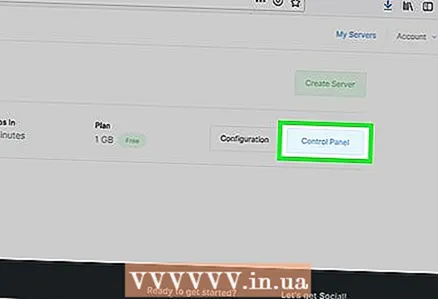 14 Update the server time. It will be removed if not updated within 60 minutes of launch:
 - Click on "Renew time" at the top of the page.
- Check the box next to “I'm not a robot”.
- Click Renew.
- Go back to your server by clicking My Servers> Control Panel.
Part 3 of 3: How to Connect to the Server
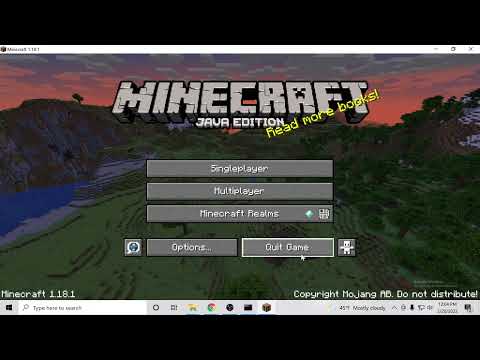
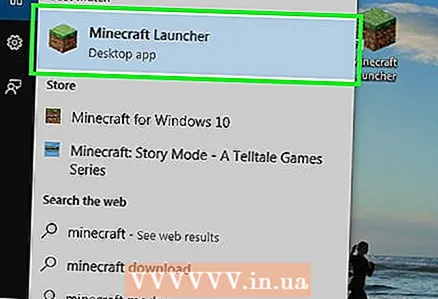 1 Start Minecraft. Double click on the Minecraft icon and then click Play or Play in the launcher window.
 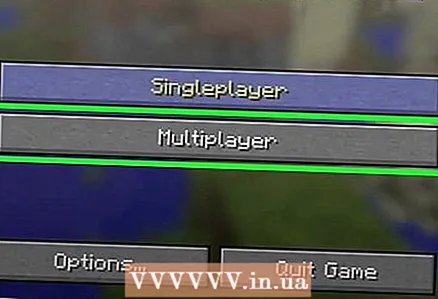 2 Click on Online game. It's in the middle of the page.
 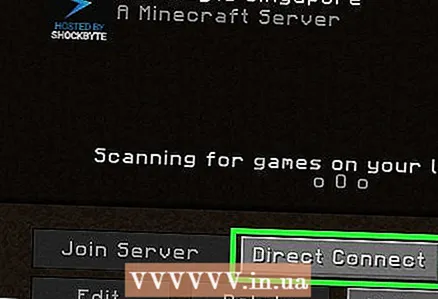 3 Click on By the address. It's in the lower-right side of the page.
 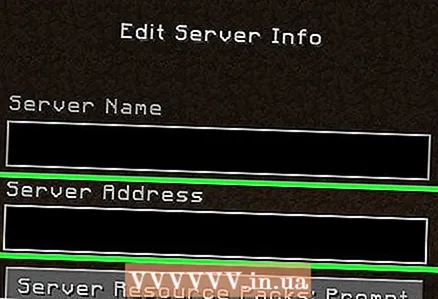 4 Enter the server address. Do this on the line in the middle of the page.
 - If you have a Minehut server, the address is above the button above the Edit server button. If your server is Server.Pro, look for the address in the "Hostname" line.
 5 Click on Connect. This button is at the bottom of the page. You will connect to the server and enter the game world.


