Author:
Eric Farmer
Date Of Creation:
10 March 2021
Update Date:
1 July 2024
Content
- Steps
- Part 1 of 7: Preparing for Installation
- Part 2 of 7: Create a Wii Flash Drive
- Part 3 of 7: Downloading the installation files
- Part 4 of 7: Installing the IOS263 software
- Part 5 of 7: Installing cIOSX Rev20b Software
- Part 6 of 7: Installing USB Loader GX
- Part 7 of 7: Launching Games from a Flash Drive
- Tips
- Warnings
This article will show you how to play a game on a Wii console that is stored on a flash drive. Note that this can be done on the classic Wii, but not on the Wii U. To play from a flash drive, the Wii must have a Homebrew channel, which will void the Wii warranty and violate Nintendo's terms of use. Once you've installed everything you need, copy the game from disc to flash drive, then you can play from the drive instead of the disc.
Steps
Part 1 of 7: Preparing for Installation
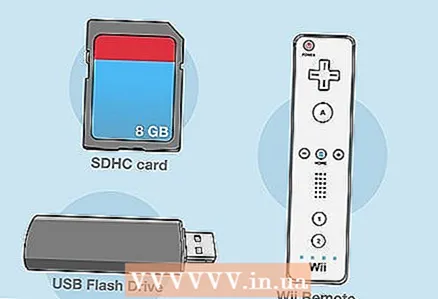 1 Make sure you have everything you need. You will need the following:
 - SDHC card - a card with a capacity of up to 8 GB is required to install Homebrew and perform other tasks.
- Flash drive - the game will be recorded on it.
- Wii Remote - If you have a newer (black) Wii model, you will need a Wii Universal Remote.
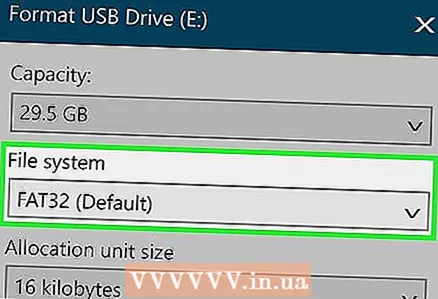 2 Format your flash drive in the FAT32 file system. To do this, in the Format window, select FAT32 (or MS-DOS (FAT) on a Mac) from the File System menu.
 - Keep in mind that formatting a flash drive will erase all files on it, so first back up important data and copy it to your computer or other flash drive.
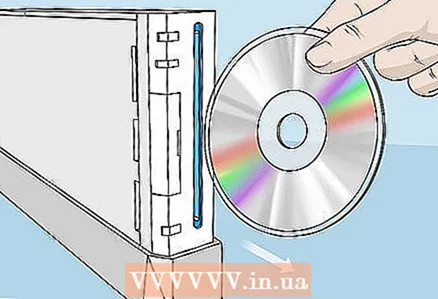 3 Remove the game disc from the Wii (if necessary).
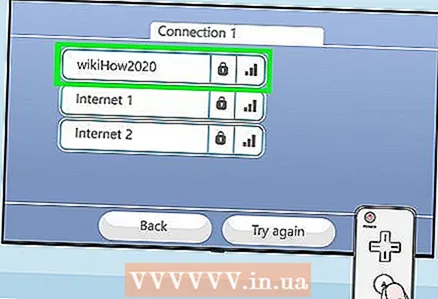 4 Connect the Wii to the Internet. This is necessary to install the required files.
 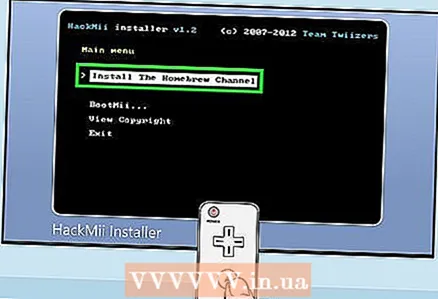 5 Install Homebrew on Wii. This channel allows you to install custom mods, one of which will allow you to play from a flash drive.
 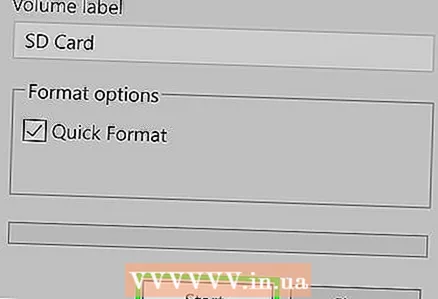 6 Format SD card. When you install Homebrew from your SD card, format it to write the files you want.
 - As with a flash drive, select "FAT32" (or "MS-DOS (FAT)" on a Mac) as the file system.
Part 2 of 7: Create a Wii Flash Drive
 1 Use a Windows computer. Unfortunately, you can't create a Wii flash drive on a Mac. If you don't have access to a Windows computer, try using a school computer or a friend's computer.
 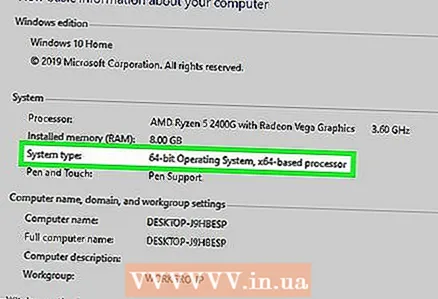 2 Determine the bitness of Windows. You need to find out if Windows is 64-bit or 32-bit in order to download the corresponding file.
 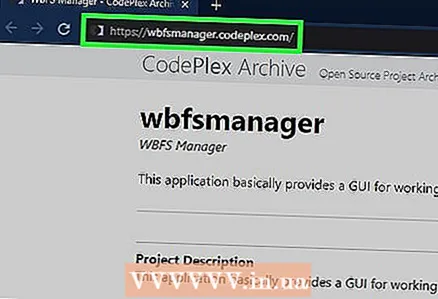 3 Open the WBFS Manager website. Go to https://wbfsmanager.codeplex.com/ in a web browser.
 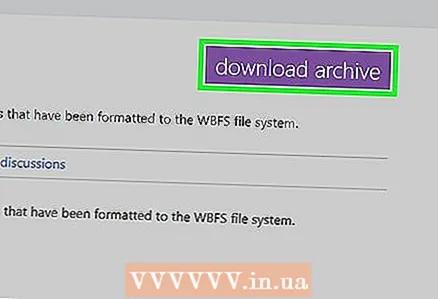 4 Click on DOWNLOADS (Downloads). It's an option at the top of the page.
 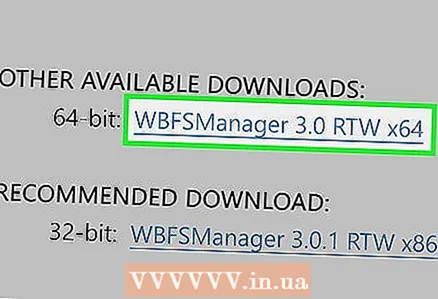 5 Click on the download link. It depends on the bitness of the system:
 - 64-bit - Click on "WBFSManager 3.0 RTW x64" in the "OTHER AVAILABLE DOWNLOADS" section.
- 32-bit - Click "WBFSManager 3.0.1 RTW x86" in the "RECOMMENDED DOWNLOAD" section.
 6 Open the downloaded archive (ZIP file). To do this, double click on it.
 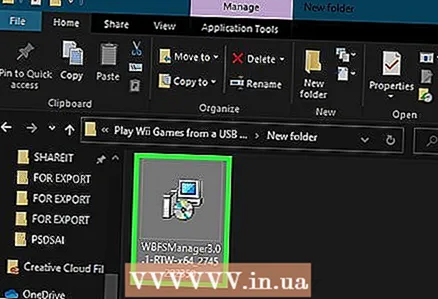 7 Double click on the file setup. You will find it in the open archive. An installer window will open.
 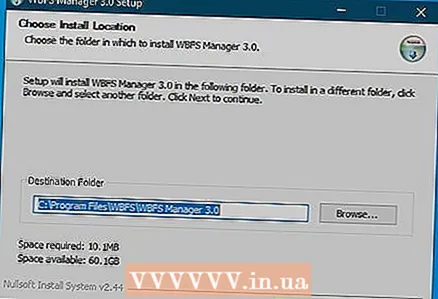 8 Install the program. For this:
 - Check the box next to “I agree” and click “Next”.
- Click Next twice.
- Click Install.
- Uncheck the "Show Readme" box.
- Click Finish.
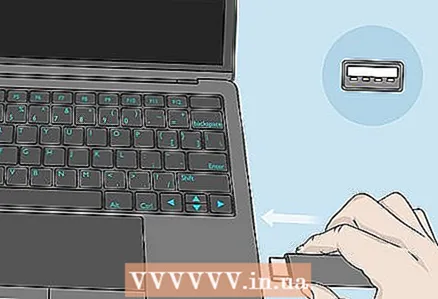 9 Connect your flash drive to a USB port on your computer.
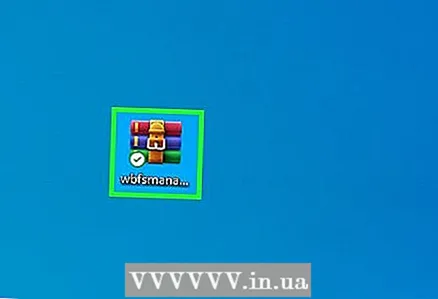
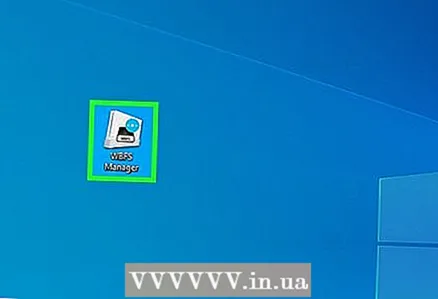 10 Launch WBFS Manager. To do this, double-click on the Wii console icon on a blue background.
 - This icon should be on your computer desktop.
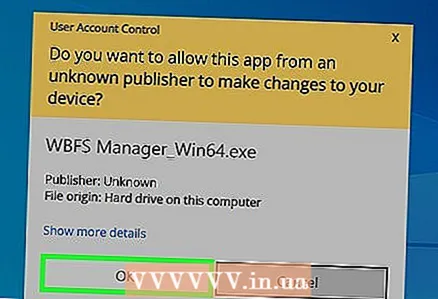 11 Click on OKwhen prompted. The main WBFS Manager window will open.
 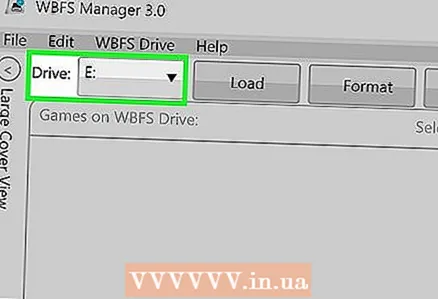 12 Choose your flash drive. Open the "Disk" menu in the upper left corner of the window, and then click on the drive letter (usually "F:").
 - If you don't know the drive letter of your flash drive, open This PC and find it under Devices and Drives.
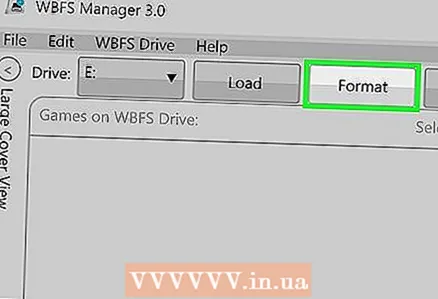 13 Format your flash drive. Click Format at the top of the window, and then click Yes> OK when prompted.
 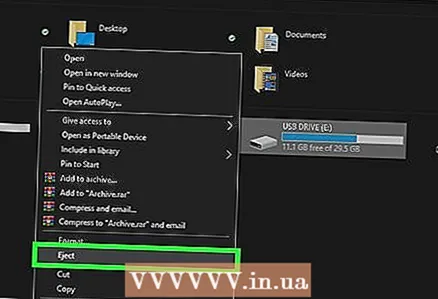 14 Remove the USB stick. Click on the flash drive icon in the lower right corner of the screen, select Eject from the menu and disconnect the drive from your computer.
 - You may need to click on "^" to display the USB flash drive icon.
Part 3 of 7: Downloading the installation files
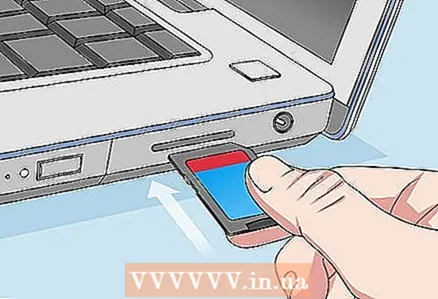 1 Insert the SD card into your computer. Insert it into the SD card slot with the sticker facing up.
 - If your computer doesn't have an SD card slot, buy a USB SD card adapter.
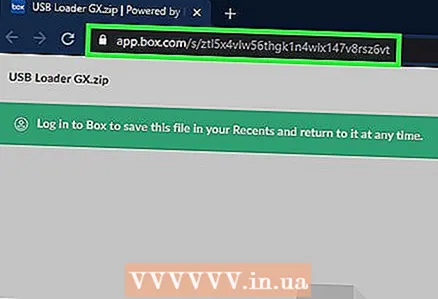 2 Open the site from which you will download the file. Go to https://app.box.com/s/ztl5x4vlw56thgk1n4wlx147v8rsz6vt in a web browser.
 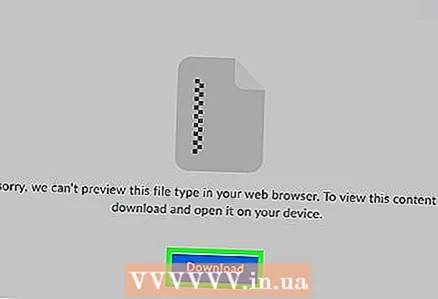 3 Click on Download. It's a blue button in the middle of the page. The archive (ZIP file) will be downloaded to your computer.
 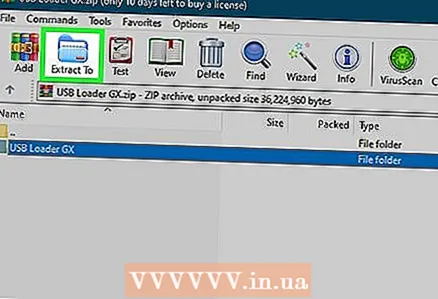 4 Extract the files. On a Windows computer, double-click the archive, click Extract at the top of the window, click Extract All in the toolbar, and then click Extract when prompted. The files will be extracted to a regular folder, which will open when the process finishes.
 - On a Mac, just double-click the zip file to open it.
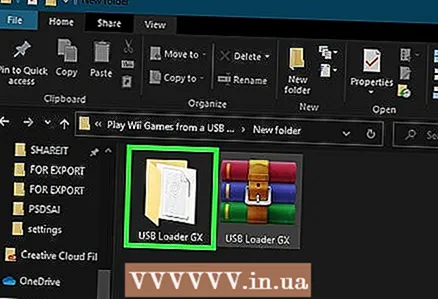 5 Open the folder Files. To do this, double-click the “USB Loader GX” folder and then double-click the “Files” folder.
 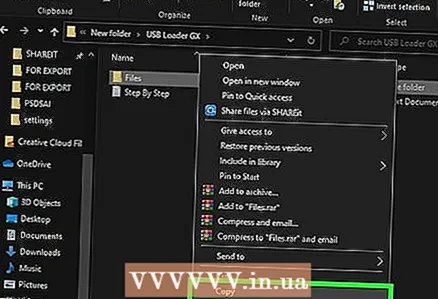 6 Copy the files. Click on any file in the folder, click Ctrl+A (Windows) or ⌘ Command+A (Mac) to select all files, then click Ctrl+C (Windows) or ⌘ Command+C (Mac) to copy files.
 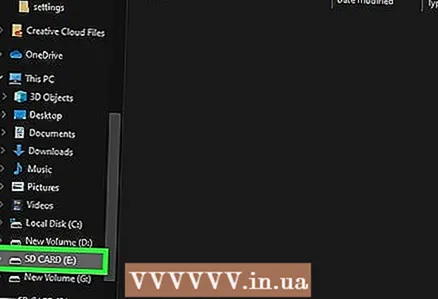 7 Click on the name of your SD card. You will find it in the left pane of the window.
 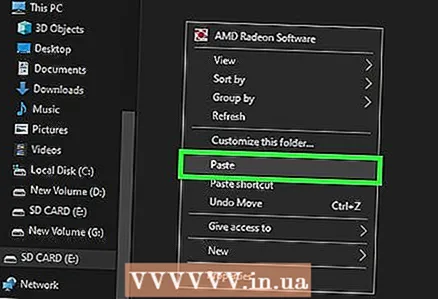 8 Insert files. Click on a blank space in the SD card window and then click Ctrl+V (Windows) or ⌘ Command+V (Mac). The files will be copied to the SD card.
 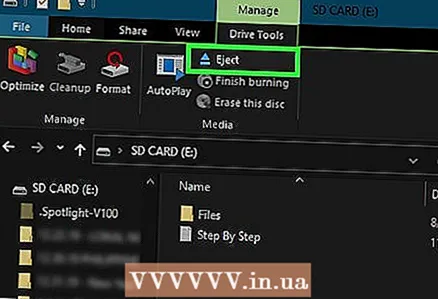 9 Remove the card. Do this when copying is complete:
 - Windows - Click on the "Manage" tab at the top of the SD card window and then click "Eject" in the toolbar.
- Mac - Click on the upward arrow to the right of the SD card name in the left pane.
Part 4 of 7: Installing the IOS263 software
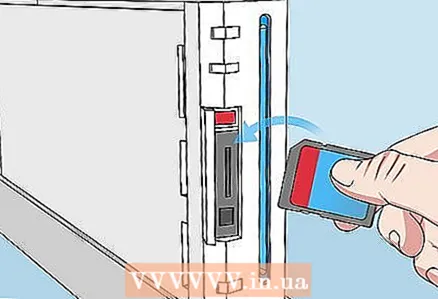 1 Insert SD card into Wii. Insert the card into the slot on the front of the console.
 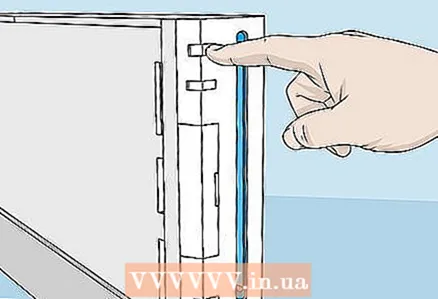 2 Turn on the Wii. Press the power button on the Wii or on the remote control.
 - The Wii Remote must be turned on and synced to the console.
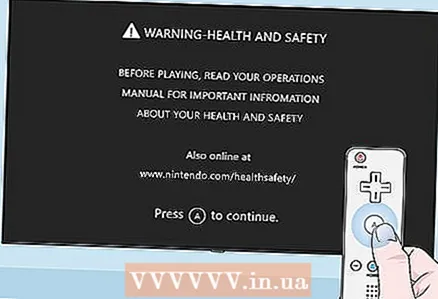 3 Click on Awhen prompted. The main menu will open.
 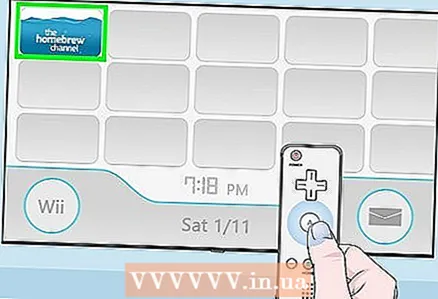 4 Start the Homebrew channel. From the Wii Main Menu, select the homebrew channel and then select Start when prompted.
 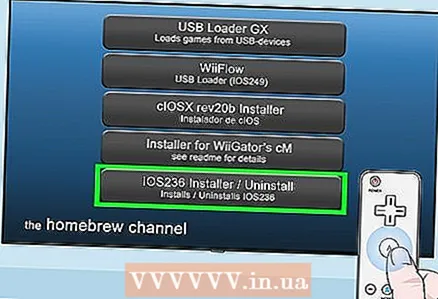 5 Please select IOS263 Installer (Installer IOS263). It's an option in the middle of the menu. A menu will open.
 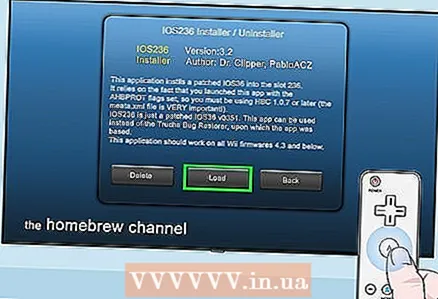 6 Please select Load (Download) when prompted. You will find this option at the bottom and center of the menu.
 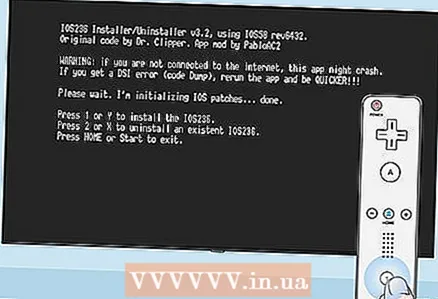 7 Click the button 1. The "Install" option will be selected.
 - If you're using a GameCube controller, press the Y button instead.
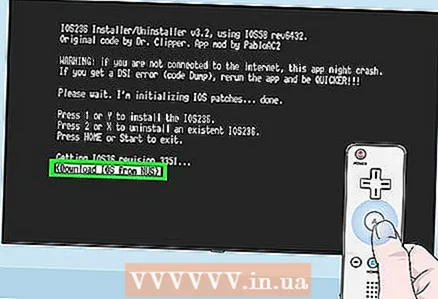 8 Please select Download IOS from NUS> (Download IOS from NUS). It's an option at the bottom of the page.
 - If you don't see this option, highlight the text in brackets at the bottom of the screen and press Right until you find it.
 9 Click on Awhen prompted. IOS263 base will be installed on Wii. This process can take up to 20 minutes.
 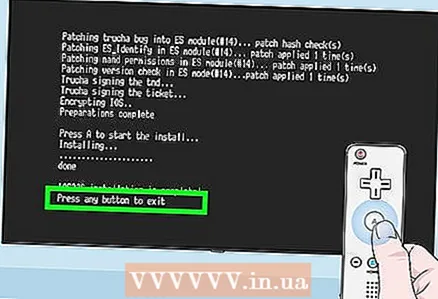 10 Press any button when prompted. You will be taken to the Homebrew menu.
Part 5 of 7: Installing cIOSX Rev20b Software
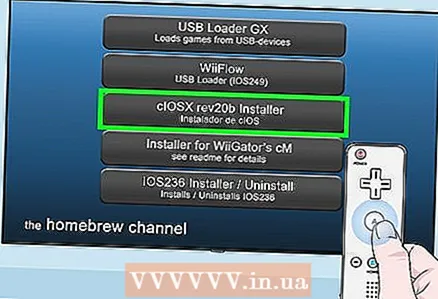 1 Please select cIOSX rev20b Installer (Installer cIOSX rev20b). It's an option in the middle of the Homebrew menu.
 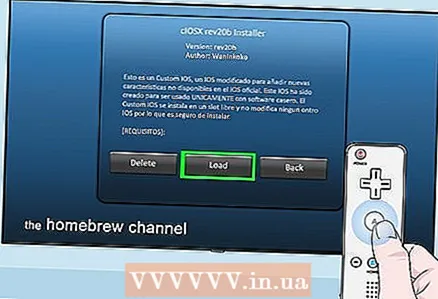 2 Please select Load (Download) when prompted. The installer menu will open.
 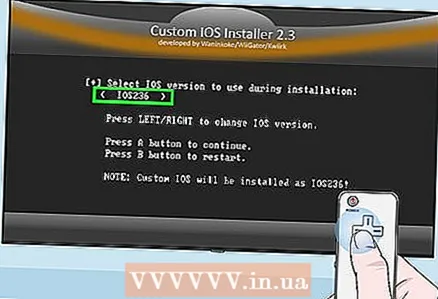 3 Scroll left to the "IOS236" option. The IOS236 file that you installed earlier will be selected.
  4 Click on Ato confirm your choice.
 5 Agree to the terms of use. To do this, press "A" on the controller.
 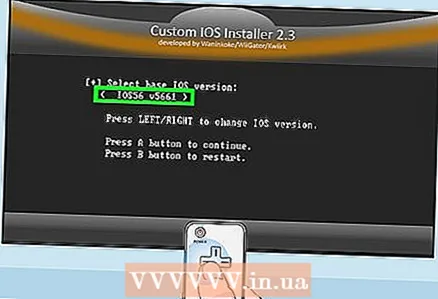 6 Select the IOS version. Press "Left" until you see "IOS56 v5661" in parentheses, and then press "A".
 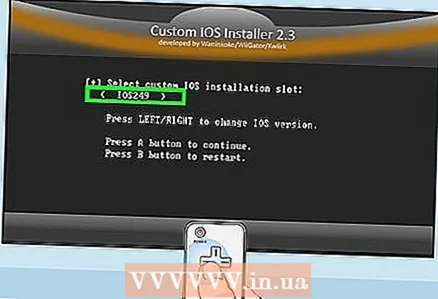 7 Select a custom IOS slot. Press "Left" until you see "IOS249" in parentheses, and then press "A".
 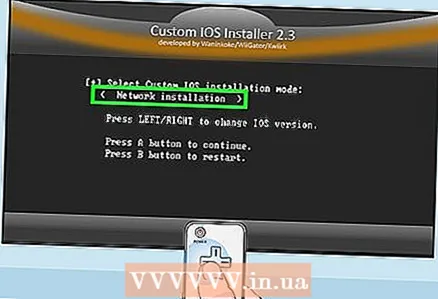 8 Select a network installation. Press "Left" until you see "Network installation" in brackets.
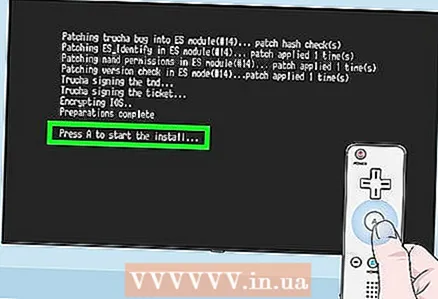
 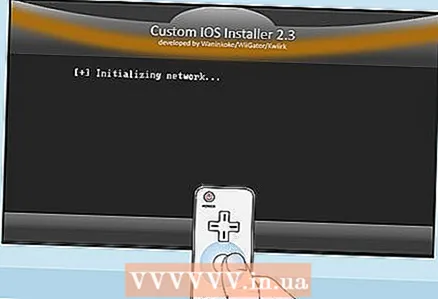 9 Start the installation. To do this, press "A".
  10 Press any button when prompted. You will proceed to the next step of the installation.
 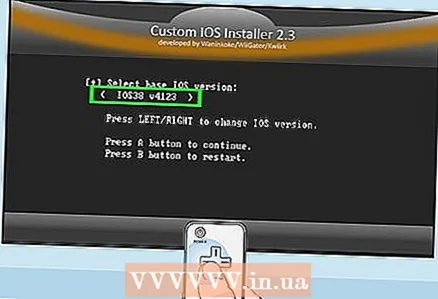 11 Please select a different version of IOS. Press "Left" until you see "IOS38 v4123" in parentheses, and then press "A".
 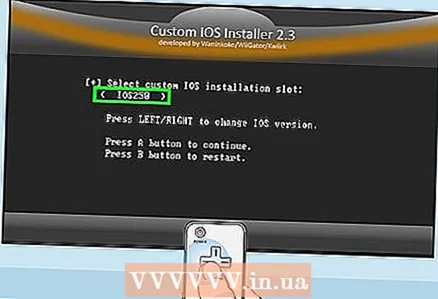 12 Choose a different slot. Press "Left" until you see "IOS250" in parentheses, and then press "A".
 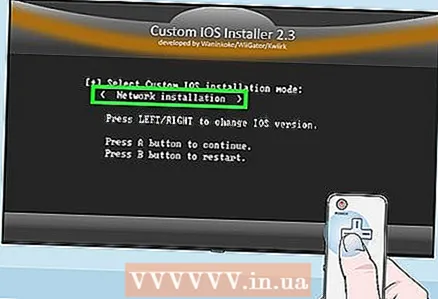 13 Use the network installer. Select "Network installation" and press "A" and then wait for the installation to complete.
 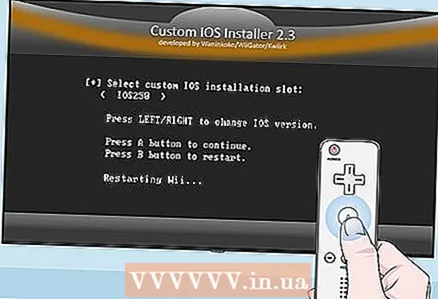 14 Click any button when prompted and then click B. The Wii will reboot.
Part 6 of 7: Installing USB Loader GX
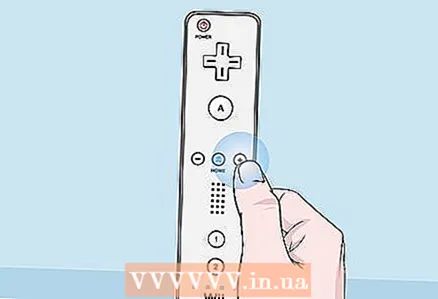 1 Go to the next page. To do this, press the right arrow on the Wii Remote D-Panel.
 - You can also click the "+" button.
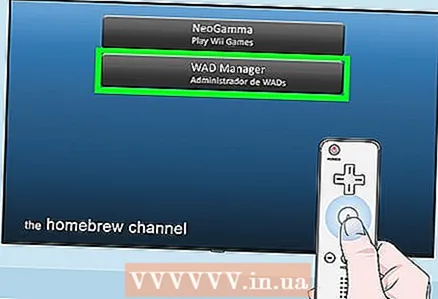 2 Please select WAD Manager (WAD manager). This is the second option on the page.
 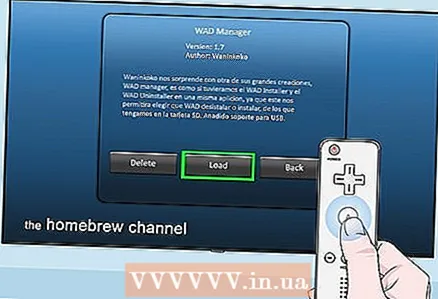 3 Please select Load (Download) when prompted. The WAD Manager installer will launch.
 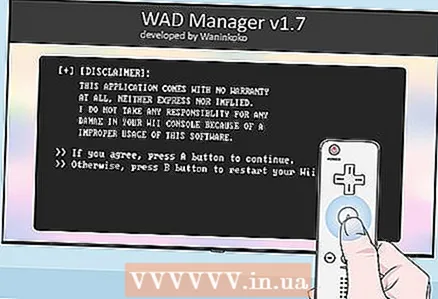 4 Click on Ato accept the terms of use.
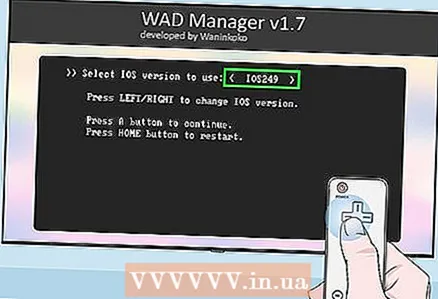 5 Select "IOS249" to download. Press "Left" until you see "IOS249" in parentheses, and then press "A".
 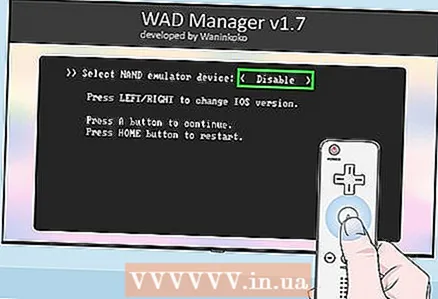 6 Disable the emulator. Select "Disable" in brackets and press "A".
 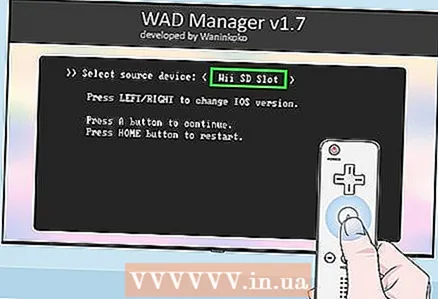 7 Select your SD card. Select "Wii SD Slot" in parentheses and then press "A". A list of files on the inserted SD card will open.
 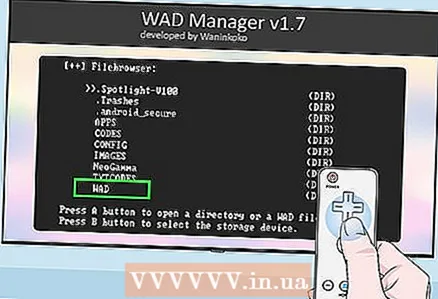 8 Scroll down and select WAD. It's an option at the bottom of the screen.
 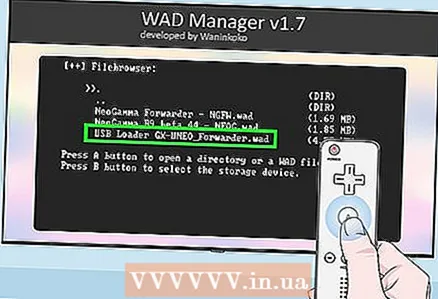 9 Select USB Loader GX. Scroll down to select “USB Loader GX-UNEO_Forwarder.wad” and then press “A”.
  10 Install WAD Manager. Press "A" when prompted.
 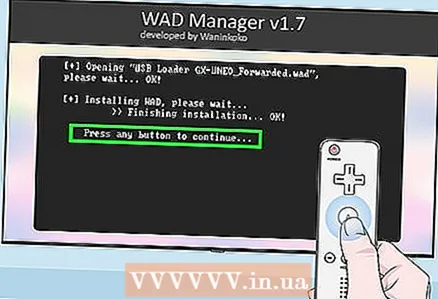 11 Press any button when prompted, and then press the Home ⌂ button. The Wii will reboot and you will be taken back to the second page of the Homebrew Channel.
Part 7 of 7: Launching Games from a Flash Drive
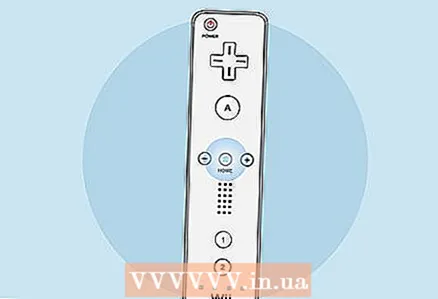 1 Press the Home button again. You will find it on the Wii Remote. The main menu will open.
 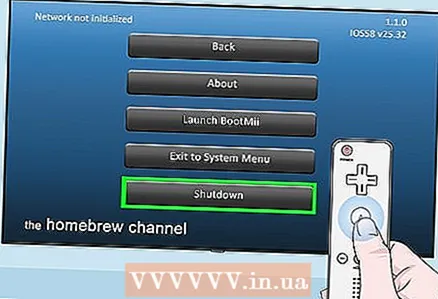 2 Please select Shutdown (Switch off). It's an option at the bottom of the menu. The Wii will turn off.
 - Wait for the Wii to turn off completely.
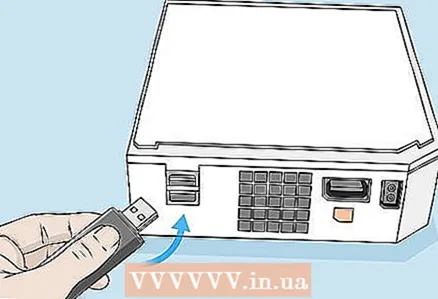 3 Insert the flash drive into the USB port on the back of the Wii.
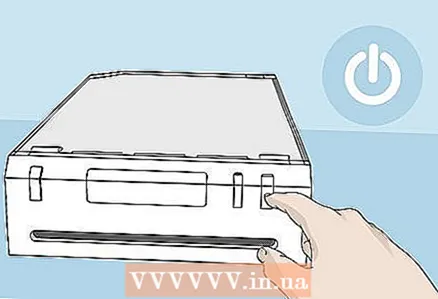 4 Turn on the Wii. To do this, press the power button.
 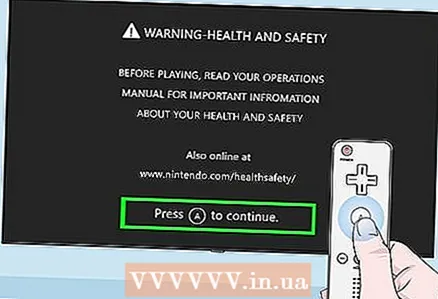 5 Click on Awhen prompted. The Wii Main Menu will open and look for the “USB Loader GX” option (to the right of the Homebrew channel).
 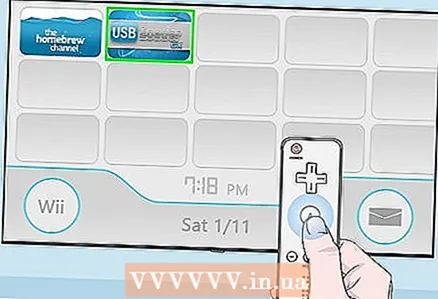 6 Please select USB Loader GX. It's an option on the right side of the page.
 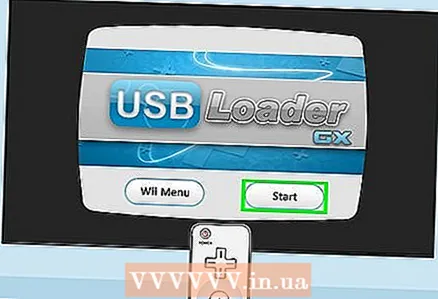 7 Please select Start (Running). USB Loader GX starts up.
 - This process can take several minutes, especially when you start the program for the first time.
- If the message “Waiting for your slow USB” appears, try plugging the flash drive into a different USB port on the back of the Wii.
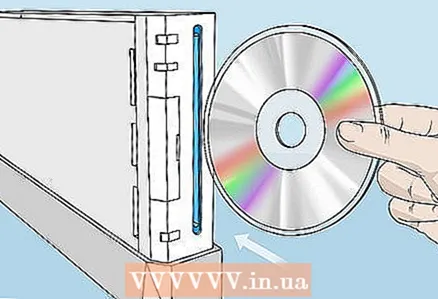 8 Insert the disc containing the game you want to copy to the flash drive into the Wii.
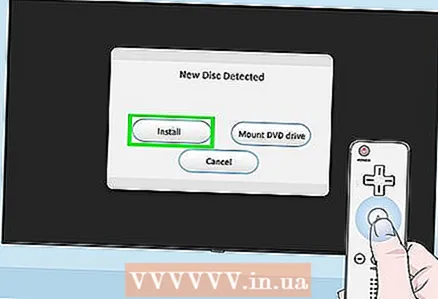 9 Please select Install (Install) when prompted. Reading the contents of the disc will begin.
 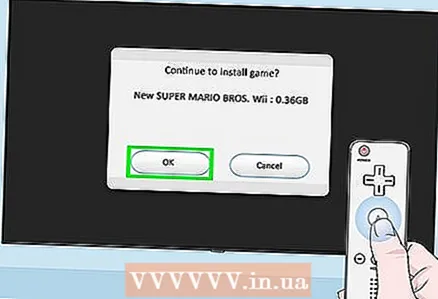 10 Please select OKwhen prompted. Copying the game from the disc to the flash drive will begin.
 - This process will take quite a long time, and the progress indicator may freeze for a while. Do not remove the flash drive or reboot the Wii while copying.
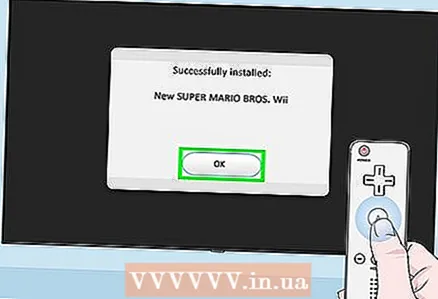 11 Please select OKwhen prompted. The recording process will be completed.
 - The game disc can now be ejected from the Wii.
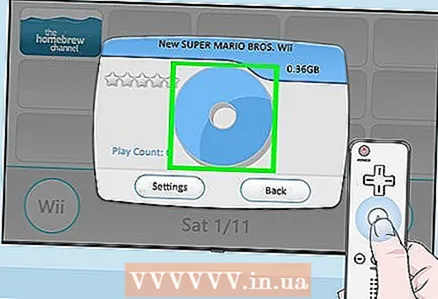 12 Start the game. Click on the name of the game, and then click on the spinning disk icon in the middle of the window.
Tips
- You can use an external hard drive instead of a flash drive.
- A single Wii game is typically around 2 gigabytes in size, so buy a flash drive with sufficient capacity.
- When you are on the main page of USB Loader GX, press the "1" button to update the cover of each game on the flash drive.
Warnings
- Do not turn off the Wii while installing the software mentioned in this article.
- Copying games as described is against Nintendo's terms of use and laws in general.


