Author:
Janice Evans
Date Of Creation:
3 July 2021
Update Date:
1 July 2024

Content
- Method 2 of 3: Hold the pen with four fingers
- Method 3 of 3: Work on the correct grip on the handle
- Tips
- What do you need
- Adjust the handle with your free hand if necessary. If you are just starting to learn to write, you can use this little trick.
- Holding the pen with three fingers is the best option. This method is simple and suitable for any pen.
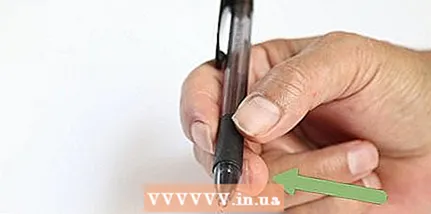
 2 Do not squeeze the handle tightly and keep it about ⅓ the length of the handle from the tip. Regardless of which hand you hold the pen, squeeze it between your thumb and forefinger. Keep your fingers level on both sides of the pen body. Squeeze the handle lightly, but firmly enough. If you squeeze it too hard, your fingers will get tired and sore pretty soon.
 - Find a comfortable handle position. It is not necessary to rest your fingers on the handle, stepping back from the tip exactly ⅓ the length of the handle.
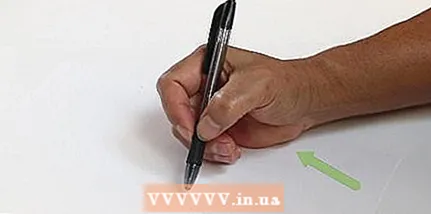
 3 Place your middle finger under the handle. Make the handle rest on your middle finger. The middle finger will be the third finger holding the pen, but it will only touch the top of the pen. The ring finger and pinky finger should be under the middle finger and not touching the handle.
 - The middle finger should grip the handle more loosely than the index and thumb. Its task is to hold the handle in a firm position.
- Make sure the top of the handle rests on the wrist at the base of your index finger and thumb. It is best to hold the handle at an angle rather than vertical.
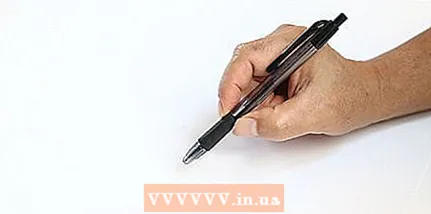
 4 Place your hand on the table with the side of your hand. Put your hand down as if you are about to write something. Place your hand on the table with an edge just above your wrist. The ring and pinky fingers should also be on the paper. Find a comfortable hand position.
 - The pen should be angled so that the tip runs freely on the paper.
- Your wrist may lift slightly as you move the pen over the paper. Don't raise it too high. This can cause tension in the arm.
- If your hand comes off the paper high, you may be gripping the pen too tightly.
Method 2 of 3: Hold the pen with four fingers
 1 Pinch the handle with your thumb and forefinger. This way of holding the handle is similar to the previous one. The handle should rest on the outside of the hand between the thumb and forefinger. First, grasp the pen with two fingers.
 - The four-finger grip on the pen is less common than the three-finger grip on the pen, but if you find it more comfortable, use it.
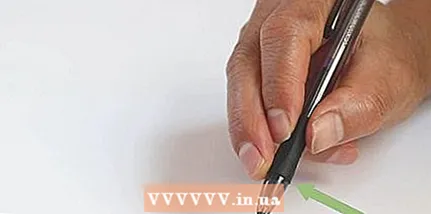 2 Hold the pen with your middle finger about ⅓ from the tip. Take the pen with your thumb and forefinger near the tip. Lower your middle finger below these fingers, resting it directly on the body of the pen. Like the other two fingers, the middle finger helps to hold the pen. Hold the handle firmly, squeezing evenly with all three fingers.
 - You can slightly adjust the position of your fingers so that it is more comfortable for you to hold the pen. All three fingers should be light but firm enough to grip the handle.
 3 Place your ring finger under the handle. The ring finger should be right below the middle one. Grip the handle with the top of your ring finger. Do not press your finger too hard against the handle.
 - If the brush looks like a pincer, then you have gripped the handle too much. All you need to do is bend your fingers slightly to hold the handle with confidence.
- If you find it uncomfortable to bend your fingers, keep the pen close to the tip.
- 4 Place the brush with the base of your palm flat on the surface. Fold your little finger under your ring finger and place your hand on a piece of paper. Lean on the base of your palm and little finger as your hand moves across the surface. The pen should be angled so that only the tip of the refill touches the paper.
- If the hand comes off the table high, loosen your grip.
- Do not position the handle vertically. Keep it at a slight angle. This will avoid the feeling of tension in your fingers.
Method 3 of 3: Work on the correct grip on the handle
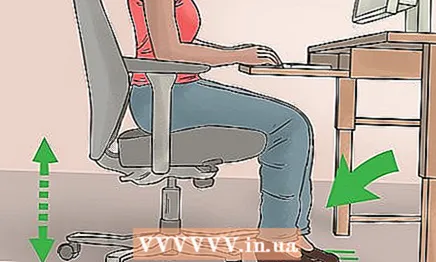 1 Sit up straight with your feet flat on the floor. Correct body position is important not only for maintaining posture, but also in order to prevent harm to health. When you write, it is better to sit in a hard-backed chair than a soft chair. Place your feet flat on the floor. Sit so that you can clearly see the sheet of paper in front of you, but at the same time do not hang over the table with your whole body. If you sit with an uneven back, it can be difficult to hold the handle correctly, so always try to straighten your back.
 - When you write, you should feel comfortable. Also, your hands should move freely on the paper.
- If you sit with an uneven back, after a while you may feel stiffness in the muscles. It can also cause quick hand fatigue.
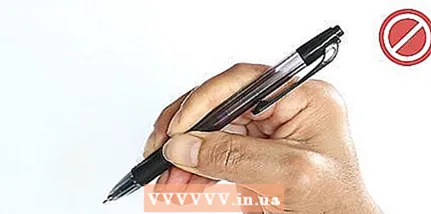 2 Do not squeeze the handle tightly to avoid tension in your fingers. When you pick up the pen, you may want to squeeze it harder with your fingers. This can lead to seizures. You don't need to press with your fingers so hard that even your knuckles turn white. Place your fingers close to the tip of the pen, squeezing it lightly but firmly.
 - If your hand looks like a pincer or is clenched into a fist, chances are you squeezed too hard on the handle. Straighten your fingers so that the handle rests on the wrist.
- To learn how to hold a pen correctly, place a small object, such as a napkin, rubber ball, or coin, into the bent brush. When there is an object in the writing hand, it will not be gripped as tightly.
- 3 Move the pen across the sheet of paper, moving your entire hand and using your shoulder. Most people write with only their fingers. They strain their hand a lot and only move the handle with their fingers. In fact, you need to relax your fingers and work more actively with your arm and shoulder. Over time, you will feel that you grip the handle much more loosely.
- This method helps to engage in the work of the forearm, which is larger and more resilient than the muscles on the fingers.
- At first, it will be uncomfortable for you to write actively using your arm and shoulder, especially if you are used to using only your fingers.
- 4 Practice writing in the air to develop hand mobility. You don't have to waste paper to write invisible words in the air. Grasp the handle in a comfortable way and raise your hand in the air. Move your hand as if you were writing text. Since you are not constrained by the surface of the table and paper, it will be easier for you to release the grip and move the pen.
- This is a great way to learn how to actively use your arm and shoulder and relax your fingers.
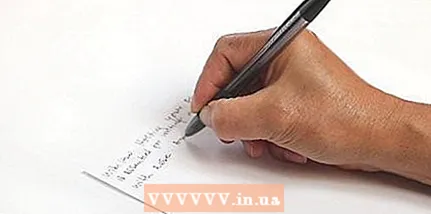 5 Practice writing words on paper. Place the piece of paper on a flat surface such as a table. Grab a pen in a comfortable way and start writing words. Write whatever comes to mind. Try writing entire paragraphs, going from one side of the page to the other with a pen.
 - Start writing slowly. As you get used to the process, you can gradually increase your writing speed.
- Also, writing practice will help make your handwriting more accurate. Repetition is the mother of learning!
Tips
- Perhaps you can find another way to hold the pen. If you find it convenient, use it.
- Do not squeeze the handle too hard with your fingers. If you feel tension in your fingers, try changing their position until you find a comfortable grip.
- Ballpoint pens are more difficult to write with than fountain pens. Typically, you need to squeeze them tighter and hold them more upright, while pushing hard on the paper.
- Pencils and other writing utensils need to be held in the same way as pens, so they can also be used to hone a skill.
What do you need
- Pen
- Paper
- Table


