
Content
WikiHow today teaches you how to fix a malfunctioning flash drive. For software or driver (driver) problems, you can scan and fix your flash drive with the built-in repair utility of your computer. If the USB does not work because of improper formatting or data corruption, you can reset the drive, but remember that reinstalling the USB drive will erase all of the files inside it. Finally, if the flash drive still does not work due to hardware damage, you should bring the USB to a professional repair center or data recovery service; If that's not possible, you can still fix it yourself by solder a broken USB circuit to the end of an active USB cable. However, Self-repair attempts are not recommended as it is very likely that you will destroy the flash drive.
Steps
Method 1 of 3: Scan and fix
Windows operating system

. Click the Windows logo in the lower left corner, below the screen.
File Explorer is in the top left corner of the Start window.
. Click the Windows logo in the lower left corner, below the screen.
File Explorer in the left corner of the Start window.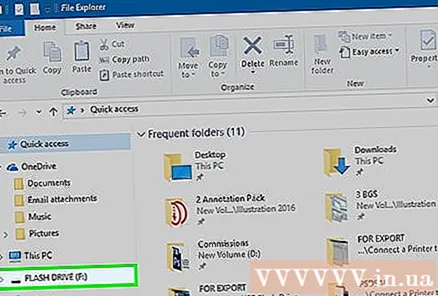
Click your flash drive's icon. The USB flash drive will appear in the options column on the left side of the File Explorer window. The drive will open.- You may need to click > lying next to This PC before, the new drive will appear.
Click the card Manage (Manage) is located in the top left of the File Explorer window.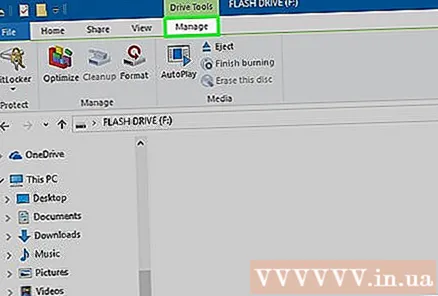
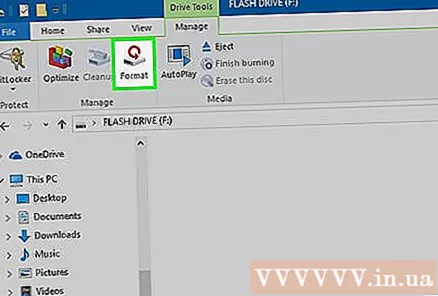
Click Format (Format) to open the Format window.
Click the "File System" box below the "File System" heading near the top of the page. You will see a drop-down menu with the following options:
- NTFS Default Windows operating system format. This format only works on Windows operating systems.
- FAT32 - Most widely compatible format. Works on Windows and Mac operating systems, but has a storage limit of 32 GB.
- exFAT (Recommended) - Works on Windows and Mac operating systems, with no storage limit.
Click a format option. Choose exFat for the highest compatibility, or choose NTFS if you are creating a Windows-only backup drive.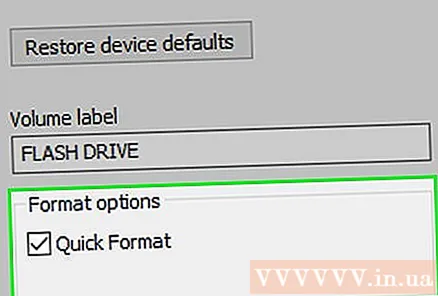
- If you have formatted the drive before and think it is not damaged, check the box Quick Format.
Click Start, then choose OK. Windows will begin to reformat the flash drive.
Click OK when prompted. The USB has been formatted finished. advertisement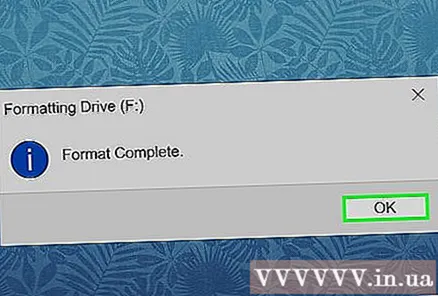
Mac operating system
USB connection to the computer. Plug the flash drive into one of the computer's USB ports.
- Some Macs do not have USB ports, so you may need to purchase an adapter.
Click the menu Go is located above the left side of the menu bar.
- If you don't see the menu GoFirst, click on the Finder icon that looks like a blue face in the Dock.
Click on the action Utilities is in the drop-down menu Go.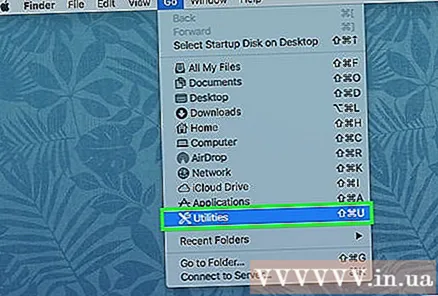
Double-click the option Disk Utility in the middle of the Utilities page.
Click on your flash drive's name. The USB flash drive will appear on the left side of the Disk Utility window.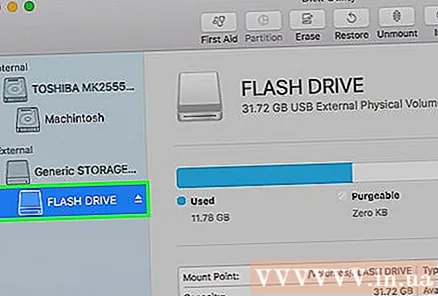
Click the card Erase (Delete) is at the top of the Disk Utility window.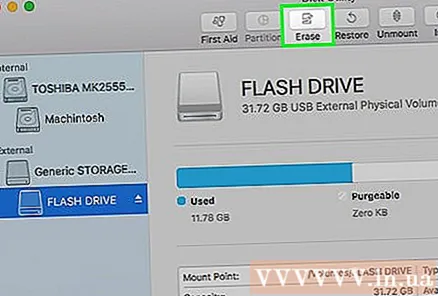
Click the "Format" box in the middle of the page. You will see a drop-down menu with the following options: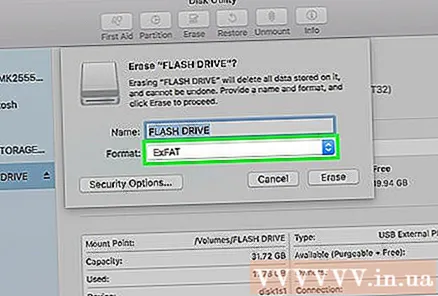
- Mac OS Extended (Journaled) The default Mac format. Only works on Mac operating systems.
- Mac OS Extended (Journaled, Encrypted) Transcoding version of the default Mac format.
- Mac OS Extended (Case-sensitive, Journaled) - The Mac version of the default format, which handles files with the same name differently in different circumstances (eg "file.txt" and "File.txt").
- Mac OS Extended (Case-sensitive, Journaled, Encrypted) Format combination of the above three format options.
- MS-DOS (FAT) Works on both Windows and Mac computers, but has a file size limit of just 4 GB.
- ExFAT (Recommended) - Works on both Windows and Mac computers. Unlimited storage capacity.
Click a format option. Choose MS-DOS (FAT) good ExFat for optimal compatibility.
Click Erase, click next Erase when prompted. Formatting will begin. Once done, you should see the flash drive's icon appear on your Mac desktop. advertisement
Method 3 of 3: Repair damaged hardware
Understand that the USB hardware repair is not doing very well. Unless you have professional experience in repairing damaged flash drive hardware.
- If the external flash drive is damaged, your best option is to have your USB repaired with a professional repair service.
- Data recovery service prices can range from 200,000 VND to several million VND depending on the severity of the damage to the drive and the type of recovery required.
Look for particles or foreign objects in the USB's mouth. The flash drive may not be able to connect to the computer because of an easy-to-remove blockage. If you see a foreign object in the USB mouth, gently remove it with a cotton swab or cotton swab.
Try connecting the USB to a different port or computer. Maybe the problem is with the USB port not working.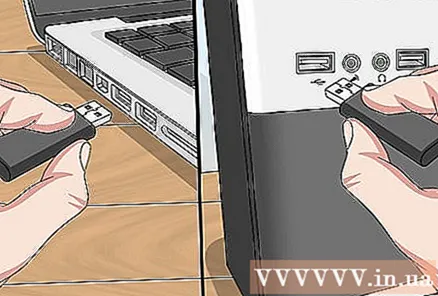
Prepare the repair tool to weld the broken joint. If you are willing to risk the data inside, you need:
- A cargo mine with solders and melting agents
- Old USB cable
- Metal cutting tools / pliers
- Small screwdriver to flat head
- Magnifying glass or jeweler's glasses
Use a flat head screwdriver to remove the USB cover.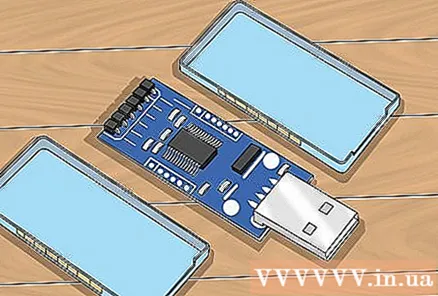
Use a magnifying glass to examine the circuit board (printed circuit board) and soldering plates. If the printed circuit board (green circuit board) is damaged or the solder is lifted, you may need to have the USB serviced.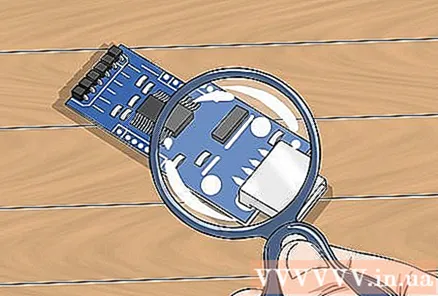
- Solder pads are 4 short solder pieces that connect the prongs of the USB connector to the copper wires in the circuit board. If the connector is broken without damaging the printed board or solder, continue to the next step.
Place the USB on a hard surface so that the connector mouth is facing you and the solder is facing up.
Use the pliers to cut the end of the USB connection cable. Before cutting the end of the USB cable, make sure the end of the cable is an adapter.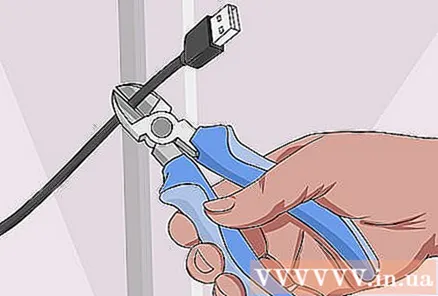
Cut off a piece of sheath at the end of the wire section of the cable end. Try to expose about 0.6 cm of the four ends of the power cord that connect to the USB cable inside the cable.
Solder each end of the wire to the four USB solder pieces. Try to be meticulous at this stage because if you fix the improper splice, the flash drive will not work.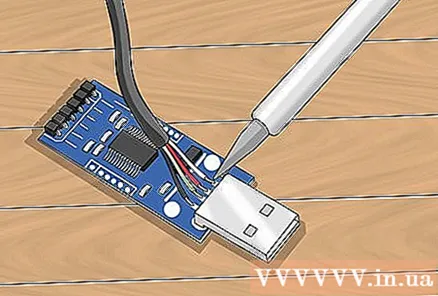
Plug the end of the USB cable into the computer. The end of the USB cable should fit into one of the rectangular ports on the computer chassis.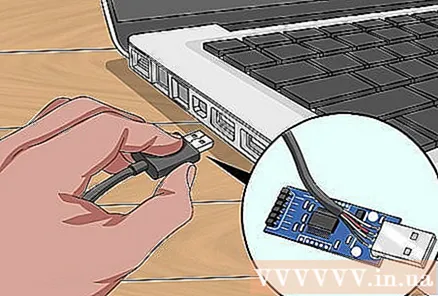
Open your flash drive (if possible). If the USB is recognized by the computer, open the drive and move the files inside to the computer as quickly as possible:
- On Windows operating systems - Open Start, click the icon File ExplorerClick on the drive icon.
- On Mac operating systems - Open Finder then click the drive icon.
- If the flash drive cannot connect to the computer, try bringing the USB to some information technology center to have experts transfer the internal data for you.
Advice
- If you choose to use the services of professional data recovery companies, you must use your best ability to describe the problem to ensure they have the tools and experience to fix it.
- USB is quite cheap and widely available. If the data on the flash drive doesn't matter, just buy a new USB flash drive.
- If your USB drive contain Important data that you want to restore, do not reinstall the device.
Warning
- Reinstalling will erase all data on the drive.
- If the files inside are important, are not let anyone (even if they have a torch) to fix the USB for you. You should take the drive to professional repair service.
- Always back up important information.
What you need
- Disk (restore) of your operating system.
- The serial key of the operating system.
- A USB that works well for testing / comparison purposes.


