Author:
Peter Berry
Date Of Creation:
16 February 2021
Update Date:
28 June 2024
Content
Drive partitioning is to divide a hard drive into multiple logical units. Users rarely partition their hard drives; however, this task has many benefits. Most importantly, when you split the drive, you can separate the operating system from the data, thereby reducing the risk of data corruption.
Steps
Open the Computer Management tool. Open the Start menu, type "Computer Management" in the Start menu search bar, and press enter.

Select the Disk Management tool. Click Disk Management On the left side of the window, you will see all the drives and their partitions on your computer.- In the illustration, there is 1 drive and 2 partitions.

Make space for the new partition. Right click on the partition you want to resize and select the task Shrink Volume (Reduce Size).- In the illustration, the selected drive is (C :).
- Note: There may be a partition named System Reserved (Reserve System). We do not recommend that you make any changes to this partition.

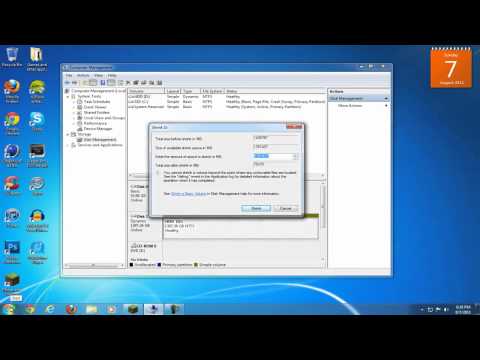
Minimize the drive. Enter the size you want to shrink the drive to in megabytes (1000 MB = 1GB). Then, click the button Shrink (Zoom out).- In this example, the drive is scaled down to 10000 MB, or 10 GB.
- Note: You cannot shrink more than the specified amount in the item Size of available shrink space in MB (The size of the thumbnail space is available in MB).
Create a new drive. At this point, you will see an unformatted partition in the window Disk Management. Right click on the partition have not been allocated yet and choose New Simple Volume (New Partition).
The New Simple Volume Wizard will start. Dialog box New Simple Volume Wizard will pop up. Click the button next to continue.
Enter the new partition size. Enter the amount of memory you want to assign to the new partition and then click the button next.
- In the illustration, the maximum available memory has been allocated to the new partition.
- Note: You cannot create a new partition larger than the available memory.
Name the new partition with a letter or path. Choose from the menu a letter name for the new partition and click the "Next" button.
- In the illustration, the selected letter name is (A :)
- An alphanumeric name or path is used by Windows to identify and navigate to your new partition.
Set up for new partitions.
- Click Format this volume with the following settings: (Format this partition with the following settings :)
- For File System (File System), select NTFS
- For Allocation unit size (Attribution Unit Size), select Default (Default)
- For Volume Label (Partition Label), enter the name you want to give the new drive.
- Click Perform a quick format (Perform quick format)
- Then, click the button next
Create new partitions. Review your settings then click finish (Completed).
Format the new partition.
- A dialog box will pop up asking you to partition your new drive. Click Format disk (Format the drive).
- Another window will pop up. Leave these settings as they are, click the button Start.
- A warning will appear. Click OK.
Check out the new drive. If the operations are correct, you will see your new drive in the window Disk Management. advertisement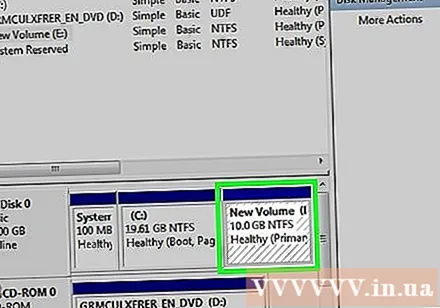
Warning
- Before we get started, we recommend Backup all data to another computer or removable storage device. This will help prevent data loss if an error occurs.


