Author:
John Stephens
Date Of Creation:
2 January 2021
Update Date:
27 June 2024
Content
As computer technology progresses, new software becomes more demanding, giving you the feeling that the computer is becoming sluggish, taking more time to process operations. Luckily, it's easy to upgrade your PC. Upgrading your CPU (Central Processing Unit) is one of the best things you can do to prevent your computer from stuttering. The CPU is an important part of any computer system, so before deciding to upgrade a computer's processor, make sure to read and understand all of the steps below. In addition to the new CPU, you may also need to prepare additional components (a new heatsink, new heatsink) and upgrade the motherboard's BIOS basic input and output system.
Steps
Part 1 of 6: Identify parts
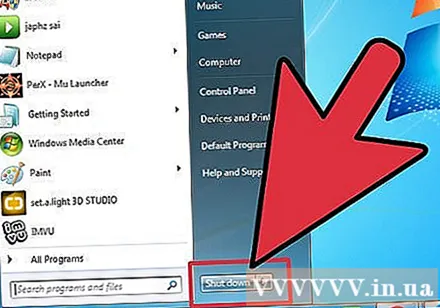
Turn off the computer and unplug the power cord.
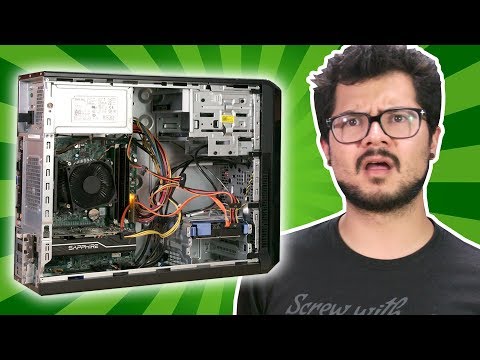
Unscrew the case and remove the case.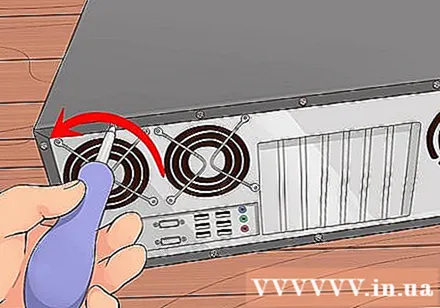
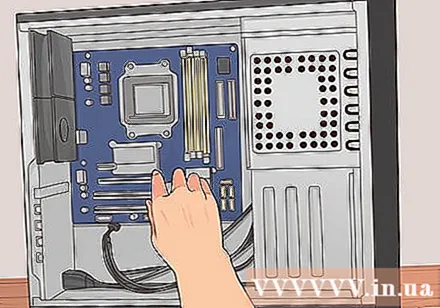
Identify current motherboard, processor chip, RAM card and video card.
Determine the socket type on the motherboard. Search Google or have your computer technician check to see if your current motherboard model supports the new processor. In addition, you will also need to determine if your computer has a 32-bit or 64-bit processor. Popular types of soles: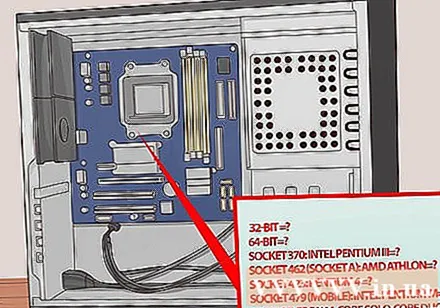
- Socket 478: Intel Pentium 4, Celeron, Pentium 4 Extreme Edition
- Socket 479: Intel Pentium M, Celeron M, Core Solo, Core Duo
- LGA775 socket: Intel Pentium D, Pentium 4, Celeron D, Pentium Extreme Edition, Core 2 Duo, Core 2 Quad.
- LGA1156 socket: Intel Celeron, Pentium, Core i3, Core i5, Core i7 Clarkdale / Lynnfield
- LGA1366 socket: Intel Core i7 (9xx), Xeon
- LGA2011 socket: Intel Core i7 Sandy Bridge-E (38, 39xxx), Core i7 Ivy Bridge-E (48, 49xxx), Xeon E5 ver.1 and version 2
- LGA1155 socket: Intel Celeron, Pentium, Core i3, Core i5, Core i7 Sandy / Ivy Bridge
- LGA1150 socket: Intel Celeron, Pentium, Core i3, Core i5, Core i7 Haswell / Broadwell
- LGA2011-3 socket: Intel Core i7-58xxK / 59xxK / 68xxK / 69xxK, Intel Core i7 Extreme Edition (5960X / 6950X)
- LGA1151 socket: Intel Skylake / Kaby Lake / Coffee Lake / Cannonlake Pentium, Celeron, Core i3, Core i5, Core i7, Xeon E3 v5 (only used with Intel C232 or C236 motherboards)
- Socket 939: AMD 64, Athlon 64 X2, Athlon 64 FX, Sempron, Opteron
- Socket 940: AMD Athlon 64 FX, Opteron
- Socket AM1: AMD Sempron / Athlon xxxx APU
- AM2 / AM2 + socket: AMD Athlon 64, FX, Opteron, Phenom
- AM3 socket: Sempron 100, Athlon II X2, X3, X4, Phenom II X2, X3, X4, X6
- AM3 + socket: AMD FX X4, X6, X8
- FM1 socket: AMD Llano APU X2, x3, X4
- FM2 / FM2 + socket: AMD Trinity / Richland / Kaveri APU X2, X4, Athlon X4

If your current motherboard supports the new processor you want, purchase the new one at the computer hardware store and continue reading the instructions in section 3. If not, scroll down to Section 2. Advertising
Part 2 of 6: Buying a new motherboard
Choose your motherboard based on your criteria (eg cost, specifications or compatibility with old hardware).
If your motherboard is compatible with all your old hardware, go to Part 3.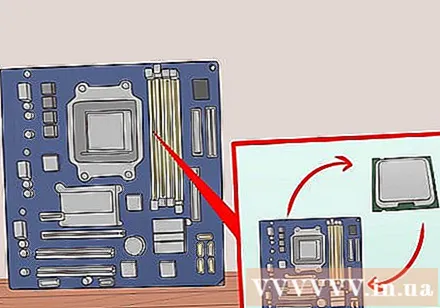
Check if the motherboard is compatible with the video card and RAM card.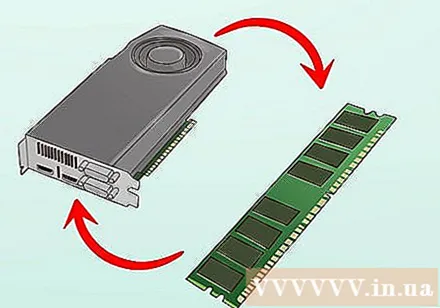
If the motherboard is incompatible with the video card or the new motherboard does not have an integrated video card, you must install a new compatible video card.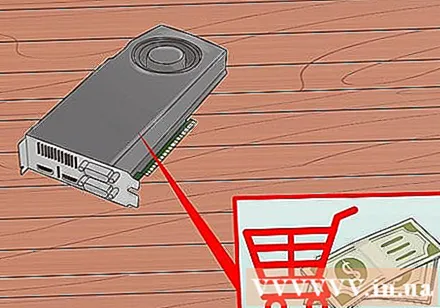
If the new motherboard does not support the old RAM, you must purchase the new RAM that is compatible with the motherboard.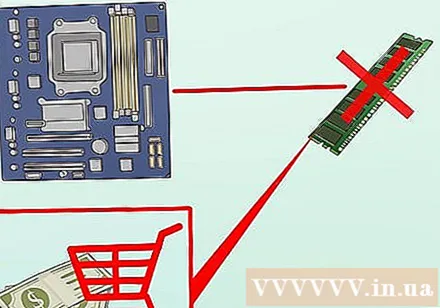
Read the instructions in Part 4. advertisement
Part 3 of 6: Replacing the Microprocessor (Desktop)
Take out the old CPU. Open the chassis, unscrew the heatsink from the motherboard, pull out the heatsink. There are some radiators that require screwdrivers or other specialized tools to remove (Zalman is quite famous for this).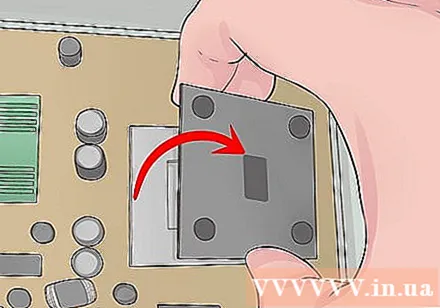
Open the socket side lever. You can open the lever by pulling the lever out, then pulling it upwards. Gently lift the old CPU out of the socket.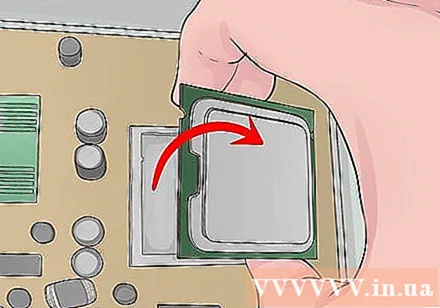
Get the new CPU out of the box. Install the CPU so that the yellow triangle on the CPU is aligned with the yellow triangle on the socket, and gently drop the CPU into place. Do not press the CPU. If you install it correctly, the CPU will automatically fit into the slot.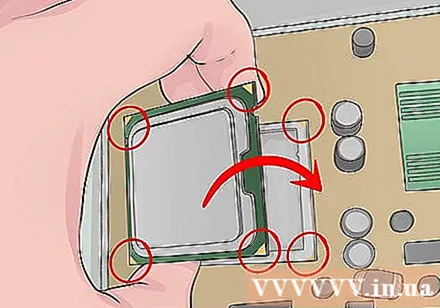
Close the ZIF (zero insertion force) lever to lock the CPU. Take the cooler that came with the new CPU and install it according to the instructions. If the heatsink doesn't have thermal grease or gasket, you can apply a very thin layer of thermal paste over the radiator. The thermal paste acts as a conductor of heat, transferring heat from the microprocessor chip to the radiator. If the radiator has a fan, plug the fan into its correct port. Do not operate the CPU without heat transfer material or radiators.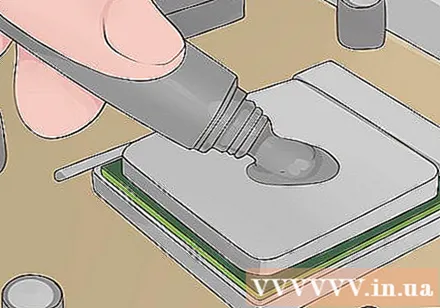
Continue reading the instructions in section 5. advertisement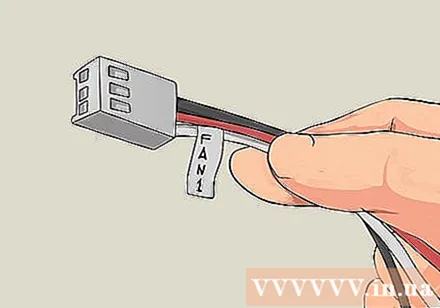
Part 4 of 6: Socket 479 and other portable dock
If the socket has screws, you must remove the screw and then pull out the CPU.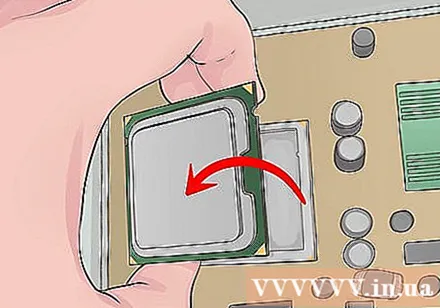
Put the new CPU in, align the CPU installation position exactly as instructed above.
The CPU will be pushed inward and held by a force or spring mechanism, or screwed into place.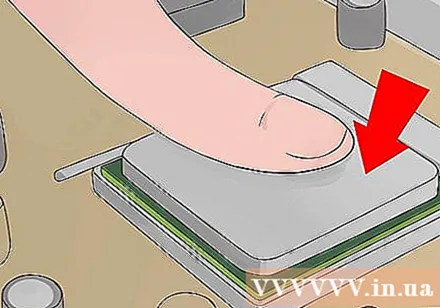
Your CPU may or may not need a radiator. Please refer to the CPU manual for more details.
Plug in and enjoy an upgraded PC! advertisement
Part 5 of 6: Replace Motherboard
Mark each cable connected to the old motherboard and make a note of where the cables connect. The names of some small cables are usually written next to the connector that connects to the motherboard. This part of the name is usually very small. For example, the heatsink fan power cable could be named "FAN1".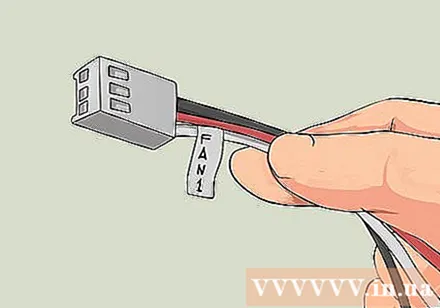
Remove all cards connected to the motherboard.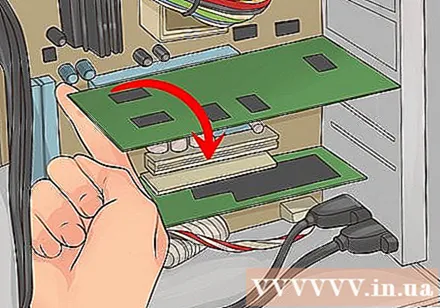
Remove all cables connected to the motherboard.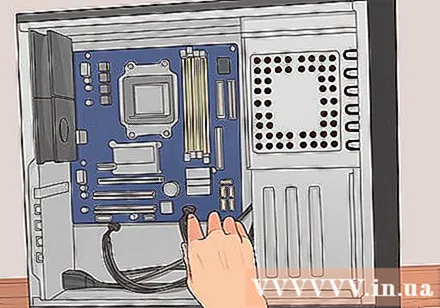
Carefully disassemble and keep the old processor in a non-static environment (you can purchase antistatic plastic bags at technology equipment stores).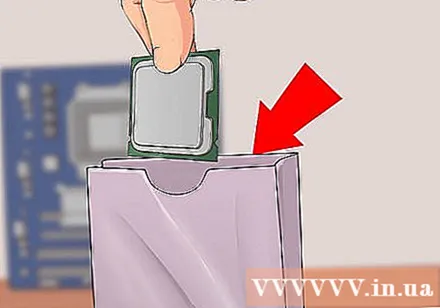
Remove the screw and remove the old motherboard.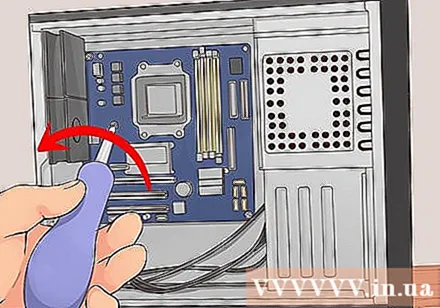
Replace the new motherboard.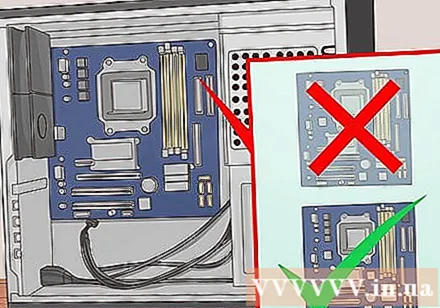
Replace the screw for the motherboard.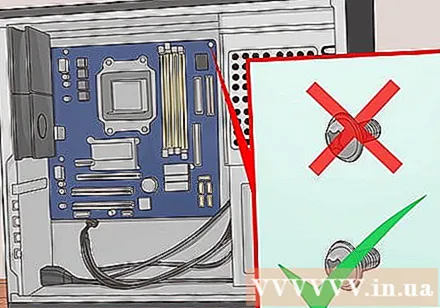
Insert new processor.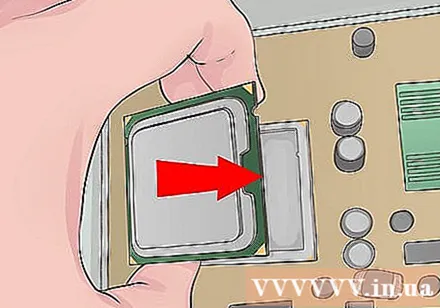
Make sure that the new processor is correctly installed and firmly attached to the motherboard.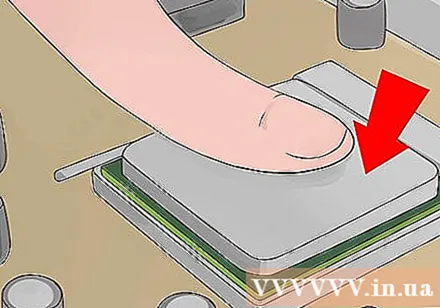
Reconnect the motherboard power cord.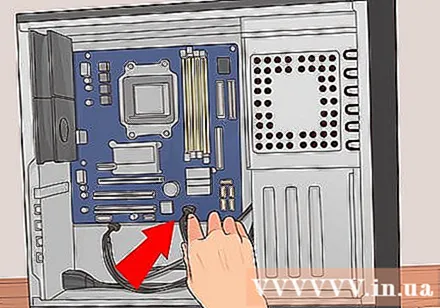
Reattach the cards to the motherboard (all cards should be mounted where they fit.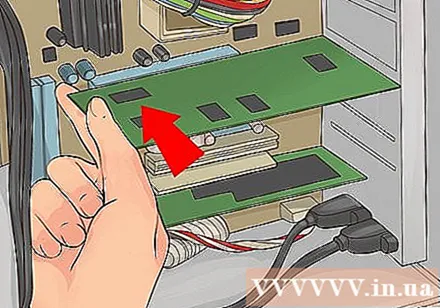
Read on to the instructions in Part 6. advertisement
Part 6 of 6: Replacing the computer
Replace the chassis.
Replace the screw for the chassis.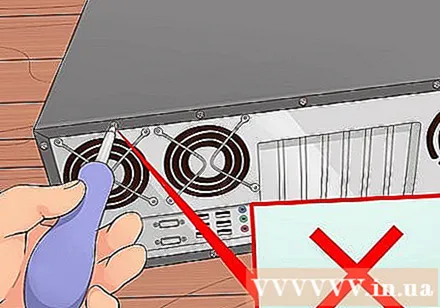
Reconnect the cord and reconnect the power cord, keyboard, mouse, monitor and other connections.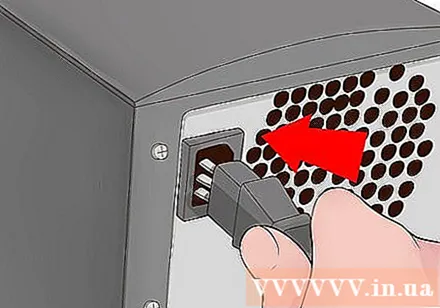
Start up your computer and check to see if you have inserted the wrong parts. If not, congratulations on your success. If there's a problem, it's better to have someone else check it and fix it. advertisement
Advice
- To disassemble the processor, you have to screw, unscrew, or disconnect other computer components such as IDE cables and many types of PCI cards. Make sure you know exactly where these parts are located and how they are connected to the motherboard before attempting to upgrade your processor.
- For proper static discharge, you can bring the grounding ring attached to the chassis before starting work for 5-10 minutes, or just unplug the computer. You can make your own ground cable by reinserting the power cord with the hot and neutral pins disconnected, leaving only the ground pin. You can also purchase commercial ground cable products. Always touch the chassis before working to discharge static electricity.
- You may need to rewrite (update) BIOS data to support new technology such as dual-core or Hyperthreading technology. Perform this step before replacing the new CPU.
- Remember that engineering work always requires careful research before execution to ensure everything is on the right track, so take the time to research and try not to rush. Remember that patience is a virtue.
- If you feel you are going in the wrong direction and getting messed up, start over by opening and removing everything again.
- Existing hardware specifications must be carefully considered to make sure the processor you want to upgrade is compatible with the motherboard. If not, you will have to buy a new motherboard.
- When applying the radiator compound on the radiator, do not overuse it. Apply only the equivalent of a grain of rice.
- If your CPU has HIS heatsink, don't be afraid to press hard on the heatsink so that it clamps in place. If the CPU has a bare core, you will need to be extra careful not to crush or break this bare core. If the core is damaged, the CPU cannot be saved.
- If you decide to buy a new motherboard, keep in mind that the cheapest motherboard is not always the best choice for your system. You may want to install some additional components later on, so make sure that besides upgrading the processor, the new motherboard will also need some additional features for you to do so. use later.
- If your motherboard was released before 2015 and is upgrading to Kaby Lake CPU, you may need to update your motherboard BIOS.
- You might make some mistakes, like plugging in the wrong cable on the motherboard, or maybe your processor is not properly attached.
Warning
- If you are afraid of damaging a part, you should not manually upgrade the processor according to the instructions above, as all operations are always risky.
- Do not touch the top of the microprocessor chip or the gold pins below the PCI cards with your bare hands. You can damage them.
- If your computer is still under warranty, you should not follow these instructions either. You may void your warranty.
- Normally, Electrostatic Discharge (ESD) will damage electronic devices. You need to periodically ground yourself by touching the chassis or wearing an antistatic strap. In addition, this is a self-safe practice and requires common knowledge.
- Never Start or run your computer without a cooler because if it's damaged, your computer won't be covered under warranty. Do not try to run CPU without heatsink or radiator. For most desktop systems the CPU requires both a heatsink and a heatsink. If you run your computer without a radiator, the processor can be severely damaged to the point of not being repaired, and this action may void your warranty.


