Author:
Roger Morrison
Date Of Creation:
23 September 2021
Update Date:
21 June 2024

Content
If you want to stick fabric to a piece of wood without letting it come off, you will need to use something stronger than regular hobby glue. To stick a piece of fabric to wood, first sand the surface of the wood and then stick the fabric in place with Mod Podge. Other glues often show through the fabric or are not strong enough, so it is better not to use them. With the right techniques and materials, the fabric will remain on the wood for a long time.
To step
Part 1 of 2: Preparing the wood
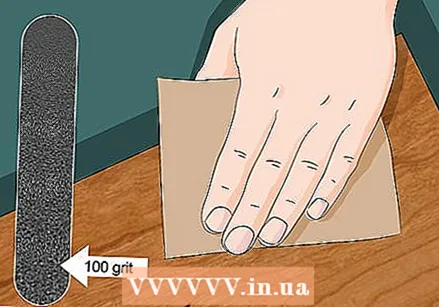 Sand the wood with 100-200 grit sandpaper. Before sticking the fabric to the wooden surface, make sure that the wood is smooth. Take a piece of sandpaper with grit size 100-200 and rub it back and forth over the area where you want to stick the fabric. Remove all imperfections to get a smooth surface.
 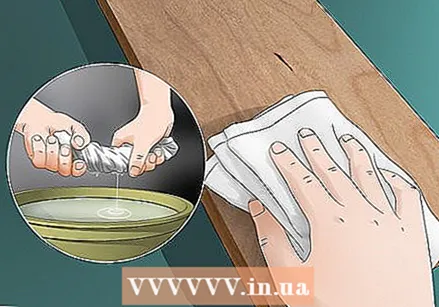 Wipe the surface of the wood with a damp cloth. Remove all dust particles created by sanding the wood by wiping the surface with a damp cloth. Do not use a soaked cloth, as the wood should not get wet.
  Let the wood dry completely before applying the glue. Mod Podge is less effective if you try to apply it to a damp or wet surface. Make sure the wood is dry before continuing.
 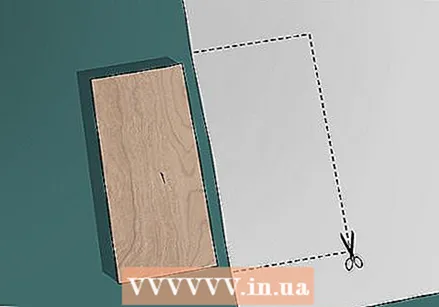 Measure and cut the fabric. Place the fabric on top of the piece of wood, leaving the fabric extending two to three centimeters on all sides. By measuring generously, you can be sure that the fabric completely covers the wood.
Part 2 of 2: Gluing with Mod Podge
 Buy or make Mod Podge. You can buy Mod Podge at hobby stores and on the internet. This versatile hobby glue is glue, lacquer and varnish at the same time and can be used on a variety of materials, including fabric and wood.
 - You can choose from different types of Mod Podge. Whether you choose matte or glossy Mod Podge, or Mod Podge that is specifically designed for fabric or wood, the glue will bond the fabric well to the wood.
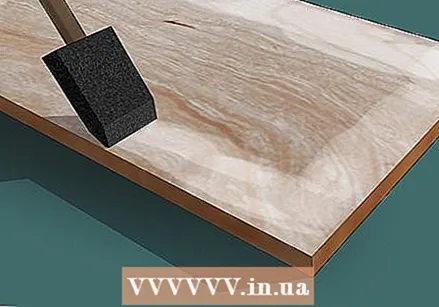 Apply an even coat of Mod Podge to the wood. Use a paintbrush or foam brush and dip it into the package with Mod Podge. Iron around the edges of where the fabric will be, then work your way to the center of the wood. Work quickly, because Mod Podge dries quickly.
 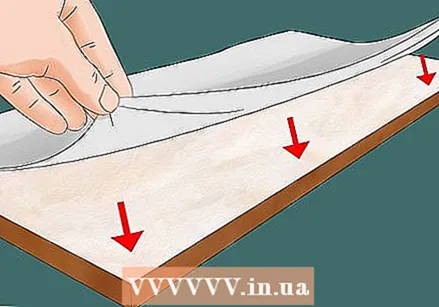 Place the fabric on the Mod Podge. Keep the fabric as straight as possible over the Mod Podge. Put the fabric down and press it against the wood.
 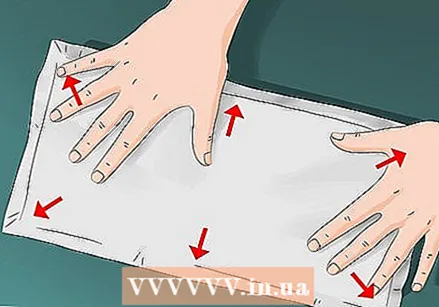 Smooth out any wrinkles with your hands. Using your palm, rub the surface of the fabric to smooth out the wrinkles. Apply some pressure to the fabric so that it sticks to the Mod Podge.
 - You can also roll over the fabric with a small roller to remove the wrinkles.
 Let the Mod Podge dry for 24 hours. Mod Podge dries pretty quickly, but let it dry overnight to make sure it is completely dry. Gently pull on the edges of the fabric to make sure it is secure.
  Trim the excess fabric. Use scissors to carefully trim the edge of fabric two to three inches wide. The fabric should now sit neatly on the wood.
Necessities
- 100-200 grit sandpaper
- Cloth
- Water
- Mod Podge
- Dust
- Wood
- Paintbrush or foam brush
- Scissors


