Author:
Christy White
Date Of Creation:
5 May 2021
Update Date:
1 July 2024

Content
Roti is a round, flat, unleavened Indian bread. Most Indian restaurants serve naan (a leavened yeast and wheat flour flatbread baked in a tandoori oven), however roti is normally prepared with whole wheat flour and baked on a hot baking tray. It is an everyday freshly baked bread that is eaten with curries, chutney's and various other Indian dishes. Roti is often used as a kind of cutlery for picking up other foods. It is a delicious, versatile and surprisingly easy to prepare bread that you can make yourself at home. This is a recipe for 20-30 rotis.
Ingredients
- 3 cups chapati flour (also known as atta) OR 1½ cups whole wheat flour + 1½ cups all purpose flour
- ½-1 teaspoon of salt (optional)
- About 1 tablespoon of ghee or oil
- 1-1½ cups of warm water
To step
Part 1 of 2: Preparing the roti dough
 Choose your flour. Traditional roti recipes call for chapati flour (sometimes spelled "Chapatti"), also known as atta. Some recipes only list atta in the list of ingredients; by this they refer to chapati flour (the terms "roti" and "chapati" are sometimes used for the same thing - they are both unleavened flat wheat breads.)
 - Atta / chapati flour is a finely ground whole wheat flour and is the traditional choice for making roti.
- If you can't find chapati flour or don't have it available, you can replace it with whole wheat flour.However, since it is a heavier flour, you might want to consider a mix of half whole wheat flour and half all purpose flour to make it more like the texture of chapati flour.
- You could even use only all-purpose flour in the recipe, if that's all you have at home. If you choose this, you may need less water. Pay attention to the composition and structure of the dough when you mix it; This will be explained in more detail in the following steps.
- Additionally, if you only use all purpose flour, your roti will not taste as firm and aromatic as traditional roti.
 Choose which oil you want to use. You will need a little oil to coat the freshly baked rotis and, optionally, a little to add to the dough. You can use any cooking oil: olive oil, vegetable oil, melted butter, or ghee, but ghee is recommended.
 - Ghee is clarified butter that has been gently boiled until all the moisture has evaporated and the milk solids have turned brown. Ghee has a nutty and caramelly flavor and color. Ghee has a high smoke level (almost 190 ° C) and is therefore suitable for baking. It can be bought in Asian food shops and specialty stores or you can make your own ghee at home.
 Sieve the flour and salt. Place the flour in a large bowl or bread mixer. Add salt and mix thoroughly.
 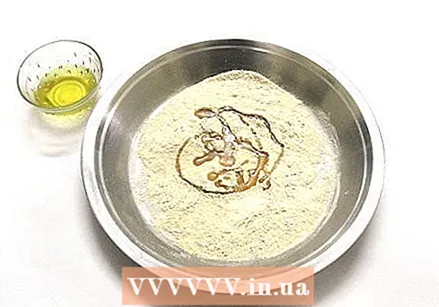 Add the ghee (or oil) to the flour. Not all roti recipes call for oil, but by doing so you can add some flavor to this simple bread and make it feel smoother. Add ghee to taste up to 1 teaspoon. Slowly mix the dough until flakes appear in it.
 - Mix the dough with clean hands. If using a mixer, mix on a low setting, and if using a food processor, pulse a few times until flakes appear.
 Add the water to the flour. Slowly add lukewarm water to the dough. The dough is sandy at first, but gradually binds more and more into a ball as you add more water.
 - Do not add the water too quickly; otherwise the dough will be too sticky or it will not roll out properly.
- If you are using a mixer or food processor, you may need to stop from time to time to scrape the dough off the sides of the bowl before mixing further.
- The final dough should be soft and a little sticky, although you should be able to wipe it off your hand. If it sticks to your hand, it is too wet and you need to add some more flour.
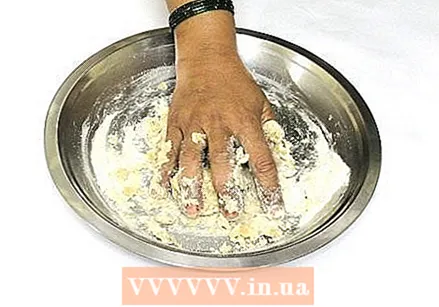 Knead the dough. Once you've formed a dough ball, use your mixer or food processor for a few more minutes and / or knead with your hands for about 5 more minutes. This helps form the gluten proteins.
 - The time you spend kneading can vary depending on your strength or your kitchen tools. The intention is that you get a pliable and elastic dough that you can roll out.

- The time you spend kneading can vary depending on your strength or your kitchen tools. The intention is that you get a pliable and elastic dough that you can roll out.
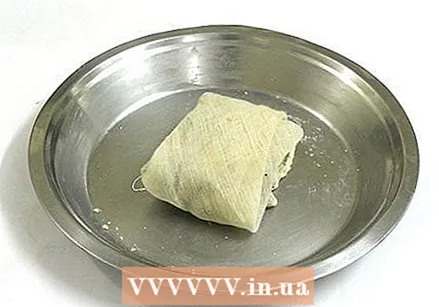 Let the dough rest. Once you are done kneading, brush the dough lightly with oil or ghee and cover with a damp towel or tea towel. Let the dough rest for about 30 minutes. (You can also let it rest longer.
 - Letting the dough rest will make the rotis softer. The gluten that you have formed during the kneading process will relax and any air bubbles will have a chance to leave the dough.
Part 2 of 2: Baking rotis
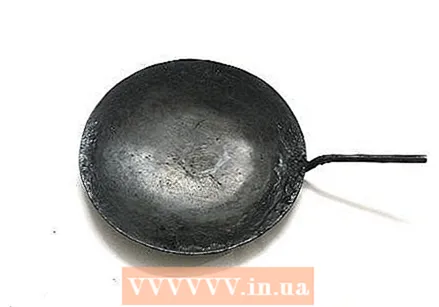 Heat your baking sheet. To bake rotis you need a baking tray, a cast iron frying pan with a diameter of at least 22-25 cm or a traditional iron tawa. Place the baking sheet over medium heat.
 - You can test the temperature of your baking tray by dropping one or two pinches of flour on the surface. When the flour turns brown, you know your baking tray is hot enough.
- Most roti recipes recommend heating your cooking surface while the dough is rolling. However, if you are doing this for the first time, the rolling may take a little longer and your griddle may get too hot or smoke. In that case, it is better to wait before heating your baking tray.
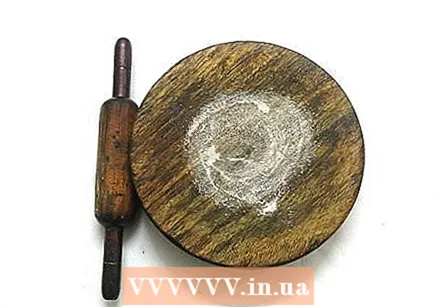 Preparing your “rolling surface”. You need a large surface for rolling the dough. A marble slab or a traditional chapati plank are ideal, but a wooden cutting board or even a countertop will work just fine. Lightly flour the work surface and keep a small amount (about 1/4 cup) on hand to dust your hands as you work with the dough. Also dust your rolling pin.
 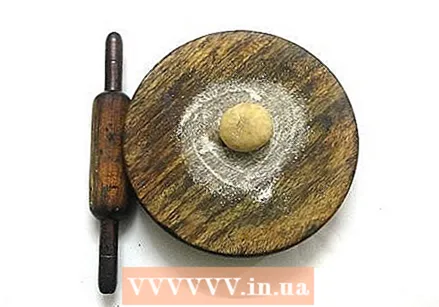 Knead and divide the dough. Take the rest of the dough and knead it for about two minutes or until the dough is soft. Divide the dough into evenly sized balls (about 5 cm in diameter).
 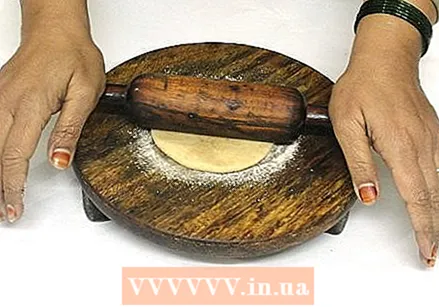 Roll out the balls. Take a ball and flatten it between your palms. Dust it with flour on both sides and roll it out on your dusted work surface with your rolling pin.
 - Continuously re-direct your rolling pin so that you get as round a shape as possible. Visualize a clock as you roll; Roll up from 6am to 12pm, then 7am to 1pm etc.
- Turn the circle of dough over regularly so that the bottom does not stick to the surface and dust the work surface even more with flour if necessary.
- Try to form a circle about 15-20 cm in diameter, but avoid making the dough too thin. If it is too thin, holes will appear or the dough will stick.
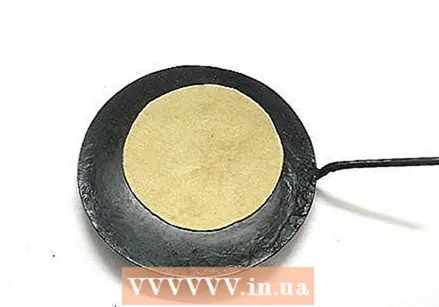 Baking the roti. Place your flat dough on your hot pan or tawa for about 15-30 seconds. You can flip the roti if you see bubbles forming at the top. Also observe the structure of the top; it will look drier once the bottom is cooked. You can also peek at the bottom using a spatula or cooking tongs. Turn it over if you see brown spots.
 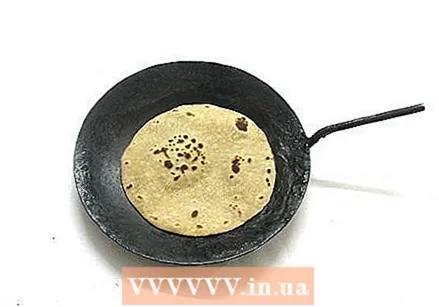 Finishing the roti. Bake the other side of the roti for another 30 seconds. The roti will bulge (good sign!), But take a clean, dry cloth and gently press down on the roti, especially on areas that bulge (this will allow the air to spread more evenly through the roti and swell more uniformly) and areas that make up the roti. do not touch the baking tray.
 - Do not hesitate to turn the roti so that it does not stick or stick anywhere. You can also turn it over again to brown the other side a bit more.
- Depending on how hot your cooking surface is, you may need more or less time between turns. Pay more attention to how brown the roti is than how long it has been baking.
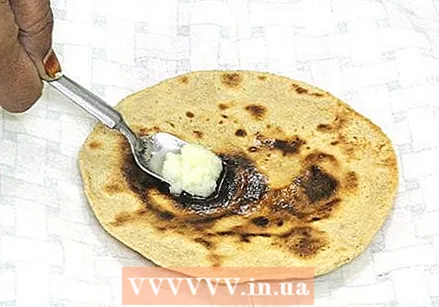 Remove the roti and repeat the process with the next ball of dough. Place the baked roti on a clean dry cloth, then fold it over and brush lightly with oil or ghee. This will keep the roti warm and soft as you continue to cook the rest.
 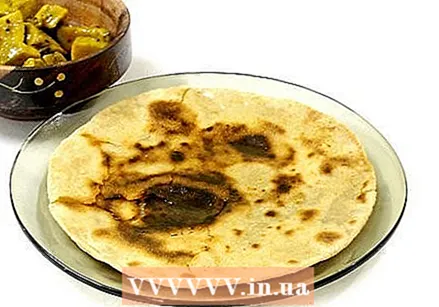 Enjoy your end product! For a complete Indian feast, you can also make raita, curry and tarka dal. Serve with freshly made rotis!


