Author:
Judy Howell
Date Of Creation:
1 July 2021
Update Date:
21 June 2024
Content
- To step
- Method 1 of 3: Growing papaya from seed
- Method 2 of 3: Plant a growing or mature papaya plant
- Method 3 of 3: Caring for papaya plants
- Tips
- Warnings
- Necessities
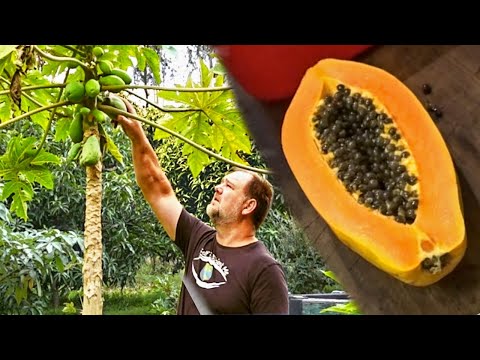
Papaya is a perennial plant that grows in tropical and subtropical climates where frost or freezing temperatures do not occur. Some varieties can reach a height of 30 feet and have attractive yellow, orange or cream flowers. The fruits of the plant can be of various shapes, including pear-shaped or round, and are known for their sweet, yellow or orange flesh. Learn how to grow papaya so that you have the best chance of producing healthy plants with a high quality fruit crop.
To step
Method 1 of 3: Growing papaya from seed
 See if papayas will thrive where you live. Papayas usually do well in areas with a minimum winter temperature of between -7 to 4 ° C. They can be damaged or die when exposed to prolonged frost and prefer climates that are warm all year round.
 - Papaya trees do not do well in moist soil. If you live in a humid climate, consider planting them on a mound of well-drained soil as described below.
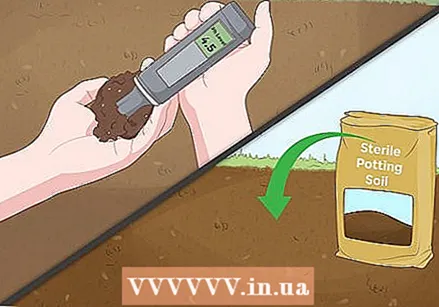 Prepare the soil. Choose a soil mixture for tropical plants that is rich in nutrients or make your own mixture with garden soil and 25–50% compost. As long as the soil is draining well, the precise texture of the soil doesn't really matter. Papaya grows in sandy, loamy and rocky soils.
 - If you are able to measure the pH of the soil or if you have to choose between commercial soil mixes, choose soil with a pH between 4.5 and 8. This is a broad spectrum, meaning any soil where you can successfully use other soil. plants in cultivation will likely have the appropriate pH for papaya.
- If you want more seeds to germinate, use a sterile soil mix. You can make this yourself by mixing one part vermiculite with one part soil mixture and bake it in an oven at 95C ° for an hour.
 Prepare the seeds. You can use seeds scraped from the center of a papaya fruit or choose seeds purchased at a garden center or nursery. Push the seeds against the edge of a colander to break the bag around the seeds, but be careful not to break the seeds themselves. Rinse well and then dry in a dark place on a paper towel.
  Plant the seeds. You can plant the seeds directly in your garden to avoid the risk of transplanting them later, or you can plant them in pots so that you have more control over the arrangement of the plants once they start to sprout. Stick the seeds about 1/2 inch deep below the surface and spaced about 2 inches apart.
 - Plant as many seeds as you have room for to increase the chances that both male and female plants will germinate; you can remove the weaker plants later. There is no good way to tell if a plant is male, female, or hermaphrodite before planting.
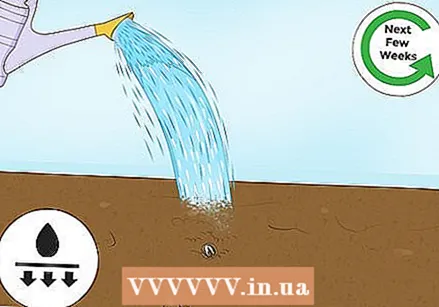 Water the soil fairly thoroughly. Water thoroughly after planting, but do not soak the soil to the point where the water holds in it. Monitor the humidity for the next few weeks and water as needed. Keep the soil slightly moist, but not waterlogged.
 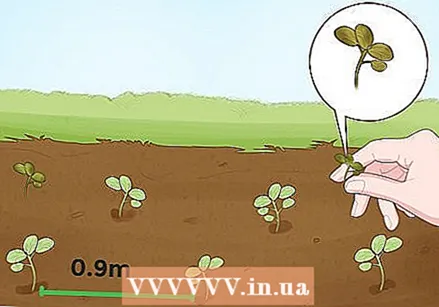 Decide which seedlings to keep. About two to five weeks after planting, some seeds will sprout and emerge as seedlings. Give them a week or two to grow, then pull out the smallest seedlings along with the ones that look wilted, discolored, or in some way unhealthy. Thin plants until there is only one plant left per pot or until the seedlings are at least 90 cm apart. Keep at least five plants so that you have a 96% chance or more of getting both male and female trees.
 - Once you have selected the strongest plants you should proceed to the planting section if you will be transplanting them to your garden. Otherwise, skip to the general care section.
 Once the plants are in bloom, remove the excess male plants. If you still have more plants than you want, wait until the plants are about three feet tall to see what gender each plant is. The male plants will flower first, producing long, thin stems with multiple flowers. Female flowers are larger and closer to the trunk. To produce fruit, you only need one male plant for every ten to fifteen female plants; the rest may be removed.
 - Some papaya plants are hermaphrodites; this means that they will produce both male and female flowers. These plants can self-pollinate.
Method 2 of 3: Plant a growing or mature papaya plant
 Make a mound of soil if you wish to avoid water. If your place of residence often suffers from heavy rainfall or flooding, make a mound 0.6 - 0.9 meters high and 1.2 - 3 meters in diameter. This will keep the water from settling around the roots of the papaya plants, which will reduce the chance of damage or dieback.
 - Before making a hill, read the guidelines below to get some information about preparing the ground.
 Otherwise you can also make a hole. In the future permanent site of your plant, make a hole three times as deep and wide as the pot or root ball. Choose a sunny, well-drained location about 3 - 6 meters from buildings and other plants. Make a separate hole for each papaya plant.
  Mix an equal amount of compost into the tilled soil. Unless your garden soil is already rich in nutrients, you should replace some of the soil from the hole or hill with compost and mix it well.
 - Do not mix with fertilizer as this can burn the roots.
 Apply a fungicide (optional). Papaya trees can die from disease after transplanting. Follow the guidelines on a garden fungicide's label and add it to the soil to minimize this risk.
 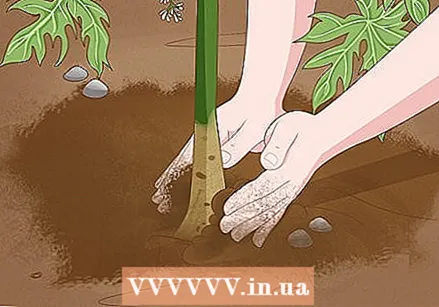 Insert the plant carefully. Add the amended soil back to the hole or pile it back up into a mound until the remaining depth is roughly equal to the depth of the potting soil or root ball of the plant being transplanted. Remove the papaya plants from the containers one at a time and plant each specimen in its own pit at about the same depth as it was in the container. Be careful not to break or chafe the roots.
  Fill the soil back up and water. Fill up the remaining space in the hole with the same soil. If the soil does not fill in the gaps between the roots, gently push to remove air bubbles. Water newly planted seedlings until the soil around the root ball is thoroughly moistened.
Method 3 of 3: Caring for papaya plants
 Use fertilizer once every two weeks. Use fertilizer for growing plants every 10-14 days and dilute according to label directions. Use a "complete" fertilizer and not a specialized variety. Keep using this until the plants are about 12 inches tall.
 - After the plant reaches this size, commercial growers continue to fertilize papaya plants once every two weeks with 100 grams of complete fertilizer. Do this close to the base of the plant, but don't let the fertilizer touch the plant. Continue to do this if you wish to stimulate the growth of the plant and gradually increase the amount of fertilizer and intervals until the papaya plants do not get more than 900 grams every two months, starting when they are seven months old.
 Water the seedlings and established papaya plants regularly. Papayas can be easily damaged by standing water, but will produce undersized fruits if not watered regularly. Do not water more than once every three to four days if you have planted in loam that the water retains well. In sandy and rocky soils, water once every one to two days in warm weather. During colder periods, wait a few days longer between each watering.
  If necessary, add mulch in the form of bark or wood chips. Add pine bark, other bark, or wood chips around the base of the plant if you want to prevent weeds or if the plant looks wilted from not holding enough water. Put a 5 cm layer of mulch around the papaya plants, keeping a distance of 20 cm from the trunk.
  Check the leaves and bark of the papaya plants regularly for signs of disease or pests. Spots or yellowing of the leaves or bark indicate a possible disease. Black spots on the leaves will usually not affect the fruit, but can be treated with fungicide if the infestation is severe. Curly leaves can indicate an herbicide from a nearby garden. Other potential problems include insects or complete plant decomposition. These issues require that you consult a gardening expert or local agricultural institute.
  Harvest papaya fruits when they reach the ripeness you prefer. Sour, green fruits can be eaten as a vegetable, but most people prefer fully ripe yellow or orange fruits for their sweetness. You can harvest them anytime when the fruit has turned mainly yellow-green. You can let them ripen inside, away from possible pests.
Tips
- Chill fully ripe papaya fruits in the refrigerator to extend their shelf life.
- When germinating papaya seeds, make sure to remove the black gelatin coating from around the seeds to speed up the germination process.
Warnings
- Do not mow or weed near the papaya tree so that you do not accidentally hit and damage the trunk. Provide a grass-free area of 30 feet around the papaya tree so that there will be less weeds to remove.
- Do not fertilize the lawn around the papaya tree. The roots reach far and too much fertilizer will damage the roots.
Necessities
- Pots of 4 liters
- Potting soil
- Papaya seeds
- Scissors
- Complete fertilizer
- Spade
- Compost
- Mulch from bark or wood chips


")