Author:
Tamara Smith
Date Of Creation:
26 January 2021
Update Date:
1 July 2024

Content
- To step
- Part 1 of 4: Determining the location of the pond
- Part 2 of 4: Creating your pond
- Part 3 of 4: Adding plants and fish
- Part 4 of 4: Maintaining your pond
- Tips
- Warnings
- Necessities
Fishing is a great way to enjoy the outdoors while preparing dinner at the same time. If you have the energy and determination, you can build a fish pond all by yourself in your backyard. Pick a location, choose the size of the pond, and buy the right materials so you can start building and adding fish!
To step
Part 1 of 4: Determining the location of the pond
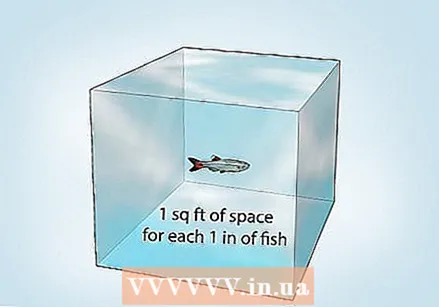 Offer 0.1 m2 for every 2.5 cm of fish. Start by deciding how much of your yard you want to dedicate to the pond. Then multiply the length by the width of the area to get the number of square footage. You can then determine how many fish you can accommodate by estimating that every inch of fish needs 0.1 square meters of space.
 - For example, if you plan to place 10 fish each measuring 12.5 cm in length, the pond should be at least 4.5 m2.
- If you install a filter system, you can assume 5 cm of fish per 0.1 m2. If not, do not exceed 2.5 cm of fish per 0.1 m2.
 Check local or national fishing pond requirements. Contact the local building authority and ask how far the pond should be from the property boundary. Then contact the local environmental authority to inquire about the relevant regulations. Depending on where you live and the size of your pond, you may need to apply for a permit. In some areas, such as Idaho, you must have a permit for a private fishing pond, which is free but must be renewed every 5 years.
 - Ask for a free consultation with a certified pond consultant. This can help you determine how best to build the pond, considering variables such as soil type and possible rainfall.
- Decide if you need to build a fence around the pond. In some areas it is mandatory to build a fence around ponds deeper than 18 inches.
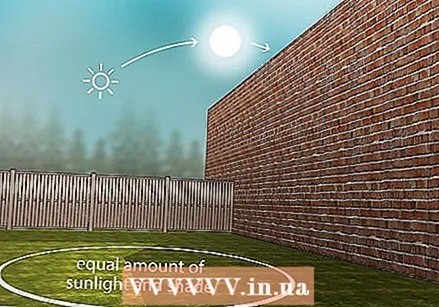 Select a location for the pond that will be exposed to equal amounts of sunlight and shade. A pond should be in a location that is exposed to direct sunlight in the morning and shaded in the afternoon. This will keep the water temperature cool and prevent algae growth.
 - Do not build your pond under trees. While it is good for shade, it will quickly clog the pond with seeds, leaves or needles. Always keep in mind young trees growing nearby and estimate how the branches will grow.
- Do not place the pond in a place where water runs off, as there is a greater chance of contamination.
- Make sure you have a waterproof connection for a residual current switch outside to power the pump. It should be approx. 3 m from the pond.
 Check that the soil in the chosen location has low water retention. Squeeze a handful of soil into a ball, throw it in the air and catch it again. If it falls apart, the soil is unsuitable. If the ball remains intact, dig a hole up to your waist and fill it up to the brim with water in the morning. In the evening, fill the hole and cover it with a plank. If most of the water is still in the hole the next day, then the soil is suitable for a pond.
 - If you only have space in a location unsuitable for a pond, cover the hole with a layer of plastic sheeting, sand, or concrete. This will prevent the water from the pond from being absorbed by the soil.
- Buy plastic sheeting, sand, and concrete from a DIY store.
Part 2 of 4: Creating your pond
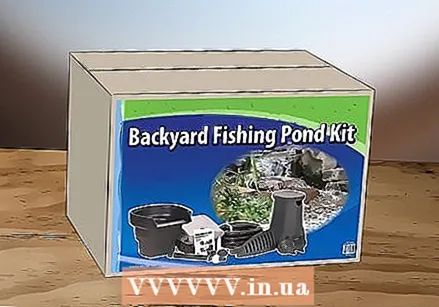 Buy a garden pond kit. Go to a local DIY store to purchase a pond kit. It should include a pond cover and a pump, and sometimes includes accessories, such as silk water lilies. Remember that each kit is designed for a specific size. For example, the smallest is usually 0.8 m2 and is designed for 315 liters. If you are going to install the pond without professional help, do not invest in a kit for a pond deeper than 45cm and longer than 1.8m.
 - Choose a set that complies with local pond regulations and is suitable for the location you have chosen.
- If you want, you can of course also buy the pond cover and the pump separately.
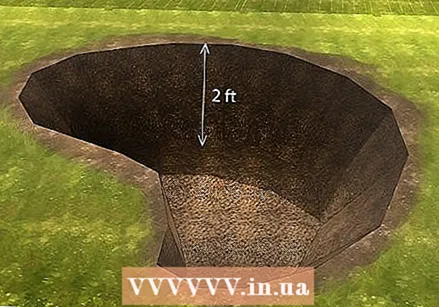 Dig a hole at least 0.6-0.9 m deep. Use the length and width measurements of your pond to determine the size of the hole. Typically 0.6m is the minimum depth for ponds containing fish. If you live in a very northern area, the hole should be at least 3 feet deep. Always start by pushing the shovel straight down and then moving it back and forth to loosen the soil.
 - Grab the center of the scoop with your non-dominant hand and grasp the top of the handle with your dominant hand.
- Create a section with a depth between 15cm and 1.2m to attract other wildlife such as toads, frogs, salamanders and ducklings.
- If the depth of the hole is uneven, make sure that at least 40-50% of the pond is in the deeper part.
- Call the local authority to find out where the area's utility lines are and be careful not to dig your pond's hole near any pipes or tubes.
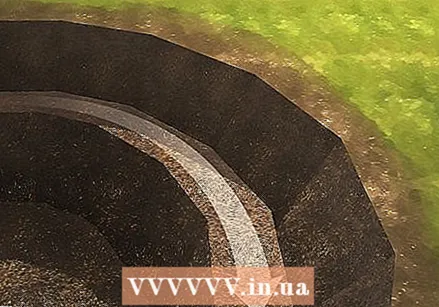 Using extra soil, create a platform below the surface of the waterline. This platform should be approx. 45 cm wide and 45 cm below the surface of the water. This layer is intended for plants and also provides a step for people who fall into the pond.
 - Take any extra soil to a waste collection point or other location that collects it. If you take it to a trash point, call the authorities ahead of time to find out the hygiene requirements for the soil.
 Install the tarpaulin over the hole. With the help of a friend, you pull the tarp loosely over the hole. Make sure there is an equal amount of material overlapping on all sides. Then weight the outline with bricks or tiles. If you do not buy a pond kit, but purchase the tarpaulin separately, calculate the necessary length and width with the following formula: (length or width) + (2x pond depth) + 0.6. Then multiply the length by the width to calculate the total area.
 - Consider a pond that is 3 feet deep and 6 feet long and wide. The calculation for both length and width is 2.1 + (2 x 0.9) + 0.6, which equals 4.5. This means that the area calculation is 4.5 x 4.5, which is 20.25 - the area in square meters that the pond cover should cover.
- Ethylene-Propylene-Diene-Monomer (EPDM) tarpaulin is more expensive, but more flexible. Polyethylene (PE) and reinforced polypropylene (RPP), on the other hand, are cheaper, but also thicker and more difficult to work with.
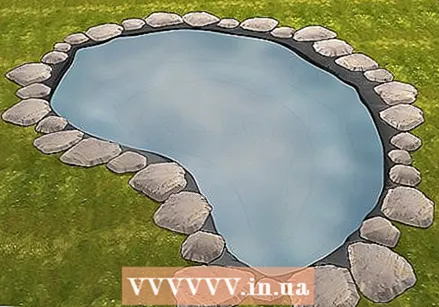 Fill the hole with water. Use a garden hose to fill the pond with water and adjust the tarpaulin as the pond fills so that it sits snugly along the walls of the pond. Begin by removing the stones as the pond fills up to avoid over-stretching the sail. Make sure the water is dechlorinated. If you can't, let the water sit in the pond for at least 1 day so that the chlorine comes out of the water and dissipates into the air. This prevents your fish from being harmed.
 - Cut any extra sail with sharp scissors or utility knife when the pond is completely filled.
- Buy a dechlorinator from a DIY store.
- Skip this step and let your hole fill with rainwater if you live in an area where it rains a lot.
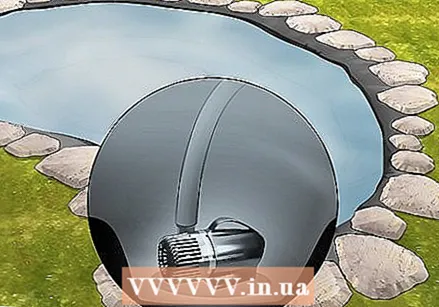 Install a pump with a circulation rate that matches the square footage of your pond. The circulation rate is displayed in liters per hour. If you bought a pond kit, the included pump is suitable for the size of the pond. Attach the feet to the pump to secure it to the bottom of the pond, and place it in the center of the pond. Now connect it to a water resistant RCD and switch it on. If the water flow is too strong, adjust the pump setting.
 - If you buy a pump separately, make sure it has the correct circulation rate. For example, if you are 20.25 m2, the circulation speed must be at least 20.25 m / h.
- You can also control the water flow using the nozzles supplied with the pump.
- Buy a unit with the lowest wattage possible to keep electricity costs down.
- Hire a contractor to install a heavy duty pump if you have a large pond.
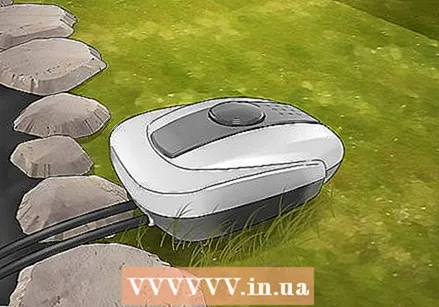 Invest in an air filter to increase the oxygen level in the water. Place the air filter on a level surface in the shade and above the waterline of the pond. Connect the air lines to the filter and extend them to the edge of the pond. Always connect the included valves to the pipes. Finally, distribute the air stones evenly over the pond and connect the air lines to it. Make sure the arrows on the flaps point in the same direction as the stones.
 - Connect the filter to a residual current contact.
- In winter, remove the rocks from the shallow parts of the pond.
- Installation instructions vary by product - always follow the manufacturer's instructions.
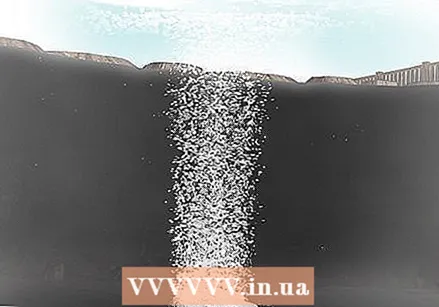 Install a water diffuser to circulate the oxygen in the pond. Proper circulation of oxygen in the water helps to extend the life of your fish and improves the health of the water system. Always choose a product that is suitable for the depth of your pond. Most systems are installed by connecting the air lines to the diffuser, placing the diffuser on the bottom of the pond, and connecting the air lines to an air compressor.
 - Always follow the manufacturer's instructions for the diffuser.
Part 3 of 4: Adding plants and fish
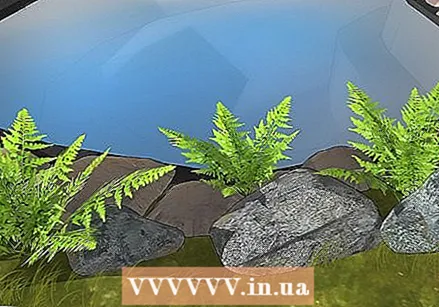 Add plants to make the pond more like the natural habitat of fish. Many fish eat aquatic plants in their natural habitat. To anchor a plant without damaging its roots, take the roots in your hand and make a point with your fingers. Then push your hand into the soil while keeping the roots of the plant covered and only then open your fingers. This will cause the roots to spread out before the bottom soil covers them.
 - Place your plants in groups of 2 or 3 so that small fish can hide from larger predatory fish that can (and will) eat them.
- Try plants like cattail, lotus, iris and water hyacinth.
- Place the plants in the center of the pond as well as along the entire platform. When you place plants in the middle, make sure there is a few dozen centimeters of space between the plants to prevent it from growing too close.
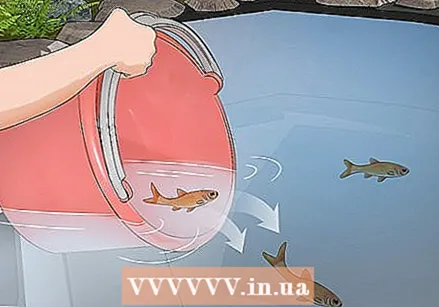
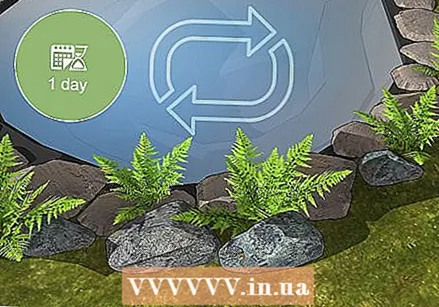 Leave the water in the pond alone for 1 day before adding fish. Resting the water is especially important for water that has not been treated against chlorine. When you add the fish, put them in a net and gently release them into the pond.
 - Let the fish acclimate to the new water before placing them in the pond. You do this by placing them in a tub or bucket with their original water and gradually adding water from the pond until they have almost all pond water.
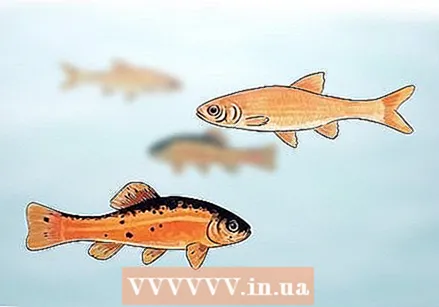 Catch some fish from a local pond. Get several pond fish to start. Try to take more than 1 kind and more than 1 of each. This ensures diversity in your pond and gives the opportunity for reproduction and therefore more fish. If you plan to eat the fish, make sure to get edible ones. Also, place cleaning species, such as crayfish, to keep the bottom of the pond clean and make sure they have enough rocks to hide under.
 - It is good to have at least 3 breeding pairs (3 males, 3 females, all adults).
- Make sure you have species that don't kill each other right away.
- You can also buy fish from local pet stores or contact conservation and fisheries authorities to ask if you can order baby fish.
Part 4 of 4: Maintaining your pond
 Add new fish to keep the population stable. Remember that if you catch every fish, there will be no more fish to breed with. Try to replace all the fish you catch with the same or similar fish to avoid disturbing the ecosystem of the pond.
 - Keep the population of male and female fish as balanced as possible to encourage mating.
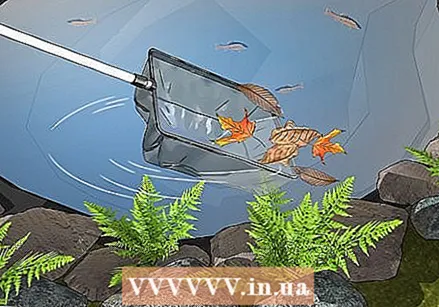 Remove any debris from the water weekly. Use a leaf skimmer to remove debris from the surface of the water - do not submerge the skimmer completely. Use a leaf vacuum to remove leaves from the bottom of the pond.
 - Buy leaf skimmers and vacuums from a DIY store.
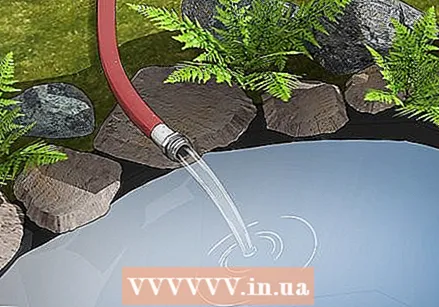 Top up the pond water if the water level drops. Splashing and evaporation lower the water level of the pond. If there is enough rain, you probably won't need to top up often. If not, use a garden hose to refill the pond.
 - Add dechlorinator to the pond when you refill it with tap water.
Tips
- Build the pond under the open sky. This way the rain can replace the evaporated water.
- Go to a landlocked (no river coming from the outside) pond or lake to see what types of plants and fish live there. The fish and plants in the local ponds are usually best for private ponds because of the similar climate.
Warnings
- When you cover the hole, use something that is non-toxic to fish or they will die.
- Use a bubble machine in the winter or your fish will die.
- This project requires a lot of time - don't expect it to be done in 1 day.
- If you don't place plants, your fish won't have protection from predators. In addition, organisms that live on these plants also serve as food for the fish.
- If both sexes are not represented, breeding is not possible. This means that after the first generation you will not have any more fish.
Necessities
- Pond kit
- Scoop
- Water
- Plants
- Fishing
- Pond cover
- Big stones


