Author:
Christy White
Date Of Creation:
5 May 2021
Update Date:
25 June 2024
Content
- To step
- Part 1 of 3: Making the base for the sanitary napkin
- Part 2 of 3: Making the pad liner
- Part 3 of 3: Putting it all together
- Tips
- Necessities
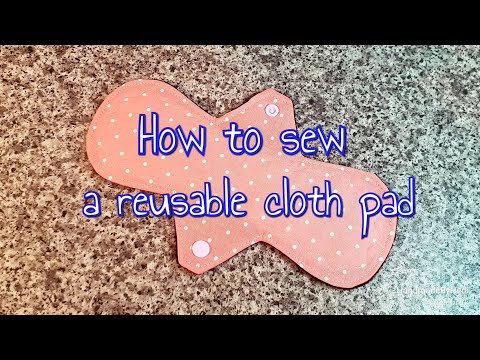
There are some things that women use a lot during their lifetime and one of them is sanitary pads. It can be very expensive to keep buying sanitary pads and some women find it uncomfortable to use. Fabric sanitary towels are not only cheaper and better for the environment, but also more pleasant to wear. This sanitary napkin is made of breathable cotton, so you sweat and smell less than with regular sanitary towels. You are also much less likely to suffer from toxic shock syndrome. Best of all, cloth sanitary pads are easy to make.
To step
Part 1 of 3: Making the base for the sanitary napkin
 Make a template from a piece of cardboard. Start with a diamond shape with rounded corners. The diamond shape should be about 23 inches long and 20 inches wide. Cut out the template when you are done.
 - Make the top and bottom corners slightly wider. These corners should be approximately 6.5 inches wide.
 Use the template to cut out two pieces of cotton flannel. This will be the outside of your cloth sanitary napkin, so choose the fabric that you like. You can use patterned or plain fabric. You can even use patterned fabric for one side and plain fabric for the other side.
 - You can also use cotton instead of flannel. Search a fabric store near you for quilting fabrics and calico for a ton of colorful options.
 Sew the two pieces together right side in. First, pin the two pieces together right side in. Sew the two pieces together all around using a seam allowance of about 6 millimeters. You don't need to make an opening to turn the fabric over as you will cut a slit in the middle.
  Cut a vertical slit in the center of the base. Make sure you just pass by a layer of fabric and not through both layers. Make the slit exactly in the middle. It only needs to be a few centimeters long.
 - Consider cutting the rounded corners of the sanitary napkin a few times. The sanitary napkin will bulge less in this way.
 Turn the fabric over using the slit so that the right side is on the outside. Use your fingers to push the corners of the sanitary napkin through the slit you cut in the fabric. If you can't get the corners through the opening, push them through with a pencil or knitting needle.
 - Press the base of the sanitary napkin with a hot iron set on the cotton setting.
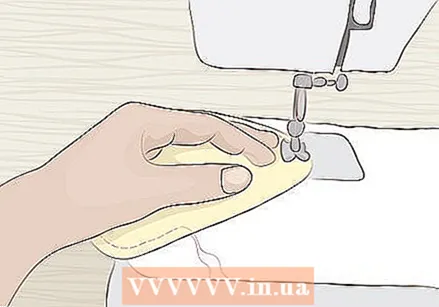
 Sew around the top of the base. You can use yarn in the same color or a contrasting color. You can even use a zigzag stitch to make the sanitary napkin look more interesting. Backstitch at the beginning and end and trim the excess threads as close to the fabric as possible.
Part 2 of 3: Making the pad liner
 Make a template from another piece of cardboard. Start with a vertical rectangle with a rounded top and bottom. Make the rectangle about 20 inches high and 6.5 inches wide. Cut out the template when you are done.
  Use the template to measure the pieces for the lining. You will need 3 or 4 pieces of soft towel fabric. Use the template to pull out more pieces of flannel. This time add an extra 6 millimeter seam allowance. You make the lining from the towel fabric. Make a cover for the lining from the flannel.
 - Make the flannel the same size as the base of the sanitary napkin.
 Stack the pieces of towel fabric together and sew them together. Use a seam allowance of 3 to 6 millimeters. Sew along the edge with a zigzag stitch. Set the pile aside when you are done.
 - Don't use the two pieces of flannel just yet.
- It doesn't matter what color of yarn you use. You will put the stack in the cover for the lining.
 Sew the two pieces of flannel together to make the cover for the lining. Pin the two pieces of flannel together right side in. Sew along the edge using a 6 millimeter seam allowance. You don't need to make an opening to turn the fabric over as you will cut a slit in the middle.
  Cut a vertical slit in the cover for the lining and turn the fabric over. Use the same technique that you used for the pad base. Now make the slit 4 inches long. This gives you enough space to put the towel fabric for the lining in the cover.
 - Consider cutting the rounded corners of the sanitary napkin a few times. The sanitary napkin will bulge less in this way.
 Tuck the lining into the flannel cover. Simply tuck the liner through the slit in the flannel cover. Smooth out any bumps and creases.
Part 3 of 3: Putting it all together
 Pin the liner to the top of the base. Rotate the base so that the longer side is vertical and the slit is up. Lay the liner on the base with the slit down. Make sure everything is centered and vertical. Pin everything together when you're done.
  Sew around the liner to secure it to the base. Sew along the edge of the lining, using a 3 to 6 millimeter seam allowance. Backstitch at the beginning and end and trim the excess threads as close to the fabric as possible. Remove the pins from the fabric while sewing.
 - You can use yarn in the same color or a contrasting color.
 Sew the lining back on about 1 inch (1.5 cm) from the edge. Make sure you are sewing about an inch from the first seam, not measuring from the edge. Use the same color of yarn as you just did. This will make the lining more firmly attached to the base and prevent the fabric from bulging.
  Attach buttons or pieces of Velcro to the wings. You can sew regular buttons to the fabric or choose snaps that you need to fasten with pliers. You can also opt for Velcro. However, do not use self-adhesive Velcro. This is easy to apply but will not last long and will eventually come off.
 - You attach the wings to the outside of your underpants, so keep that in mind.
 Use the sanitary napkin. Place the base of the sanitary napkin flannel side down in the crotch of your underpants. Make sure the liner is facing up. Fold the wings under the crotch of your underpants and fasten the buttons. Depending on how much blood you are losing, the sanitary napkin should last 2 to 4 hours.
  Wash the sanitary napkin properly. Keep the pads in a dry bag until you get home. Then rinse it immediately with cold water and wash it with hot water and detergent. Rinse the sanitary napkin again with cold water and dry it in the dryer.
Tips
- Wash all fabrics beforehand so that your pads don't shrink in the wash.
- Make sure to use 100% cotton fabric. Synthetics don't breathe well and can cause you to sweat and smell.
- Consider spending a little more money on good quality fabric. This feels better and lasts longer than cheap fabric.
- Instead of creating your own template, you can also look up one on the internet and print it out.
- Adjust the template to your own needs and the desired size.
- Fold the top and bottom corners of the sanitary napkin over first, then fold the wings over. You now have a small package that you can discreetly put in your bag.
- Do not use perfumed detergent to wash the pads, as this can cause skin irritation.
Necessities
- Cotton flannel
- Cotton towel fabric
- Fabric scissors
- Straight pins
- Sewing machine
- Yarn
- Cardboard
- Pen


