
Content
- To step
- Part 1 of 3: Choosing your suit design
- Part 2 of 3: Cutting the pattern and fabric
- Part 3 of 3: Sew the pieces together
- Tips
Sewing your own suit is a great way to make something luxurious for a lot less than it would cost you to buy! A suit usually has a blazer or suit jacket and trousers. A 3-piece suit also includes a waistcoat. It is best to use a pattern to make a suit, as sewing a well-fitting suit requires precision. Choose a suit and fabric pattern that you like, then follow the pattern's instructions on how to put it all together.
To step
Part 1 of 3: Choosing your suit design
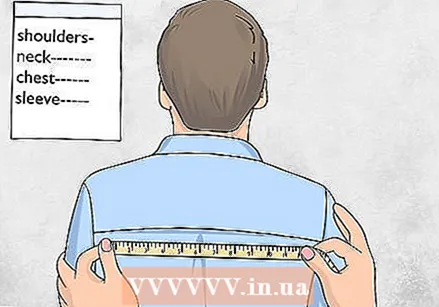 Record your measurements to determine which size suit to make. Taking measurements ensures that you choose the correct size pattern for your suit, so do this first. Use a soft tape measure to measure around the shoulders, neck, chest and waist, and the length of the jacket, sleeves and the inseam of the pants. Write all of your measurements on a piece of paper so that you can look at them when viewing patterns.
 - To get the length of the jacket, have the person stand with their arms at their sides. Measure from the bottom of the neck to the knuckle of his thumb.
Tip: When sewing a suit for yourself, ask a friend to measure you. It can be difficult to get accurate readings from yourself.
 Choose the style of the suit you want to make. There are several different styles of suits to choose from. Think about when and where you plan to wear the suit. Some types of suits you can choose from are:
 - 2-button blazer to wear every day, such as to work and important meetings.
- Tuxedos for formal occasions, such as black-tie occasions and weddings.
- Three-piece suit, including a waistcoat by the jacket and trousers. This can be ideal for a winter suit.
- Lightweight summer suit to keep you cool during the warmer months.
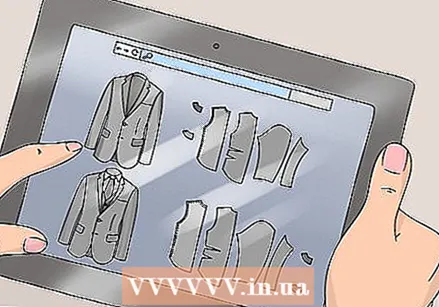 Buy a cartridge for the suit. You must use a suit because when making a suit, it is necessary to accurately cut out fabric and join those pieces together in a certain way to make a well-cut suit. Choose a suit pattern in your desired style and size. You can find suit patterns at a craft, fabric, or sewing supply store, or online.
 - If you don't want to buy a pattern, there are free suit patterns that you can download and print. Just search the internet for the kind of suit pattern you want.
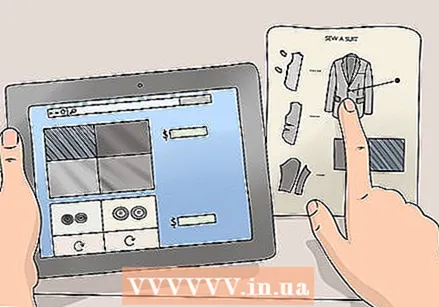 Choose fabric and additional materials for the suit. Check the cover of your pattern to determine which type of fabric to buy and how much of it you will need. The shell also announces the additional materials you will need, such as buttons, zippers, thread, etc. Choose a heavy fabric to make your jacket, unless you are making a summer suit, then use a medium weight fabric.
 - Heavy fabrics for jackets include wool, tweed, velvet and corduroy.
- Medium weight fabrics include linen and cotton.
Part 2 of 3: Cutting the pattern and fabric
 Read the instructions for the sewing pattern carefully. Before you start, read all the instructions that come with your cartridge. Reading the instructions will give you a preview of the project, make sure you have all the materials you need, and notice important information about the pattern, such as what the symbols on the pattern mean.
 - If there is anything unclear about the pattern, ask someone who has experience sewing suits to explain it to you. For example, you can ask a friend or family member for help or post the question on an online tailoring forum.
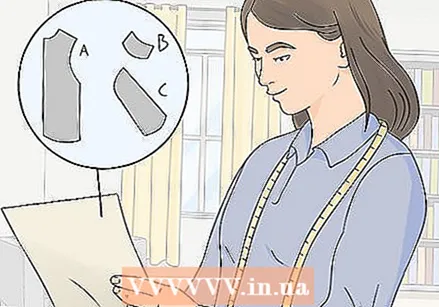
 Cut out the pieces of the suit pattern to the desired size. Check the pattern's instructions to identify the pieces of pattern you will need. Before cutting out the pieces of the pattern, draw along the desired dimension lines with a red pencil or marker. This will help ensure that you cut the pieces to the correct size. Then use sharp scissors to cut along the lines.
 - Different groups of pattern pieces for a design are usually indicated with letters, such as A, B, and C. For example, if you are making a two-piece suit, you only need the pieces for the jacket and pants, but if you are making a three-piece suit you will have the pieces for the jacket, pants and waistcoat. The two-piece suit can be marked with an A, while the pieces of the three-piece suit can have an A and B or just a B.
- Cut slowly and carefully to avoid jagged edges or over your desired dimensions.
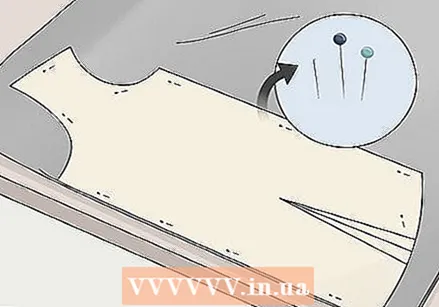 Pin the paper pattern pieces to your fabric as indicated by your pattern. Once you've cut out the pattern, pin the pieces to your fabric following the directions on the pattern. You will probably need 2 of some pieces, so fold the fabric first and then pin the pieces to the folded fabric.
 - Make sure to follow any special instructions that come with the pattern on how to pin the pieces onto the pattern. For example, you may need to pin some pieces along a folded edge and avoid cutting that edge off the fabric. This is usually on the back of jackets and waistcoats as they require larger pieces of fabric.
Tip: If your material is delicate, put weights on the pattern pieces. Do not push pins through the fabric as it may be damaged.
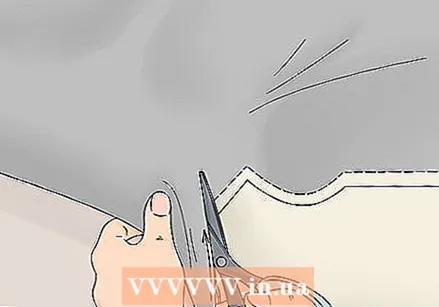 Cut along the edges of the paper pattern pieces. Once the paper pattern pieces are attached to the fabric, use sharp scissors to cut the fabric. Follow the edges of the paper pattern pieces as you cut the fabric. Go slowly so as not to create sharp edges or go over the edges of the paper.
 - Make sure to cut out any indentations in the fabric that are indicated along the edges of the paper pattern pieces. These are important for putting your pieces together properly when you sew them together.
- Do not immediately remove the paper pattern pieces from the pieces you are cutting out. Keep them in place so you can tell the different pieces apart.
Part 3 of 3: Sew the pieces together
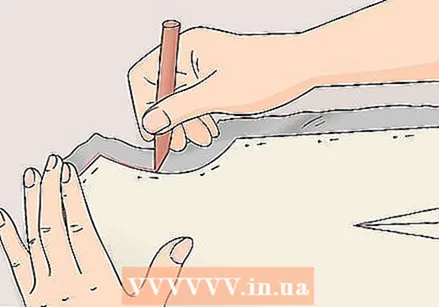 Transfer the pattern markers to your pieces of fabric. Once you have finished cutting out the pattern pieces, see if there are any special marks on the pattern that you should transfer to the fabric before sewing. These include buttonhole markers or arrows to indicate pleats. When you see these special symbols on the inside of a pattern piece, use a piece of chalk or a marker to mark them on the pieces of fabric.
 - For example, the front pieces of the jacket will likely have markings for buttonhole and button placement that you will need to mark on the front pieces.
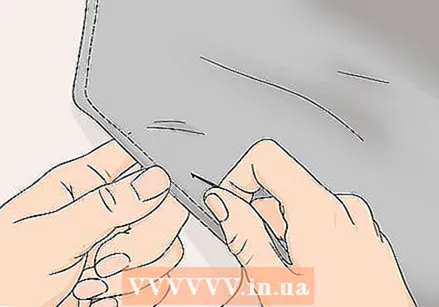
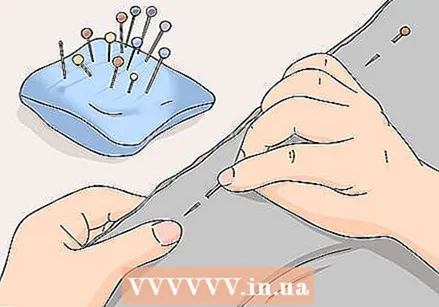 Pin the pieces together according to the pattern's instructions. Before you sew the pieces together, check the instructions on how to pin certain pieces together. In most cases, you will pin the pieces right sides together so that the raw edges of the fabric will be hidden on the inside of the suit. Insert the pins perpendicular to the edges of the fabric where indicated by your sewing pattern. Place 1 pin every 5-7.5 cm along the edges of the pieces.
 - For example, if you are attaching one of the front pieces of the jacket to the back, you will need to pin the pieces starting at the edges of the 2 pieces that go under the armpit and all the way to the bottom of the 2 pieces.
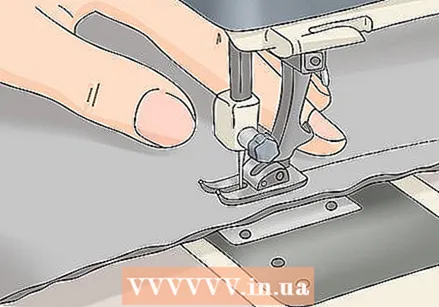 Sew a straight stitch along the pinned edges. Once you have pinned one or more pieces together, take them to your sewing machine. Set the machine for straight stitches, which is setting number 1 on most sewing machines. Then lift the presser foot on the machine and place the fabric underneath. Lower the presser foot and sew a straight stitch along the edge to join the fabrics.
 - Make sure to remove the pins while sewing. Do not sew over the pins or you will damage your sewing machine.
- Repeat to join all other pieces of the suit together.
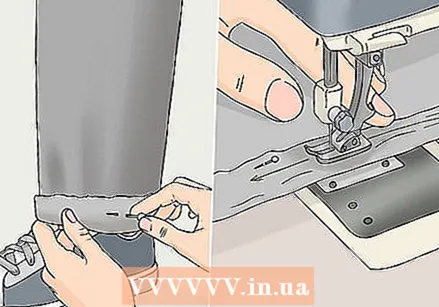 Fit and hem the pants and jacket sleeves. When you are done sewing all the pieces of the suit together, you will need to hem some pieces of the suit. Before doing this, the person who will be wearing the suit should adjust it as is. Then you fold and pin the pants and the sleeves of the jacket over to the desired point before hemming them. Sew a straight stitch about 1/2 inch from the raw edges of the fabric to give the jacket sleeves and trouser legs a seam.
 Tip: If you are making a suit for yourself, have a friend help you make the suit fit while you are wearing it.
 Add buttons and zippers where indicated on the pattern. Once you have finished sewing the jacket, pants and waistcoat together (optional), attach the buttons to the jacket and waistcoat (optional) and zip the pants. Follow the directions on your pattern about where to place those things. You can sew buttons on by hand with a sewing machine, but you will need a sewing machine for the zipper.
 - If you've transferred markers from the paper pattern pieces to the fabric, these will serve as helpful guidelines for where to make buttonholes and sew buttons on.
 Combine the suit with a shirt and tie to complete the look. Once the jacket and pants are complete, the suit is ready to be worn. Choose a shirt and tie to wear with the suit. Shirts and ties come in many colors and prints. Choose a shirt and tie that will complement the suit color.
 - You can buy a tie to wear with the suit or make your own if you want.
Tips
- Making a suit is difficult and requires a lot of practice to become skilled. Don't give up if your first pack doesn't look like you hoped. Just keep practicing!


