Author:
Roger Morrison
Date Of Creation:
20 September 2021
Update Date:
21 June 2024
Content
- To step
- Method 1 of 3: Work according to a basic design
- Method 2 of 3: Using six different colors
- Method 3 of 3: Make knotted bracelets
- Tips
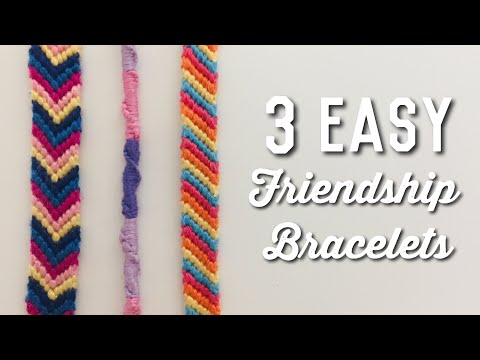
Making bracelets with strings can be a fun way to spend the day. There are several designs and knots you can use in making these types of bracelets. The technique can be tricky, especially if you are a beginner. However, if you read the instructions carefully and go through the steps slowly, you can also make a beautiful bracelet.
To step
Method 1 of 3: Work according to a basic design
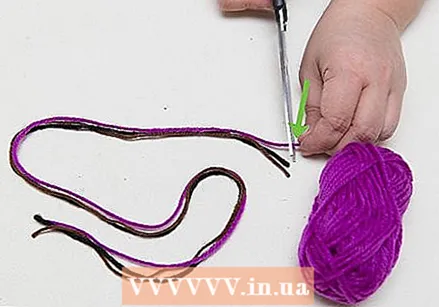 Cut three equally sized strings. If you want to make a very simple design, you can use three strings. In this example we will use violet, pink and blue. You may want to make a more elaborate design later, but this pattern will teach you some of the basics of knotting.
 - Cut the strings to the length you want. Keep in mind that since you will be knotting with this technique, the original length of your strings will be shorter than the end result.
- To start, lay your strings next to each other on a flat surface.
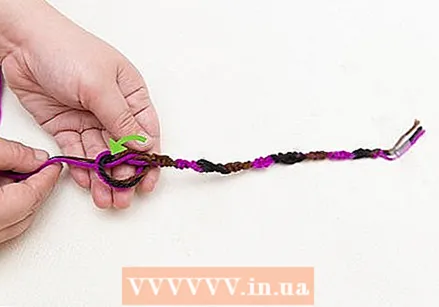
 Tie a knot at the end of the strings. To start, you need to tie a knot in the end of your strings. These connect the strings together. Tie the knot about two inches from the ends of the strings.
 - Later in the technique you will use specialized knots. However, this is not necessary at this point. Just use a basic knot, such as one that you would use to lace up your shoes. Make sure the knot is tight enough. If the knot comes loose, your bracelet may come loose.
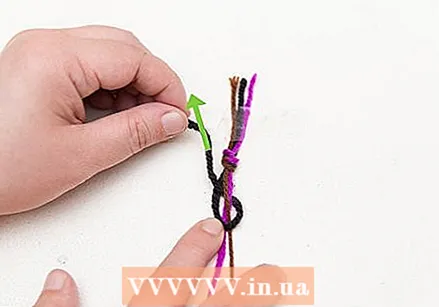
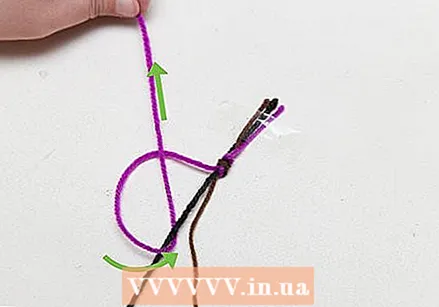 Make a forward knot with the outermost string on the left. Take the outer string on the left. In our example, this is the purple string. Use this to make a "forward" knot.
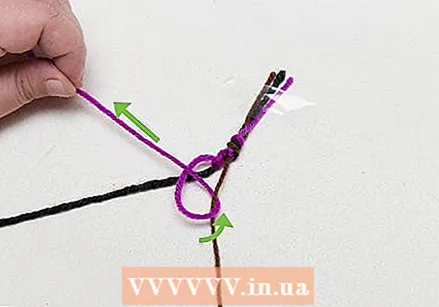
 - To make a forward knot, take the purple string and bend it over the pink string at an angle of about 90 degrees. This should look something like the number four.
- Next, loop the purple string underneath the pink string, working your way up towards the knot that connects all the strings. Pull the loop upwards. Repeat this process. It is very important that you make a forward knot twice. If you don't, your bracelet will have too much slack.
 Make a forward knot around the next string. Keep working with the purple string. Use this string to make a forward knot around the last string in the row. In our example, this is the blue string. Follow the same steps you went through before, not forgetting to tie a double knot and pull the string tight.
  Repeat the front knots with the pink string. If you made a row with the purple string, repeat these steps with the pink string. The pink string will now become the outermost layer of your bracelet, followed by the blue string. Make a forward knot, looping the pink string over the blue string. Then make a forward knot by making a loop with the pink string over the purple string.
 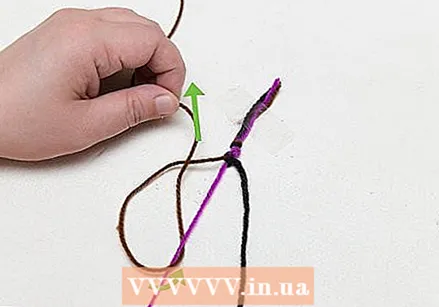 Make the forward knots again with the blue string. The blue string will now have taken its place as on the outside. Make a forward knot around the purple string. Then tie a forward knot around the pink string.
 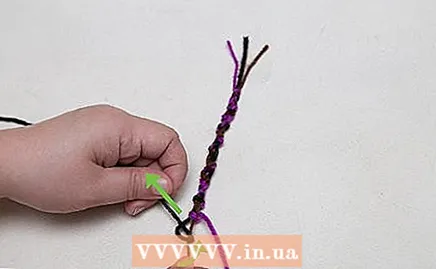 Repeat. Now the purple string will be the outermost string again. Repeat these steps, making forward knots with the purple string, followed by the pink string, followed by the blue string.
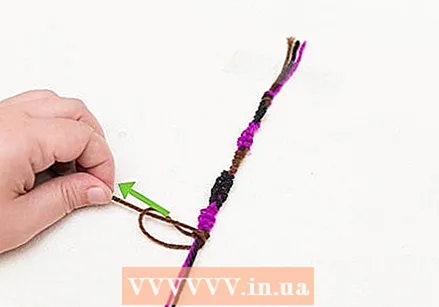
 - You can keep knotting until your bracelet is as long as you want. This depends on what you want, the size of your wrist and other factors.
- Too short a bracelet may not fit. However, a bracelet that is too long can slip off. Take breaks from time to time while working to wrap what you already have around your wrist. Stop when you reach a point where the bracelet can be easily put on and taken off, while remaining in place.
 Tie the ends in place when you are done. When you've reached the desired length, tie the remaining loose strings together. As with the knot you made in the beginning, use a regular basic knot to do this. Then pull the remaining strings through the loop on the other side of the bracelet. Tie the strings around the loop and make a circular bracelet.
Method 2 of 3: Using six different colors
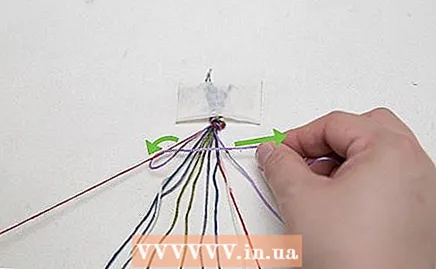
 Gather the necessary supplies. With six strings you can make a simple striped bracelet. You use some of the methods explained above for the basic bracelet, to make a more elaborate design. To start, gather your things.
 - You will need a safety pin or tape to fasten the strings you are working.
- You also need scissors to cut the strings.
- You will need embroidery floss, which you can purchase at a craft store. Choose six different colors you like.
 Cut the embroidery floss to size. Once you have your supplies together, you can get to work. First you need to cut the embroidery floss.
 - Cut 12 strings in your different colors. The strings should be about 2 feet each. Make sure you have two sets of each of the six colors you chose.
- Combine the strings by tying a knot at the end of the strings, leaving at least 8 cm of slack. You will need this slack later when you finish the bracelet.
- In order to work with your strings, you need to tie them. There are two ways to do this. You can stick the button on a flat surface such as a table. You can also attach the button to a pillow with a safety pin.
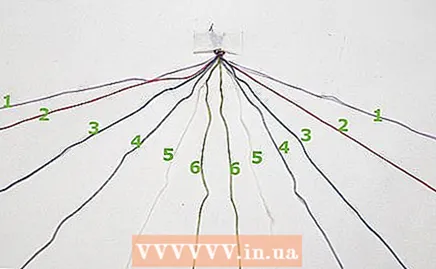 Arrange the strands in a mirror image pattern. Now you have to arrange the strings. You have to do this in a way that creates a mirror image. This will help create the dash design.
 - Separate your strings, placing six strands of the different colors on each side. Then move them so that the colors mirror each other.
- If this is confusing, look at this example. On your left, from the outer string to the inner string, you have red, then orange, lavender, green, yellow, and blue. On your right side, the inner string will be blue. Blue is followed by yellow, green, lavender, orange and finally red.
 Start with a forward knot on your left. You start with the outermost string on your left. In the example above, that's the red string. You take the red string and make a forward knot over the second outer color. In our example, the second outer color is orange. If you don't remember how to make a forward knot, see step 3 of method 1.
 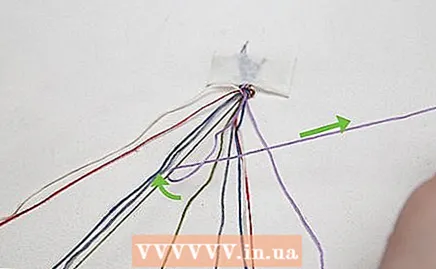 Continue to tie the outer color towards the center. Work inward from the outermost string. Keep tying forward knots over each color until you reach the string in the middle. In our example, this is the blue string. Don't forget to tie twice when making forward knots.
  Repeat this on the right with back knots. When you are done with the left side, you can move to the outermost string on the right. The steps are largely the same. You move the outer color inward towards the middle string. However, you use so-called backward knots instead of forward knots.
 - Again you put the outer string on top of the string next to it. In our example, this means that you place the red string on the right over the orange string on the right.
- Loop the red string under the orange string. This time, move down when you make a loop with the string, away from the knot that holds the strings together. Pull it tight in a knot. As with a forward knot, you knot twice.
- Just like you did on the left, keep moving in with the outer strings. Make two back knots with each color on the right side until you reach the inner string. In our example, this is the blue string.
 Tie a back knot to connect the two middle strings. In the middle you have two strings of the same color. In our example, there are two blue strings in the middle. When you are done tying the left and right sides, tie these center strands together. To do this, use a back knot, as described above.
 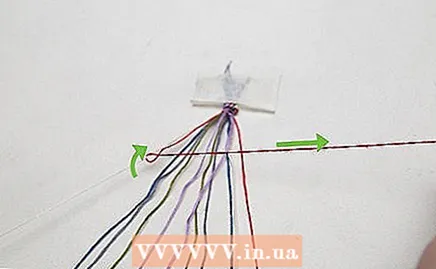 Repeat the process with the next outermost color. After you have tied the first outer color, a new string should emerge as the outer color on each side. In our example, orange would become the new outer color. Repeat the above process with the orange string.
 - Start on the left. Use forward knots, don't forget to knot twice, to tie the orange string with all the other colors.
- On the right side, use the orange string to tie back knots in all other colored strings. Don't forget to tie twice.
- When you reach the center, tie the two inner strands together with a backward knot.
- Repeat these steps until you have tied all the strings together. At the end of the steps you should have a nice simple striped pattern.
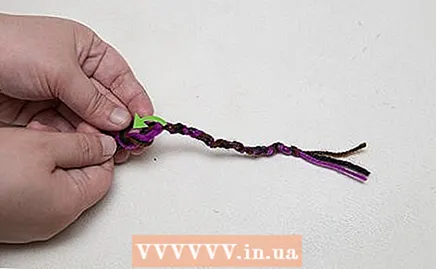
 Braid the last piece of the strand together. When you are done putting all the strings together, tie a tight knot at the end of the bracelet. Braid the remaining strings together. Remove the tape or pin from the other end. Braid these strings together as well. You have made a simple, striped bracelet out of yarn.
Method 3 of 3: Make knotted bracelets
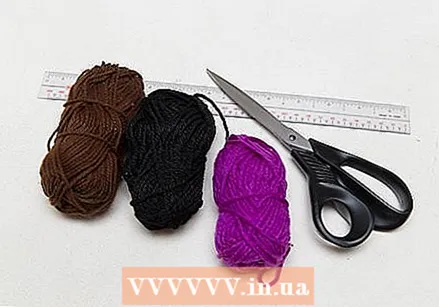 Get the supplies you need. A knotted bracelet can be a fun and simple design to try. To get started, you will need some basic supplies. You will need three different colors of embroidery floss, a safety pin and a pair of scissors.
 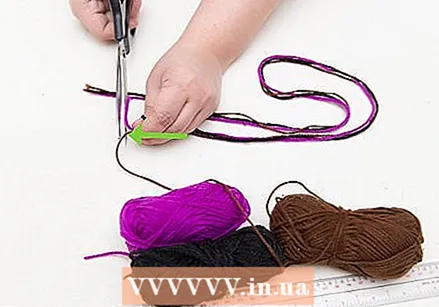 Trim the strings. Once you've gathered your supplies, you can start cutting the strings. Cut a piece of string of each color. Your strings should be quite long. Each string should be 2-3 arm lengths.
 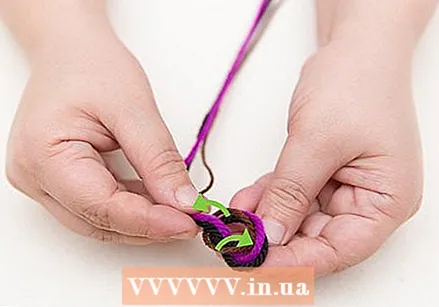 Tie the strings together in a loop. Once the strings are cut, gather the strings and tie them into a loop. These steps can be a bit tricky, so take it slowly and follow the instructions carefully.
 - Gather all your strings together. You can place them next to each other on a long table or on the floor. Find the center of all three strings. Fold all strings in half along the center point.
- Tie the strings towards the end, together in a tight knot, to secure them. This will form a small loop at the end of your strings. Use a basic knot here, as you would use when tying your shoes.
- You use the loop you make when you finish the bracelet. Finally, put the strings through the loop and tie them together. Make sure the loop is big enough to pass three strings through.
- Insert a safety pin through the loop. Secure the loop to a cushion or other sturdy surface. This keeps the strings organized and in place while you work.
 Tie your knots. Once everything is set up, you can start knotting. For this type of bracelet, simply repeat the following steps until the bracelet is as long as you want.
 - Use one hand to collect two strings on the right.
- Use your other hand to make a loop with the string on the left. Place the left string over the two strands on the right and make a round loop with the slack of the left string. It should look something like a flipped "P".
- Slide the left string under the two strings on the right. Slip it through the loop you made and work your way up to the knot at the top.
- Pull the left string and hold the other two strings loosely. It should be possible to move the knot you made up to the knot that connects all the strings.
- Repeat these steps until all of your strings are tied together.
 Change the colors as desired. The knots take over the color of the string on the left. If you want to change the colors, bring the left string back to the other two strings. Then take a string of a different color from the bunch and move it to the left. Repeat the steps for knotting with that string.
 - How and when you change colors depends on your personal preference. If you want a bracelet with a more random design, change the color whenever you feel like it. If you want a more uniform design, follow a particular rule you've set. For example: change color every five buttons.
 Make the last knot. When you reach the end of your bracelet, make a final knot. How long you make your bracelet is up to you. However, make sure you have at least an inch or two of the strings on the end. You just need to make a knot with all three strings, like you did when you made the loop at the beginning.
 - Remove the bracelet from the safety pin. Pull the excess strings through the loop at the top. Then tie a knot with the excess strings to make a full bracelet.
- For this part of the process, you can simply use the basic buttons, as you would use to lace up your shoes.
Tips
- Embroidery thread is a good choice unlike other threads - the pattern comes out better and the twine is less likely to come off.
- You can bring as much embroidery floss as you want to make a braid.
- Read all instructions at least twice before getting started to make sure you understand how to do this.


