Author:
Judy Howell
Date Of Creation:
3 July 2021
Update Date:
1 July 2024
Content
Parallel lines are lines that are equidistant from each other at all points and would never touch, even if they continued indefinitely. You may be given one line and have to draw another line parallel to it, through a certain point. You might be tempted to just take a protractor and draw a line that seems about right, but you can't be sure that that line is actually parallel. With the help of geometry and a compass you can indicate extra points, so that you can be sure that the line you are drawing is actually parallel.
To step
Method 1 of 3: Draw perpendicular lines
 Determine the line and the given point. The point will not be on the given line, but above or below it. Label the line
 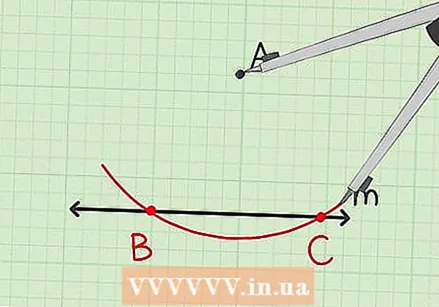 Draw an arc intersecting the given line at two different times. To do this, place the point of the compass on the point
 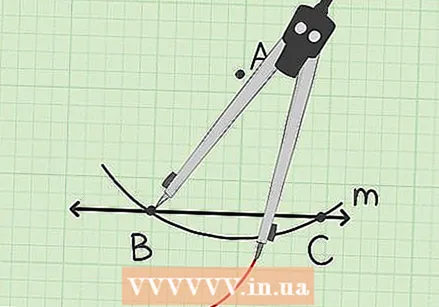 Draw a small arc opposite the given point. To do this, open the compass a little wider. Place the point of the compass on the point
 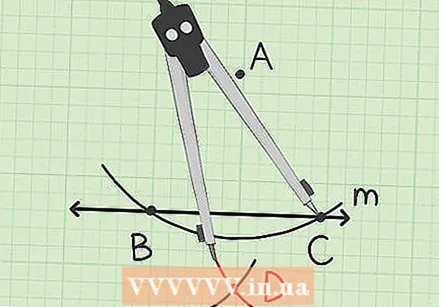 Draw another small arc that intersects the previous section. To do this, keep the caliper set to the same width. Place the point of the compass on the point
 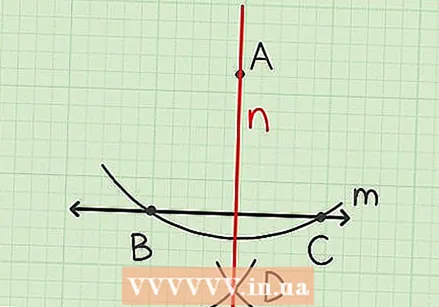 Draw a line connecting the specified point and the intersection of the two small arcs. Label this line
 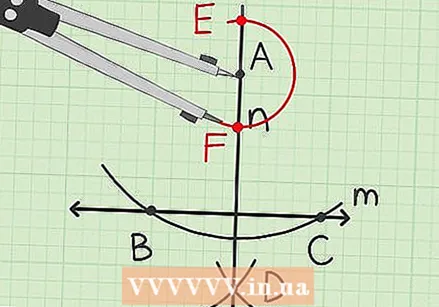 Draw an arc that intersects the line perpendicularly at two different times. To do this, place the point of the compass on point
  Draw a small arc opposite the given point. To do this, widen the compass a bit. Place the point of the compass on point
 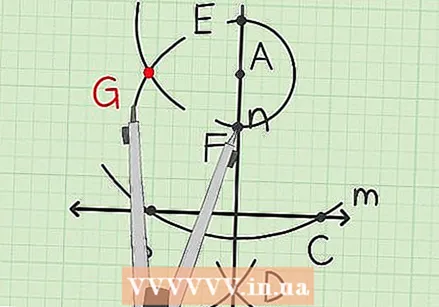 Draw another small arc intersecting the previous one. To do this, the caliper remains set to the same width. Place the point of the compass on point
 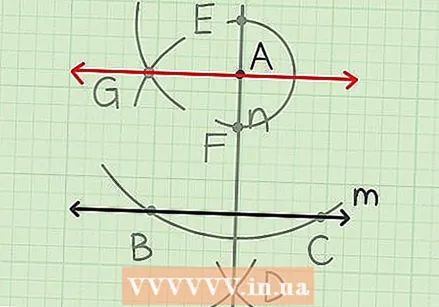 Draw a connecting line between the given point and this new point. This line is perpendicular to the line
  Determine the given line and point. The point will not lie on the given line, and can be above or below it. Think of this point as the vertex of a rhombus. Since opposite sides of a rhombus are parallel, we can create a parallel line by drawing a rhombus.
 - If the line and point are not already labeled, do this now first to make it easier to keep track of the steps.
- For example: you have the line
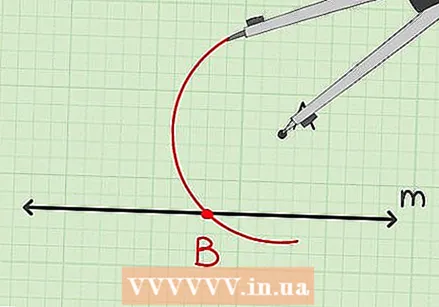 Draw the second vertex of the diamond. You do this by placing the point of the compass on the given point and drawing an arc that intersects the given line at a given point. Leave the width of the compass unchanged.
 - It doesn't matter how wide you set the compass, as long as it can intersect the given line.
- Make sure the arc extends above the given point and crosses the given line.
- For example: place the point of the compass on point
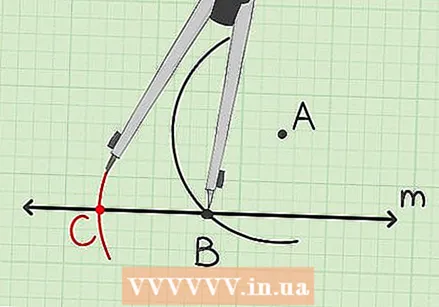 Draw the third vertex of the diamond. Using the same compass width, set the compass tip to the second vertex and draw an arc intersecting the given line at a new point. Do not change the width of the compass.
 - The arc only needs to be long enough to indicate where it intersects the given line.
- For example: set the caliper tip to point
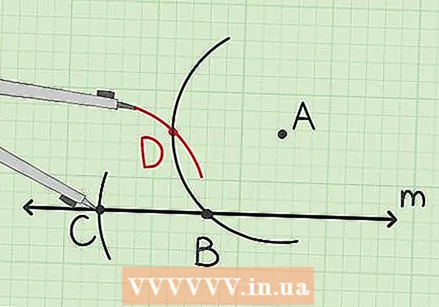 Draw the fourth vertex of the diamond. With the same compass width, place the compass on the third vertex and draw an arc that intersects the first arc you drew (through the second vertex).
 - The arc only needs to be long enough to indicate where it intersects the first arc.
- For example: set the caliper tip to point
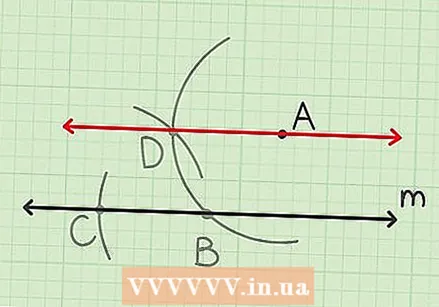 Draw a line through the first and fourth vertex of the diamond. This line passes through the given point and is parallel to the given line since the two lines form two opposite sides of a diamond.
 - For example: a line passing through a point
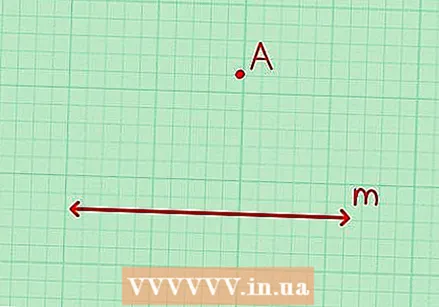
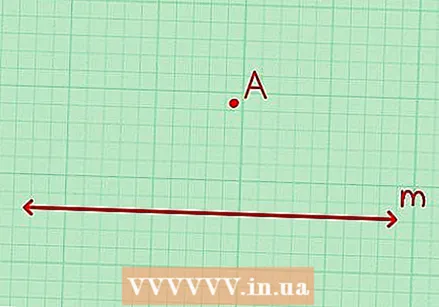 Find the given line and point. The point is not on the given line and can be above or below it.
 - If the line and point are not already labeled, you may want to label them to make the steps easier to keep track of.
- For example: take the line
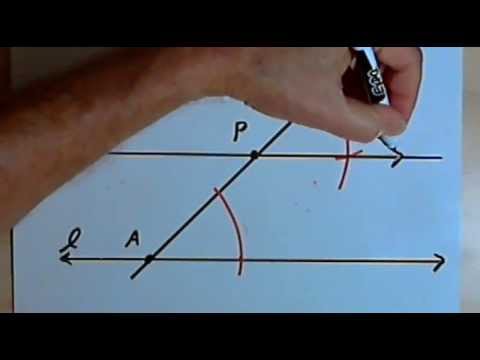
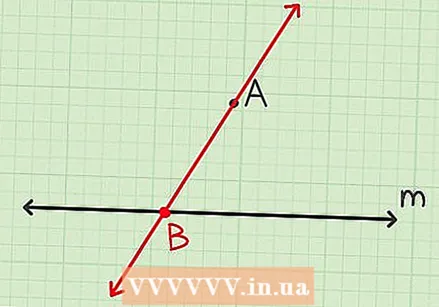 Draw a line through the given point and any point on the given line. This is the transverse line you will use to draw two congruent (corresponding) angles that will help you form the parallel line.
 - Make sure that the transverse extends well beyond the given point.
- For example: you can put a line through the point
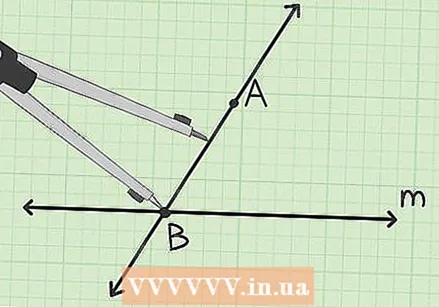 Prepare the compass. Set the caliper to a width that is less than half the line segment you constructed.
 - The exact width of the compass does not matter as long as it is less than half the width of the line segment.
- For example, you should set the width of the compass so that it is less than half the width of the line segment
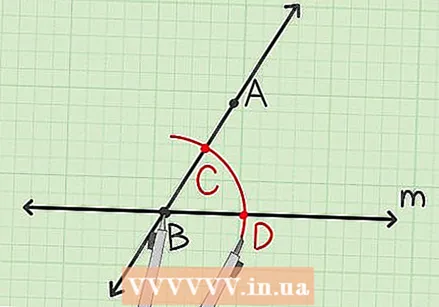 Draw the first corner. Place the point of the compass at the point where the transverse line intersects the given line. Draw an arc intersecting the cross line and the given line. Do not change the width of the compass.
 - For example: set the caliper to point
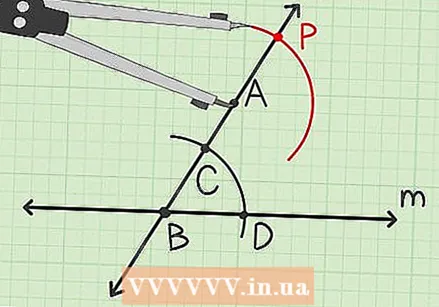 Draw an arc. Use the same compass width and place the point of the compass on the given point. Draw an arc that intersects the cross line above the given point and extends to just below the given point.
 - For example: place the compass on point
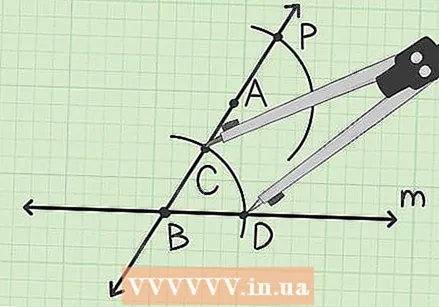 Prepare the compass. Set the width of the compass to the width of the first corner you made.
 - For example, the first corner you made was
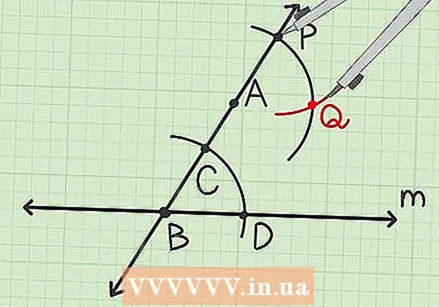 Draw the corresponding angle. Use the width of the first corner to set the point of the compass to the point of the cross line above the given point, and draw an arc that intersects the previously created arc.
 - For example: set the caliper tip to point
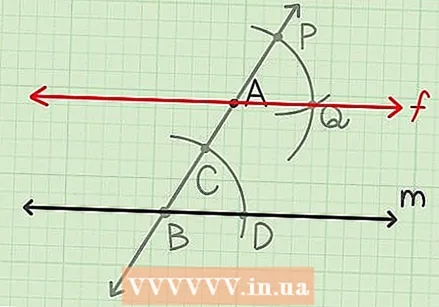 Draw a line through the given point and the point formed by the two intersecting arcs. This line is parallel to the given line through the given point.
 - For example: a line through a point
and a period
creates a line
, which is parallel to the line
.
- For example: a line through a point
- For example: set the caliper tip to point
- For example, the first corner you made was
- For example: place the compass on point
- For example: set the caliper to point
- For example: a line passing through a point
Necessities
- Pen or pencil
- Geo triangle or ruler
- Compass


