Author:
Mark Sanchez
Date Of Creation:
3 January 2021
Update Date:
27 June 2024

Content
- Steps
- Method 1 of 2: Embossing the Leather with the Press Method
- Method 2 of 2: Stamping the leather
- What do you need
When working with leather, special tools are used to apply a pattern to it. You can create an embossed pattern by stamping or embossing it with a metal mold onto unpolished leather. If you don't have leather tools, choose the pressing method, and if you want to invest in a leather mockup kit, you should choose the second method.
Steps
Method 1 of 2: Embossing the Leather with the Press Method
 1 Buy unpolished leather from the store. You will not be able to emboss leather on pre-finished clothing or accessories.
  2 Find a sturdy metal mold or metal stamp for leather. You can use a mascot or buy a leather stamp with a pattern of your choice. You can order stamps from sellers on Etsy.
 - If you are using a metal talisman, make sure it has sharp edges. This will make your skin pattern more visible.
 3 Smooth out the unpolished leather on the work table. The front should be on top. It should be near the edge of the table to which you can attach a sturdy clamping bracket.
  4 Dampen the sponge. It shouldn't be too wet, so wring it out a few times.
  5 Clean the skin with a sponge, moisturizing it with an even layer. Slide the piece of leather to fit under the brace.
  6 Place the metal stamp on the leather where you want the embossed pattern.
 7 Place the upper leg of the clamp in the center of the metal object. Tighten the bracket as much as possible.
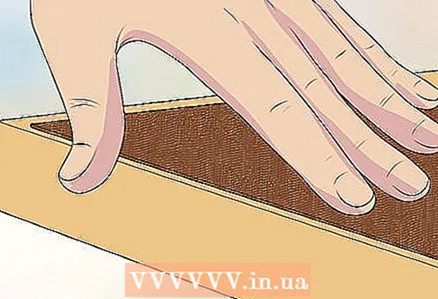
 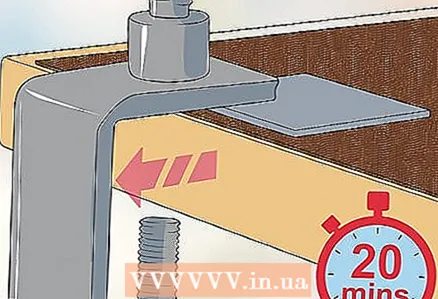 8 Remove the bracket after 20 minutes. Cover the leather with varnish if you want to improve the longevity of the pattern and the appearance of the leather.
 - The coating should be applied to the leather after the embossing is finished. But this must be done before you sew on this piece of leather or make an accessory out of it.
Method 2 of 2: Stamping the leather
 1 Buy a leather stamping kit from a store or online. Buy 3-D dies with a cylinder that can be inserted into any of the flat dies. You can order custom stamps online or start with alphabet stamps.
 - Make sure the metal cylinders fit your dies. The cylinders are the parts with which you press the stamp shape into the leather.
 2 Place a piece of untreated leather on a flat work surface. The front side should be on top. Decide where you want to make the pattern.
  3 Wipe the leather surface with a slightly damp sponge. If the water changes the color of your skin a lot, wait until it dries a little.
  4 Place a metal stamp on the leather where you want to place the pattern.
 5 Insert a metal cylinder into the center of the stamp. Hold it firmly with one hand.
  6 Hit the stamp several times with a wooden mallet. Be careful not to move the stamp.You can then lift the stamp, see if the embossing is deep enough, and repeat the process if necessary.
 - It takes a little practice to figure out how hard to hit with the hammer.
 7 Repeat these steps with other stamps if you want to make a more complex pattern. After embossing is complete, cover the leather with varnish before using it in your creations.
 - You can also apply leather paint to the embossed pattern to give it more flair. Any alcohol-based paint will work, apply it to the leather before varnishing it.
What do you need
- Metal form
- Sponge
- Water
- Clip
- Wooden mallet
- Stamps for leather
- Paint for leather
- Leather lacquer


