Author:
Joan Hall
Date Of Creation:
26 July 2021
Update Date:
16 June 2024

Content
A filling is a dental material that is used to fill a cavity in a tooth after caries has been drilled out. At your dentist's office, you may be asked to have a filling if you have tooth decay. You can also ask for a tooth filling yourself if you know for sure that you have a problem with it. To put a filling, the dentist will perform several simple procedures, but if you urgently need to heal your tooth, and you do not have the opportunity to go to the doctor right now, read the first section to reduce possible losses.
Steps
Part 1 of 2: Self-healing
 1 Take a pain reliever to relieve discomfort. Cavities in teeth often cause pain. This is because they are usually deep. Buy over-the-counter pain relievers to relieve pain. They can be taken as needed in appropriate doses, avoiding overdose.
 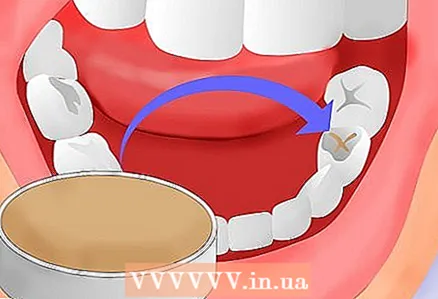 2 Apply dentifrice to sharp edges. The edges of the cavities are not always smooth - they can have jags and irregularities, and this often leads to damage to the soft tissues in the mouth. There is a simple workaround for this problem:
 - Gently run your tongue over your teeth, paying attention to the sharp edges.
- Roll up a small piece of wax and place it where it feels sharp.
- Check with your tongue to see if there are any uncovered edges. If any, attach the wax to them. Repeat as needed. Dental wax is a temporary solution because it will fall out over time, but it will help prevent incisions in your cheek until your dentist appointment.
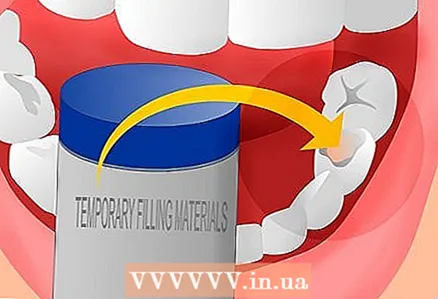 3 Place a temporary filling. Such fillings are used when the patient does not have the opportunity to immediately place a permanent filling, since an unhealed cavity usually causes discomfort. You can close the cavity with a temporary filling by purchasing it at the pharmacy. You need to put it like this:
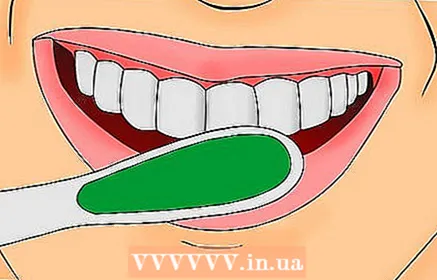
 - Brush your tooth. Remove plaque and food debris.
- Wipe the tooth with a cotton pad.
- Take the applicator that comes with the filling and place the filling material in the cavity.
- Bite down on the filling to make sure it does not protrude beyond the edges.
- Remove excess material from the edges of the tooth.
- Let the filling harden. Do not eat, drink, or press on the tooth for 30 minutes.
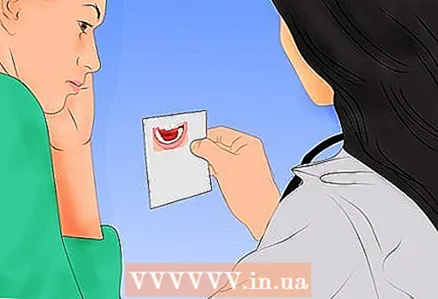 4 See your doctor. The tips above will help you temporarily improve your situation while you wait for your doctor's appointment. You should see your dentist even if you do not feel pain, if the temporary filling is holding and if the cavity has no sharp edges. The dentist will be able to replace temporary fillings with permanent ones (they are more reliable). In addition, a doctor's examination will help prevent the development of serious dental problems.
Part 2 of 2: Seeing the Dentist
At the appointment, the doctor will perform a series of procedures that will allow the filling to be securely fixed. These procedures include:
 1 Identification of caries. The doctor will examine all of the teeth to find out where the caries is. If you have multiple cavities on one side, he will offer you to heal them all at once. You will be told how many caries areas you have and how deep they are. Depending on the condition of the tooth, the doctor will choose one of several options for filling materials.
 - If it is difficult to determine the degree of caries, the doctor can take an x-ray or use a coloring material to know exactly what he needs to be treated. Both are completely painless and safe procedures. For diagnostics, a laser can also be used, since caries does not reflect light in the same way as healthy enamel (laser examination is also safe and painless).
 2 Anesthesia. First, the doctor will apply an anesthetic gel to the gum and then inject it into the area. The gel will relieve the discomfort from the injection, and the anesthesia will make the tooth and the adjacent gum insensitive so that you do not get painful during the treatment.
  3 Protection of adjacent tissues. The doctor will wait for the anesthesia to work and cover his mouth with a special napkin. The napkin will have a small hole that the dentist will place over the aching tooth. This will prevent filling material and dust from drilling the tooth from getting into your mouth or throat and will help the doctor better see the tooth to be treated.
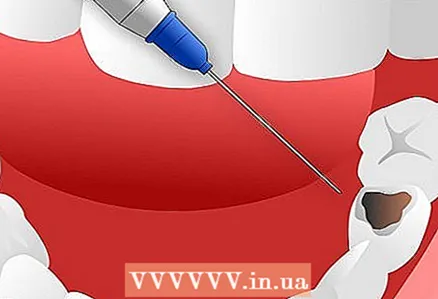
  4 Removal of temporary filling. The dentist will use a bur to remove the temporary filling or any remnants of it. It will also drill out the damaged area and debris. Only clean and healthy areas of the tooth should remain in the mouth.
  5 Tooth preparation. After the tooth is cleaned, the dentist will use strengthening materials to hold the filling in place. The following attachments can be used:
 - Pin. It is a vertical anchorage that reinforces the filling inside the tooth.
- Top mounts. They are put on from above and hold the seal on both sides.
- Side mounts. They are located at the edges of the cavity and do not allow the filling to collapse.
- A special material that is laid on the bottom of the cavity.
- Other materials and fixtures.
- Before placing the filling, the doctor will make sure that there are no cavities or sharp edges inside the cavity. He will also check if the walls of the tooth are strong enough to hold the filling.
- Filling. After the preparation of the tooth and the selection of the required material, the tooth is filled with a filling substance. Remember that each material has its own characteristics of application and fixing.
 6 Amalgam. It is one of the oldest filling materials and is most often chosen for its good physical properties. There are special rules that a dentist must follow when working with this material. To prevent the filling from falling out, it is necessary to drill a square hole in the tooth, which means that, most likely, some part of the healthy tooth will be removed.
  7 Composite material. This material, which has the same color as teeth, is very popular for its aesthetic value. It is applied in several layers, and each of the layers is dried under a special lamp. A cavity of any shape is suitable for using this material.
 - After removing caries, the cavity is cleaned and the composite material is immersed in it. This material is ideal for filling anterior teeth. In addition, there is a special reinforced version for the posterior chewing teeth.
- Gold and ceramics. These materials are very durable. Gold is expensive, and this is perhaps the only drawback of this material. After the cavity is formed, the doctor takes a picture of the tooth and sends it to the laboratory. There they make a gold or ceramic insert (it does not go beyond the tooth) or a crown (it covers the tooth from above) and gives it to the doctor. The resulting structure is then attached to the tooth with a cementitious substance.
- Ion-containing polymer. Fillings made from this material can consist of different substances and have different consistencies. Depending on the method of application, liquid and thick polymers are produced. If this substance is used for filling a tooth, it is better to choose a thick consistency, as this will increase the strength of the filling.
 8 Checking the form and convenience. Before leaving the patient home, the dentist will check whether he is comfortable with the filling and whether it has the correct shape. This will restore the functionality of the tooth.
 - To test usability:
- The patient is offered to bite a special paper. It is painted in a special color, thanks to which it becomes clear to the doctor that in such places it is necessary to cut down the excess.
- The patient is asked to bite a tooth so that he can assess whether he is comfortable. Since the tooth is surrounded by many nerve endings, the patient will immediately notice any unusual sensations.
- To check the form:
- The doctor runs a firm instrument over the filling to find ridges and sharp edges. If he succeeds, the excess is cut down.
- The doctor examines the curves in the filling. They should follow the natural shape of the tooth, as this will allow food and liquid to drain off while chewing and the patient to chew normally.
- To test usability:
 9 Care. The doctor will ask you not to eat anything for an hour. If you are thirsty, drink plain water after half an hour. If the color of your filling matches the color of your tooth, remember that colored drinks will color the filling, so it is worth waiting more than an hour before drinking dark or bright drinks for the filling to solidify completely. In addition, if the filling is disturbed before it hardens, it can lose its strength. To make the filling last long:
 - Brush your teeth with fluoride toothpaste regularly.
- Keep track of your sugar intake.
- Eat solid foods with caution.
- Monitor your oral hygiene.
Tips
- If tooth decay is not treated in time, it can lead to toothache, problems with chewing and jaw, and abscess. Bacteria that live in carious areas of a tooth can penetrate deeper layers, causing irreversible damage.


