Author:
Eric Farmer
Date Of Creation:
12 March 2021
Update Date:
25 June 2024

Content
- Steps
- Part 1 of 2: Preparing your home for painting
- Part 2 of 2: Painting the house
- What do you need
- Tips
- Warnings
Painting your home isn't just about creating a proper exterior. Correctly executed painting work will allow you to protect your home from the harmful effects of wind, water and other harmful weather conditions. In addition to the time and money invested in your home, you will need to get the job done carefully using the finest materials. Thanks to this, you will extend the period of time after which the house will need to be painted again. Although you have a long job ahead of you, go over the tips below on how to paint your home. Just start at Step 1.
Steps
Part 1 of 2: Preparing your home for painting
 1 Pick the right time of year. It is imperative to consider the time of year when you intend to paint your home, as very cold (below 4 degrees Celsius) or very hot conditions are unacceptable when painting.
 - Therefore, the best time to paint your home is late spring or early autumn. You should also check the weather forecast so that rain doesn't ruin your plans.
 2 Clean the surface of your home. With any luck, the only preparation for painting will be cleaning the surface of the house. Use a hose to scrub the dirt off the walls, then use a wire brush (also use warm, soapy water) to brush over the surface of the house.
 - Alternatively, use a washer to remove dirt and old paint. Just be careful not to set the jet too strong so as not to damage the surface of the house.
- Remember to wash the house from top to bottom and give the surface enough time to dry before starting painting.
 3 Remove old paint. If old, peeling paint remains on the house, you need to remove it from the surface before proceeding to painting. You need to remove any lagging, bubbly, or flaky pieces of paint.
 - Removing the old paint will allow the new paint to stick fairly strongly to the surface of the house.
- Use a wire brush or putty knife to scrape off old paint from the surface of the house, then use a sander (or sandpaper wrapped around a block of wood) to smooth out any unevenness.
- If there are large chunks of old paint left on the surface of the house, you will need a paint stripper to melt it and remove it from the wall.
 4 Make necessary repairs. Before you start painting, you need to inspect the house and check for any damage, if necessary, repair. This may sound daunting, but it will give your home a proper look after painting.
 - Walk around the house and look for any splits, rust, mildew, or protruding nails. Look not only at the surface of the wall, but also under the cornice and the space around the foundation. Look for areas around windows and doors where old sealant or putty may accumulate and may need replacing.
- Rust and mold must be removed. Cracked siding needs to be poured and sanded, places where caulking material is missing need to be refilled, cracked shingles need to be replaced and leaking downpipes repaired.
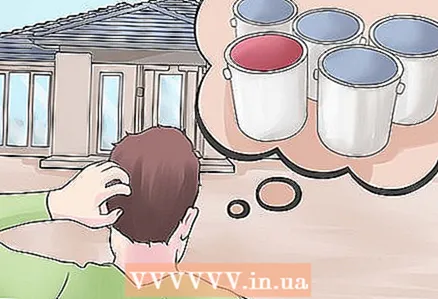 5 Find out how much paint you need. It's a good idea to think about how much paint you need. before start of work. This will avoid a situation where the paint runs out and half of the house is not painted yet.
 - To calculate how much paint you need, find out what the perimeter of the house and its height (excluding the roof) are and multiply these parameters.
- Divide the resulting number by the square meters of surface indicated on the paint can you plan to use. This will give you an idea of how many liters of paint you will need. However, it is better to prepare the paint with a margin.
- To calculate the amount of paint needed to paint a roof, calculate its width and height, multiply these figures and divide by 2. This will figure out the area of your roof in square meters, and then you can include this figure in the calculation of the amount of paint.
- Note that some surfaces, such as shingles, masonry and plaster, can take 10-15% more paint than smooth, flat walls of the same size.
- The method of applying paint affects the amount of material used - using a spray gun, you use twice as much paint as when painting with a brush or roller.
 6 Primer the surface. In some cases, you will need to apply a coat of primer to the surface of your home before you start painting. The primer provides a suitable base for the paint and will help it last longer, and it additionally protects the surface of the house from the harmful effects of the environment.
 - You will need to primer on certain damaged areas, especially if you find areas of damp wood, bare metal during the prep work, or if you've removed too much old paint and damaged the surface.
- You will also need to use a primer if you are painting new boards or if you want to change the color of your home.
- The type of primer depends on the type of paint you intend to use. If you are using latex paint, you will need a latex primer. If you are using solvent-thinned paint, you will need a solvent-thinned primer, and if using metal-based paint, you will need a metal-based primer.
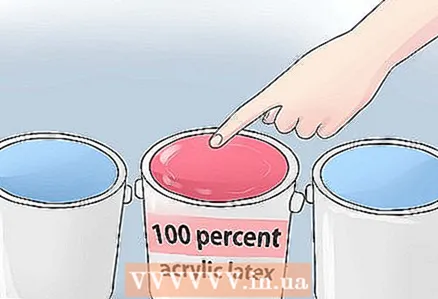 7 Choose paint. Look for a high quality outdoor paint such as 100% acrylic latex. This paint has a better color, it dries faster and lasts longer.
 - Look for paint with the highest percentage of solids. The bank should say “premium” or “super premium” - don't go for cheap brands.
- Also think about what color you will paint your home. Consider the overall style of your home and make sure the color you choose matches the color of the roof material and the brick or stone finish.
- You can take paint samples and try applying it to a hidden part of the house. Wait a couple of days to observe how each of the samples looks in different lighting conditions, and choose the option you like the most.
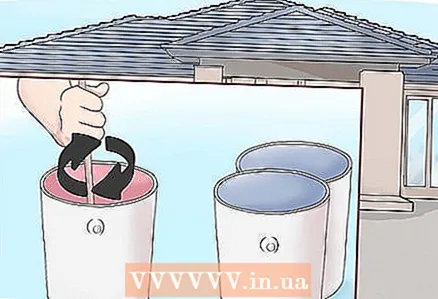 8 Mix the paint. If you bought multiple cans of paint, you will need to mix them in one large container.
 - This must be done because different batches of paint may differ slightly from each other, even if it seems to you that they are absolutely identical. By mixing them, you will definitely get one color.
- However, it's best not to throw away paint cans. That way, if you have any paint left over after finishing work, you can pour it into jars and seal.
- At this point, you need to put a protective film around your home to keep paint out of the walkways or lawn.
Part 2 of 2: Painting the house
 1 Choose a method for applying paint. Ultimately, whether you use a paintbrush, roller or spray gun to paint is a matter of taste. Each method has its own advantages - with a brush you have maximum control over the painting process, a roller for efficient work, and using a spray gun will help you cover a large area.
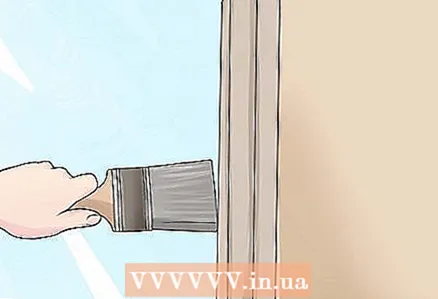
 - Using the brush: Many people who are painting their home for the first time prefer to use a brush, as this forces you to be more meticulous and allows you to control the process at every section. How to do it: Dip the brush into the paint until the bristles are half-dipped in it. Touch the brush in several places on the wall, keeping a horizontal line. Brush back and forth to fill in any unpainted areas and distribute the paint evenly over the surface.
- Roller use: If using a roller, roll it over the paint until all sides are evenly painted, then apply the paint to the wall surface in a crisscross pattern. After that, go back to the area you started and paint over it by moving the roller up and down to fill in the empty spaces.
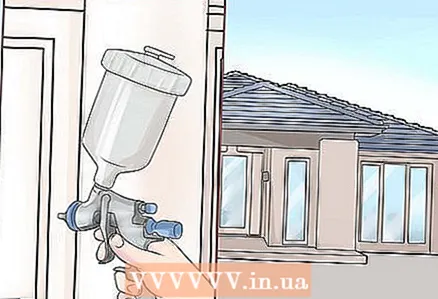
- Using the sprayer: To use a spray gun, first load paint into it. Keep it straight, 30 cm from the wall. Move the spray back and forth, while starting the movement first and then pulling the trigger - this will prevent the appearance of extremely shaded areas. Provide an overlap of the next layer on the previous one by 20 cm.
- Using the spray + roller technique: The spray + roller technique provides a high speed of painting and an even distribution of paint over the surface, but this requires the participation of two people. The first person quickly applies the paint with a spray, and the other evenly spreads it with a roller.
 2 Siding painting. Paint all the siding on your home before tackling the planks. This makes your work easier and speeds up the whole process, since you do not need to change colors. When you paint siding (or any material that covers most of your home's surface), there are a few guidelines to follow:
 - Apply from top to bottom. Always apply paint from top to bottom, left to right. Applying paint from top to bottom will allow you to smudge droplets that will inevitably fall along the surface of the wall, and moving from left to right will help you quickly figure out missing spots (this takes into account the fact that you are already accustomed to reading from left to right, so your brain is programmed to process information in this way ).
- Follow the sun. Try to plan your work to follow the sun throughout the day. Wait for the morning sun to dry out the moisture on the walls left over from the night. You should stay in the shade, away from direct sunlight, as this can affect performance.
- Be careful when using the ladder. It is important to be extremely careful when using ladders, especially retractable ones. In no case, while standing on the stairs, do not try to reach out to areas that extend beyond your outstretched arm. Instead, you should paint horizontally as far as you can, then move the ladder and continue.Make sure your ladder does not wobble from side to side and that it sits on a flat surface that is 1/4 the length of the ladder, away from the foundation of the house.
 3 Apply a second coat. Once the recommended amount of time has passed for the surface to dry completely, you should apply a second coat - if time and budget allows.
 - The second layer is not so much a paint as it is a protective layer for your home. It will provide a flawless look and safety to your home.
- If you have chosen the brightest color for your home, a second coat is all the more necessary - it will really liven up the look of your home.
 4 Paint the planks. Once you're done with the siding, it's time to go back to painting the planks, whether they are the same color as the rest of the house or not. It can take a long time, but the look of the house will be much more professional.
 - It is recommended to use a brush for painting the siding, as it will allow you to achieve more accuracy, but a small 15 cm roller is also suitable if you want to speed up the process, especially for painting door frames and window sills.
- As with siding, you have to paint the planks from top to bottom - start at the gable and attic, then work your way down to the eaves and gutters, then to the upstairs windows, downstairs windows, doors, and finally to the foundation.
- When painting windows, you need to protect the glass from paint by attaching duct tape or using a splash guard.
- When painting, pay special attention to window sills as they take the brunt in bad weather and may look more worn out than other areas. Apply 2-3 coats of paint if necessary and don't forget to paint underneath.
- It's easier to paint doors by removing any knobs, knockers, or numbers to start with. It would be ideal if you remove the door from its hinges altogether and lay it on a flat surface before starting painting. Paint one side first, then flip the door over and paint the other side. It will be easier to paint the jambs and frame with the door removed.
What do you need
- stairs
- protective film
- metal brush or spatula
- sandpaper
- paint sprayer
- sealant
- sealant gun
- outdoor primer
- exterior paint
- brush
- paint rollers
- roller tray
- spray gun
- glasses and mask
Tips
- When using a spray gun, wear safety goggles and a mask to protect yourself from the harmful effects of harmful paint fumes. Make sure that windows, doors, and any other surfaces that you do not plan to paint are covered so as not to accidentally paint them. Move any cars away from the painting area. Make sure there is no wind and notify neighbors when you are going to paint the house.
- You will need a ladder to paint a multi-story building or the top of the wall of a one-story home.
Warnings
- You cannot leave the tree unpainted in the sun for a long time; from this the tree deteriorates.


