Author:
Peter Berry
Date Of Creation:
20 February 2021
Update Date:
1 July 2024

Content
Minecraft is a fun game that you can play by yourself. After a while, though, you'll probably start to feel a little lonely. If that's the case, it's time to call on other players to share your Minecraft game discovery experience! Fortunately, this game is designed to easily connect with other players.
Steps
Method 1 of 5: Join playing Multiplayer (on PC / Mac)
Find a server to play with. To join the Multiplayer game mode in Minecraft game, you need to search for a server (server) that you want to connect. You cannot browse the server list in Minecraft game; instead, you have to search for the server using your web browser. There are many websites that specialize in server listing, and many popular servers have their own websites. Some of the websites that have listed the largest list of servers are: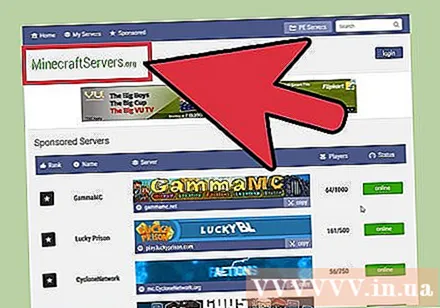
- MinecraftServers.org
- MinecraftForum.net Server entry
- PlanetMinecraft.com Server entry

Look for the server IP address. The computer will look for an address like that mc.wubcraft.com or 148.148.148.148. This address may include the port at the end of the record :25565.
Decide which server is right for you. Often times you will pay attention to a number of factors when choosing a server. Different servers will have completely different experiences, and most will come with descriptive information that you can read. You should pay attention to some of the following important information before choosing a server to play: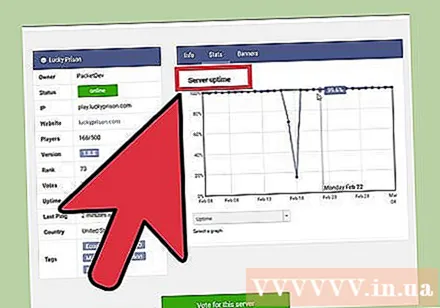
- Game mode - In addition to the servers that use the standard Minecraft gameplay, there are many servers that include all kinds of game modes (game mode), from robbery mode to character role-playing and several other modes.
- Whitelist - If the server uses whitelisting, only registered players are accepted. This means that you need to create an account on the server's website to connect.
- Population - This is the number of people currently playing the game and the maximum number of players. Note that it is likely that you won't be playing games with all of those people. Usually large numbers of players are split among multiple servers.
- PvP - Or fully spelled "Player vs. Player", meaning players are allowed to attack each other. This can be a tough server for newbies.
- Uptime - This is how often your server is online and available. If you intend to play online games for a long time, you should look for a server with a Uptime rate of 95% or higher.
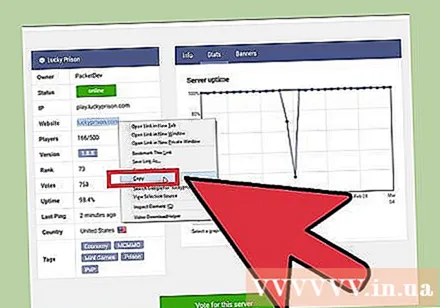
Copy the server's IP address. To connect to the server, you need the server's IP address. You can find this IP address in the list of servers. IP addresses usually consist of letters and / or numbers separated by dots. Highlight and copy the address to temporary memory.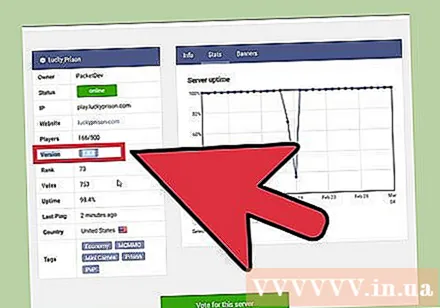
Check the server game version. The server usually runs the old version of Minecraft game, so it will take a while for the server tools to be updated to the new version. Note the Minecraft game version that the server is running on.
Launch Minecraft Launcher and set the game to the desired version. Before starting to play Minecraft, launch Launcher and pay attention to the Minecraft game version displayed in the bottom right corner of the screen. If this version is different from the version the server is running, you will need to edit your profile to load the correct version.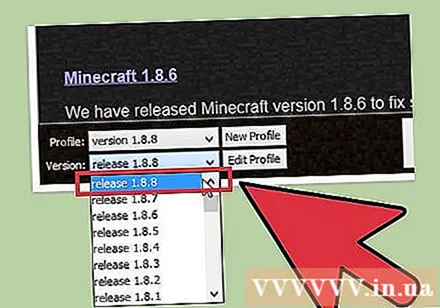
- Click the Edit Profile button located in the lower left corner.
- Click the "Use version" drop-down menu and choose the version that matches the server. Click Save Profile to save your changes.
- Consider creating a new profile specifically for the server. If you find that you are connecting to multiple servers running different versions, you may need to create a dedicated profile for each server. This makes the connecting process a lot simpler.
Launch the Minecraft game and click "Multiplayer". This will open the Multiplayer menu.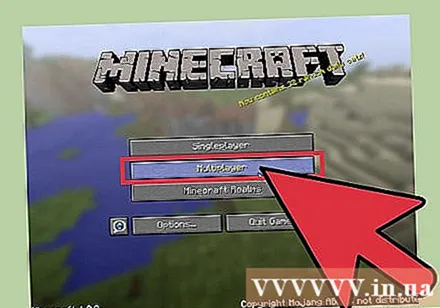
Click the "Add server" button. This step opens the Edit Server Info screen.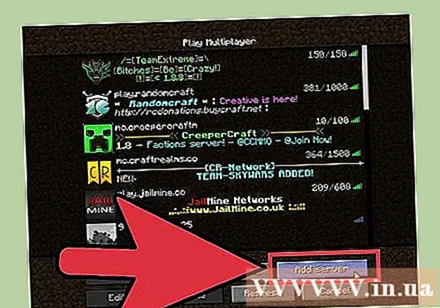
Paste the address into the "Server Address" field. Type a name in the "Server Name" field. No matter what type of name you are allowed, but explicit server naming makes it easy to identify it later.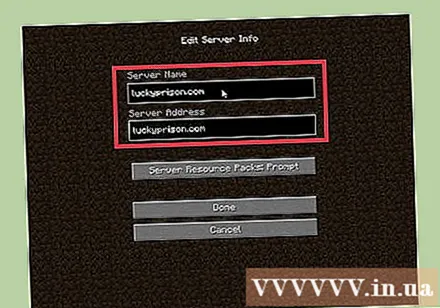
- Click "Done" to save the server information. The newly added server will appear in your gaming list.
- If the server does not appear, check that you have typed the Server Address correctly.
Select the server and click the "Join Server" button. Minecraft will try to connect to the server and load the world. If you see a message saying that the server is running a different version, check that you have selected the correct version from the Profile menu.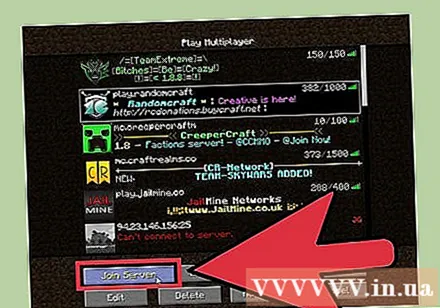
Start playing the game on the server. On most servers, you will appear in the welcome area. Here you can see the rules of the game and server instructions, and details on how to join other players.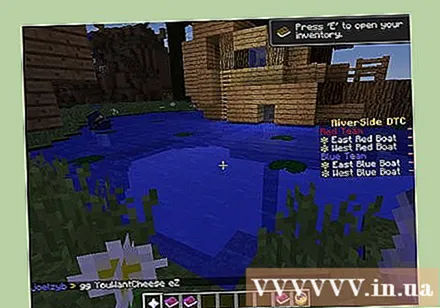
- When playing a game on a public server, make sure you don't destroy other people's creations. In addition to being considered rude, you can easily fall into the ban list of the most peaceful servers.
- Follow the server's rules. Minecraft game will bring an enjoyable experience when everyone follows the same rules. Each server has different rules, so make sure to read the welcome area information carefully and take a close look at the server's website.
Press the T key to chat with other players. This step helps open a chat box for you to type your message. Remember that while you are playing a game on a public server, you are chatting with strangers, so don't reveal your personal information. advertisement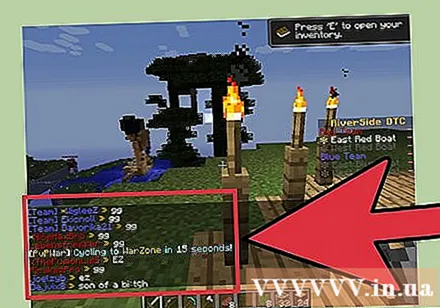
Method 2 of 5: Join playing Multiplayer (in Pocket version)
Open the web browser on your device. You can play Minecraft PE game with others by connecting to Minecraft PE server. To find these servers, you need to use your web browser application. These servers include all sorts of different game modes and modes to always give players a different experience. There are many popular hosting websites out there, for example: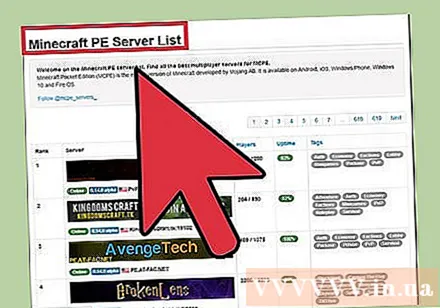
- Minecraftpocket-servers.com
- MCPEstats.com
- MCPEhub.com/servers
- MCPEuniverse.com/pocketmine/
Compare server characteristics. Most server listing sites provide detailed information about each server, including the game modes available, the number of players connected, server locations and much more. Review this information to find a server that suits your gaming needs.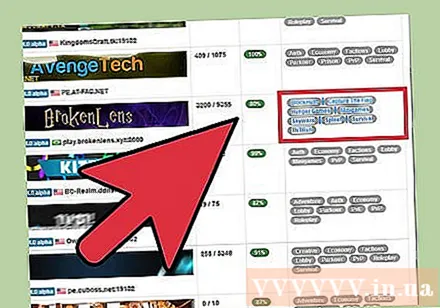
- Note the version of the game the server is running. Minecraft Pocket Edition does not allow you to switch to other versions of the game, so you are only allowed to connect to servers running the correct version that you have installed. Most servers are updated to the latest version within 24 hours of release.
Note down the server address and port number. Server address consists of many letters and / or numbers separated by dots. The port number is separated from the address by a colon (:).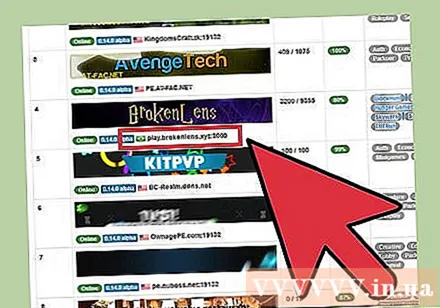
Open the game Minecraft PE and click "Play". This step opens up your world list.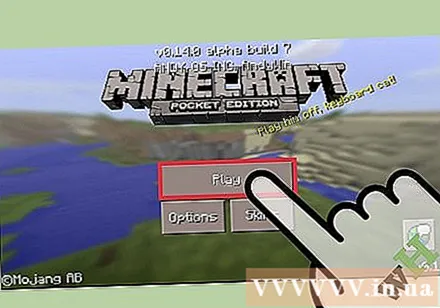
Click the "Edit" button. This button is in the upper right corner.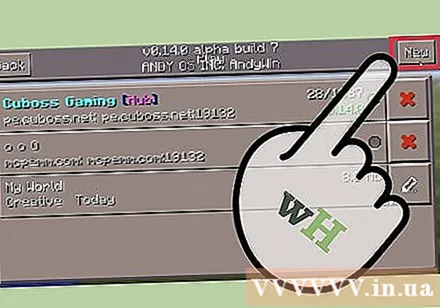
Click the "External" button then click "Add Server". This step helps you to enter information about the server.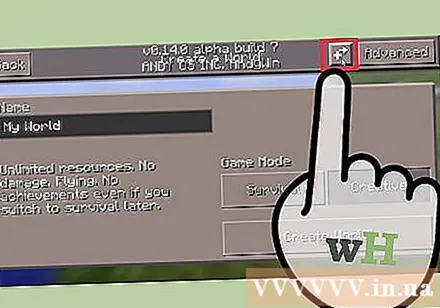
Fill in the boxes that provide the server information. You need to fill out all the boxes and click "Add Server" to add it to your list.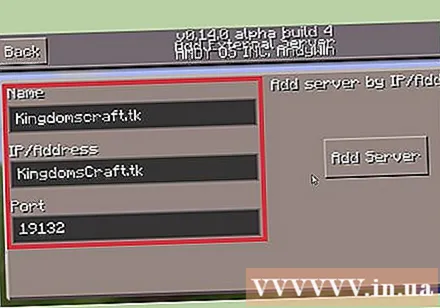
- Server Name - You can type anything here. Typing a hostname makes it easy to identify it later.
- Address - Type in the IP address in this box.
- Port - Enter the port number here. The port number is the number that appears after : in the server address.
Click to connect to the newly added server. The game will try to connect to the server. After successful connection, you will appear in the server's welcome area.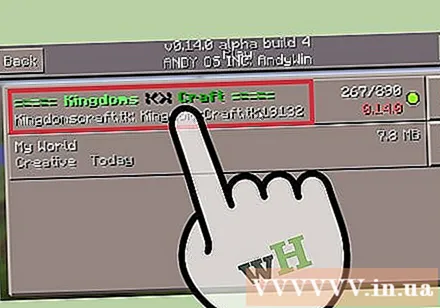
- If you cannot connect, there are a few reasons as follows: You cannot connect when the server is full and do not receive the message about this problem. You also cannot connect when the server is offline. Also, you will not be able to connect in the event that your name matches the name of another previously connected player.
- You are allowed to change the name of your game from the Settings section of the main menu of the game Minecraft PE.
Register to play on the server if necessary. Some servers require you to register before you can start playing or benefiting from the game. Follow the steps on the screen to register your email address with the server. You need to open a confirmation message sent to your email address. advertisement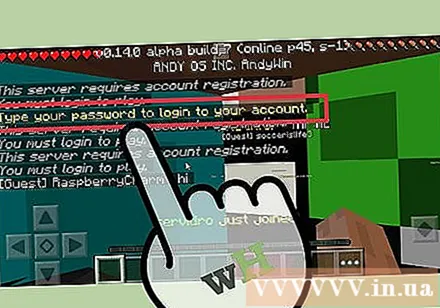
Method 3 of 5: Play games on local network (LAN)
Make sure all computers are connected to the same local network. Minecraft game allows you to easily start playing Multiplayer games if all players are connected to the same local network.
- If you're at home, chances are all the computers are connected to the same local network. Things can get a little more complicated in work or school settings. Click here to see how to set up a local network.
- You can use a virtual private network (VPN) to connect multiple remote computers to the same network. This can be used to bring friends from many different places without having to create a server. Find out for yourself how to set up a virtual private network for you and your friends.
Make sure all players are running the same version of Minecraft. To connect with the game, everyone must play the same version of Minecraft. Decide which computer will start the game, then use the profile editor on all computers to set the version to match.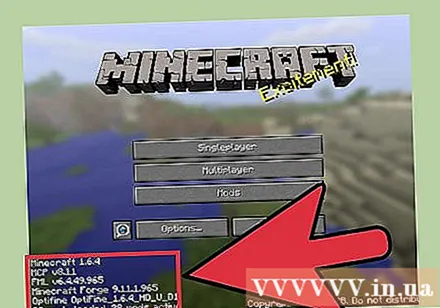
- Launch Minecraft Launcher and click the Edit Profile button.
- Select the correct version from the "Use version" drop-down menu.
Start the game on one of the computers. This computer is considered the "host", usually the one with the most powerful configuration. Load one of your worlds in Single Player mode on the host machine.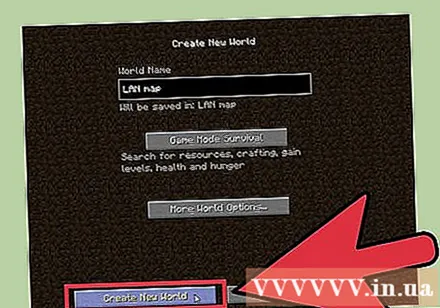
Press the Escape key to open the Pause menu. Once the world has loaded, you can open the game to anyone on your local network through the Pause menu.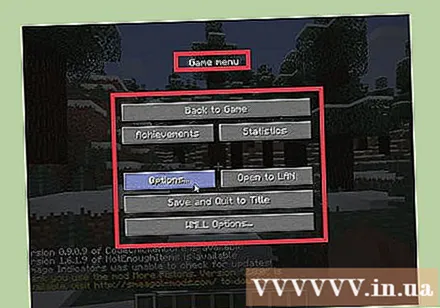
Click Open to LAN. This will start the network setup process and a new menu will appear.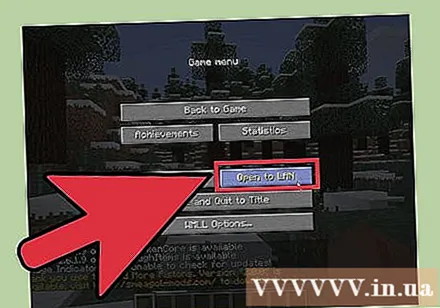
Customize multiplayer game settings. You are allowed to choose from the game modes of survival (Survival), adventure (Adventure), and creativity (Creative), as well as enable or disable cheat codes (cheat code). Click the buttons to switch between options.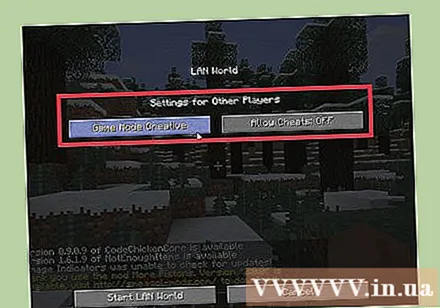
Click Start LAN World to start a multiplayer game. Other computers on your local network should now be able to connect to this game.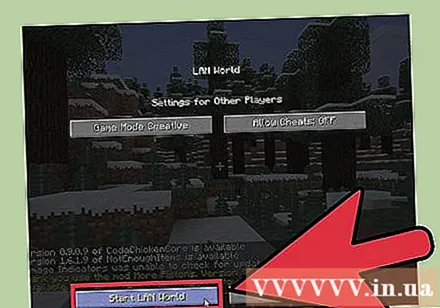
Open Minecraft game on the second computer. Make sure the computer is connected to the network and running the same version of Minecraft that the host computer is running.
Click the button Multiplayer in the main menu of the game Minecraft. Minecraft will scan your network for any active games. The host computer's Minecraft game will usually appear in the list.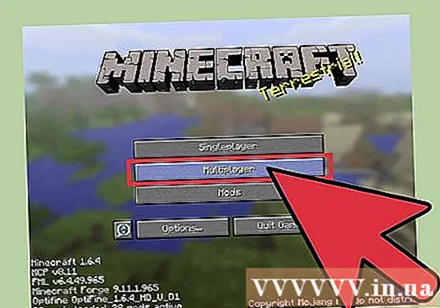
- If no game is visible, click the button Direct Connect and type in the local IP address of the host computer.Click here for specific information about finding the IP address of the host computer.
Select a game and click Join Server. Your screen will be displayed LAN World above the name of the game. After choosing and joining, the world will load and you can start playing.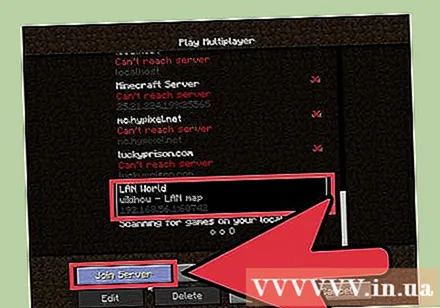
Have the host teleport all players together. Once everyone has joined, they may find themselves far away from the host, especially since the person has been exploring multiple locations in the game. The host can instantly teleport each player so everyone can play the game together.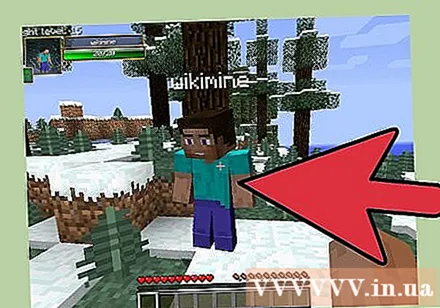
- On the host computer, press T to open the chat box, then type / tp Name playersNameHost and press Enter. This step helps teleport the player named Name players close to the host. Repeat this step for other players.
- Make sure each player is resting on a bed in your new location. This ensures that they will appear there if they die.
Method 4 of 5: Create a server for friends
Download the Minecraft server files on the computer that is serving as the server. Creating a Minecraft server will provide a stable world for you and your friends to play the game at any time. The server will be private so only your friends can join, and you are allowed to install mods. However, you need to have a computer that is always turned on and connected to the network constantly.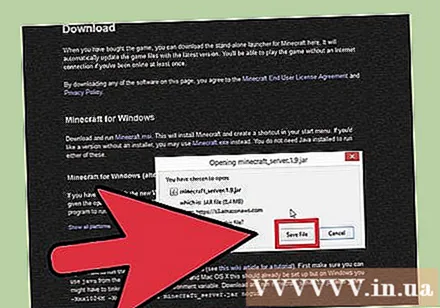
- The Minecraft server files are all free and can be downloaded from. Download.
- This section will cover how to create a quick setup Windows server. You can learn by yourself how to create a server in Linux or OS X, or create a server in Windows manually.
Create a directory for your server. The Minecraft server will install all the necessary files into whatever directory it contains. Create a folder on your desktop or other easily accessible location and name it "Minecraft Server" or something similar. Copy files to this directory.
Run the server program. You will see many generated files in your folder, after which the program will close automatically. This is often the case.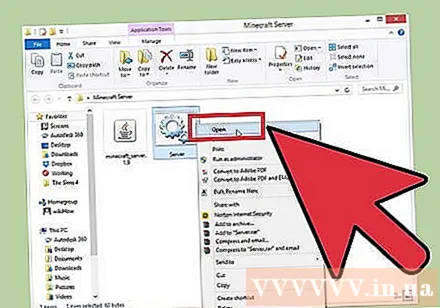
Open .. You can find this file in your Minecraft Server directory.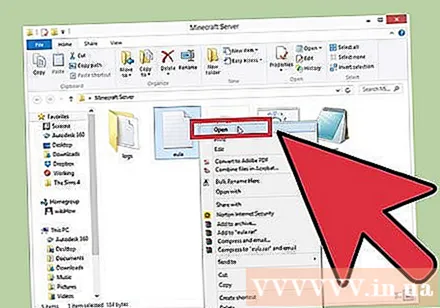
Edit .Fort. Save your changes to the file and close. By doing this step, accept the terms and conditions for the Minecraft Server program.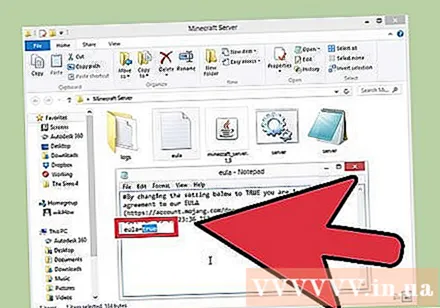
Run the server program again. If the Windows Firewall window appears, click the Allow access button. More files will be generated in the Minecraft Server field. Now close the server window as you will make a little more changes.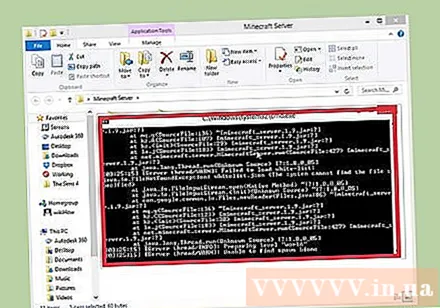
Right click on the file.and choose "Open With". Search for Notepad in your list of programs. This step opens the server's custom file for you to make changes.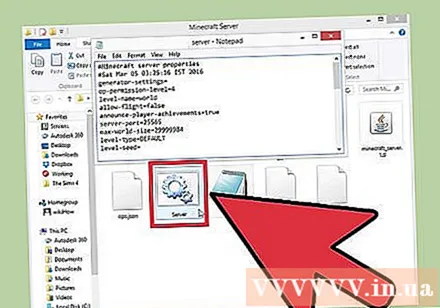
Search .. Edit to. This step helps to turn on the white list (white list), which means a list of approved players. Others will not be able to connect to your server, ie this is the server dedicated to you and your friends.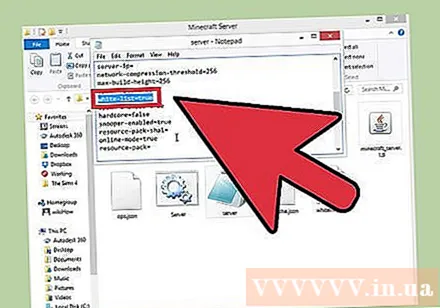
- You are allowed to change some other game settings, but for now save and close the file.
Run the server and add players to your whitelist. Collect your friends' Minecraft player names and whitelist in turn with the following command: whitelist add Name players.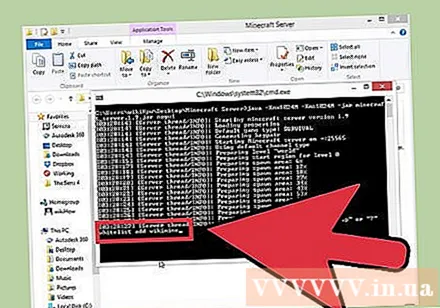
Forward port 25565 so that others can connect. Your server is basically up and running, and your friends have been whitelisted. Now you need to customize the router (router) to allow them to connect to the server and access the game. This requires port forwarding.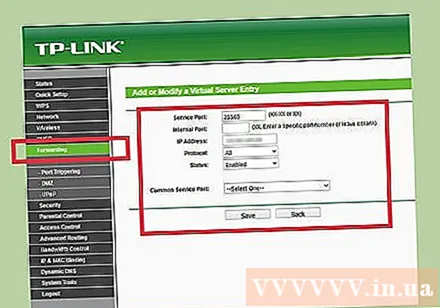
- Log in to your router's custom engine. Usually you can easily access this section from your web browser by typing the address 192.168.1.1, 192.168.0.1, or 192.168.2.1. This address may differ depending on the model of your router.
- You need to enter the router administrator username and password. See your router documentation for default credentials if you've never changed it.
- Open the Port Forwarding section of the router customization page. This can be in the Advanced or Admin section.
- Create a new rule using the server computer's internal IP address. Forward port 25565 for both TCP and UDP.
- For more information on how to open ports, click here.
Open Google on the server computer and type.my ip. Your computer's public IP address will be displayed above the search results. Copy this address or write it down. Give an address to a friend to use when connecting to the server.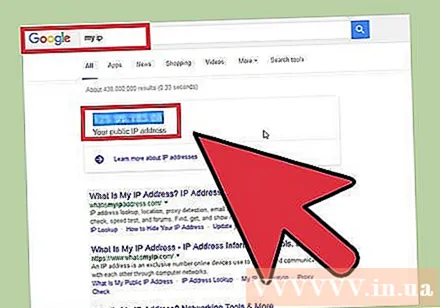
- Note: If you have a dynamic IP address (this usually happens), your IP address will change from time to time. If so, you need to give your friend a new IP address for them to reconnect. You can avoid doing this in the future by setting up dynamic DNS. Accordingly, you will set up a premium account with a service that automatically forwards users who have typed your domain name to a dynamic IP address.
Connect to your own server. Your server is online, your whitelist is ready, and your ports are forwarded. Now your friends can connect to the server using the IP address you provided, but you need to use a different IP address.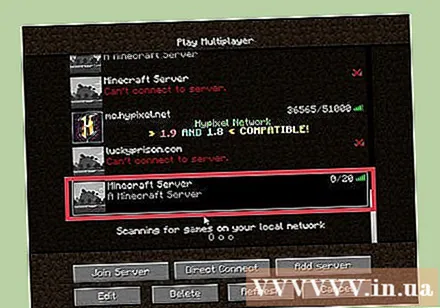
- Open the Multiplayer menu in Minecraft game. Your game will usually appear in the list, but if you don't see it, you need to click on the "Add Server" button. If you are playing a game on a server computer, you need to type 127.0.0.1. If you are playing the game on another computer on the same network, type in the server's internal IP address (the same address you used for port forwarding). If you're using a computer on a different network, you'll need to enter the server's public IP address.
Method 5 of 5: Play the game in split screen mode (on Xbox / PlayStation)
Make sure you are playing games on an HDTV. To use splitscreen, you need to play games on a 720p or higher resolution monitor, which means an HDTV and HDMI or Component cable are required.
Create new worlds or download existing worlds. You can play the game in split screen mode in any of your available worlds. Uncheck the box "Online game".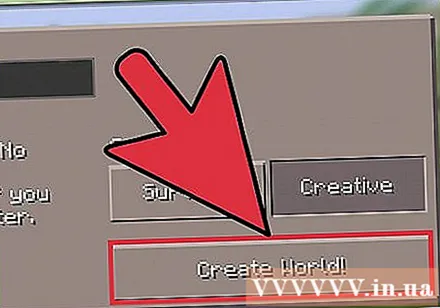
Press.▷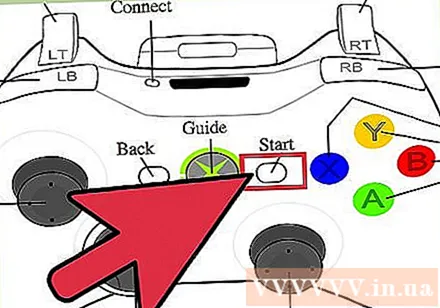
STARTon the second handle. This step opens the Sign In window.
Selection of profiles for the second player. You need to create a profile before you start playing the game if you don't have a profile for a second player yet.
Repeat the above steps for other players. Game mode on the same screen supports up to four players. advertisement
Advice
- If you find that other players are playing the wrong game, you can try asking them to stop playing that style or leave and look for a different server. On most public servers, the moderator will follow anyone who interrupts the game, annoys others, or gets things messed up. On a private server, usually only trusted people like friends are invited in, so you can work together to solve any problems that arise.
- Try to avoid spoilers. There are players who love to destroy other people's works for no particular reason other than that they like it. If you find yourself on a server full of these guys, it's best to leave.
- However, if you like to cause and experience destructive feelings, like really pissing off other opponents, you should play games on the PVP Raid server. You will be unleashed as destructive as you want, but also be careful because other players may take revenge!
- Some servers include plug-ins for added entertainment that you wouldn't normally get in Single Player without a mod. See the "Warnings" section below for more about anti-destructive plugins.
- Some mods you use on your client also work on Multiplayer servers.You will know if this mod works or not by testing it while in Multiplayer mode.
- Some servers are named according to the correct content to play. For example, PVP is Player vs Player, there are many other servers like Free Building, Role Playing (Roleplay), Endless, and many more. . There are many options for you!
Warning
- Take risks when entering public Multiplayer servers. Carefully read the terms and conditions, know how to contact moderators (moderators) and administrators (admin) as well as see reviews (if any) about certain servers before come into play.
- Some mods like TMI and X-Ray will not be approved on Multiplayer servers. The reason is because these tweaks allow playing cheating on items or having unfair resource exploitation rights. You will be kicked out, and worse than banned, if found to be using these fixes.
- Every time you engage with unfamiliar players online, there's always the risk of you encountering someone who likes to play dirty or intimidated. If this happens, don't give up. You can contact a moderator and ask for help, and stay away from the bad guys until the problem is resolved. Unfortunately, such behavior is quite common in Minecraft games, so there are many plug-ins created to deal with tantrums and spam, preventing this from happening while you are in the game. play. These add-ons, if applied, are no longer optional. To know how to use them, you need to read the server's terms, conditions and terms.


