Author:
Frank Hunt
Date Of Creation:
18 March 2021
Update Date:
16 May 2024

Content
- To step
- Method 1 of 7: The shadow stick
- Method 2 of 7: Sundial
- Method 3 of 7: Navigate with your natural environment
- Method 4 of 7: Navigating with the Polaris (North Star)
- Method 5 of 7: Navigate with the Southern Cross
- Method 6 of 7: Make your own compass
- Method 7 of 7: Determine the direction with magnetic or electronic equipment
- Tips
Being able to determine the four directions of the compass can help you determine your direction if you have turned around a few times, or save your life if you are lost. There are a few easy ways to determine the wind directions, but if you don't have a compass or mobile handy, it is still possible to find north, south, east, and west.
To step
Method 1 of 7: The shadow stick
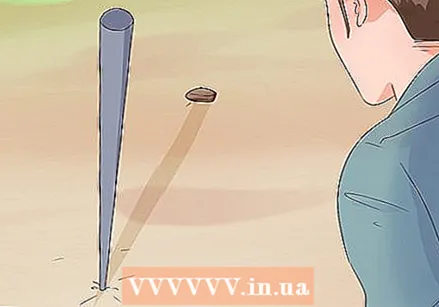
 Gather your tools. Since the sun rises in the east and sets in the west, the shadows cast by the sun will also move in the same direction, and you can observe that movement to orient yourself. For this method you will need:
 - A straight stick that is between 60 cm and 150 cm long
- A straight stick of about 30 cm
- Two rocks, boulders, or other objects (heavy enough not to be blown away by the wind)
 Put your stick upright in the ground. Place one of the stones on the ground to mark the top of the stick's shadow.
 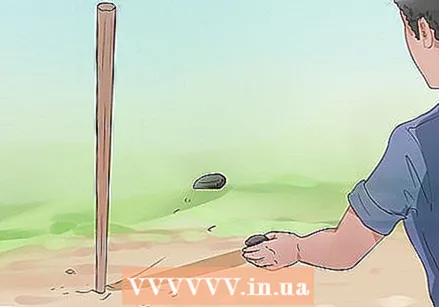 Wait 15 to 20 minutes. The shadow will have moved. Take the second stone and mark the new location of the top of the stick shadow.
 - If you can wait longer, do so, and place more stones to mark the change of the shadow.
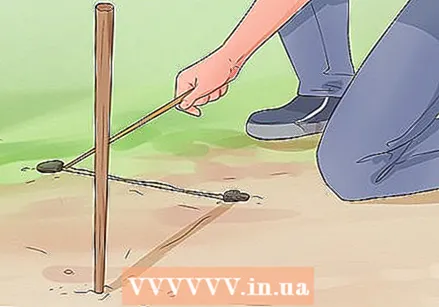 Connect the bricks. Draw a straight line on the ground between the marks, or use the other stick to connect the dots and make a straight line. The shadow moves in the opposite direction of the sun, so this line represents the east-west axis: the first marker is west and the second is east.
 - To find the north and south, remember that on a watch, the north is 12 o'clock, the east 3 o'clock, the south 6 o'clock, and the west 9 o'clock.
- Mind you, this method is only an approximation and you can deviate 10-20 degrees from the correct value.
Method 2 of 7: Sundial
 Collect all the tools. This method is similar to the stick method, but is more reliable because it uses a longer observation period.Look for level ground and collect all the tools:
 - A stick or pole of 60-150 cm
- A small, sharp stick
- Two small stones
- A long thread
 Stick the long pole into the ground. You must do this before 12 noon. Place a stone where the shadow of the pole ends.
 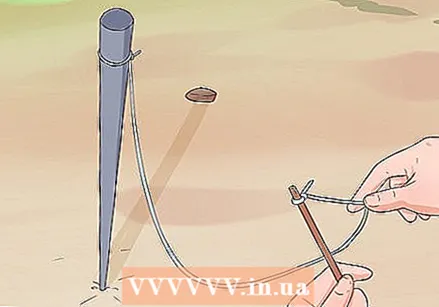 Attach the string to the stick and the pole. Tie the string to the sharp stick, and tie the other end of the string to the post, but make sure the string is long enough to reach the rock on the ground.
 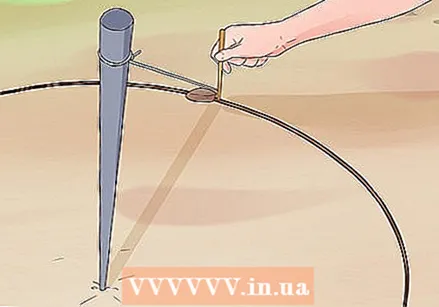 Draw a circle around the pole. Starting with the rock, use the sharp stick you attached to the pole to draw a circle on the ground around the pole.
 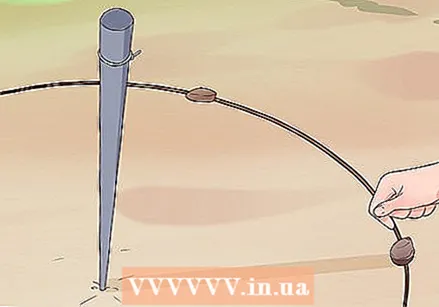 Wait. When the shadow of the pole finally touches this circle again, mark the point of contact with the other stone.
 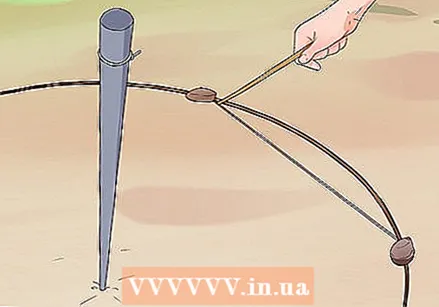 Connect the dots. The straight line connecting the first stone to the second stone is the east-west axis, and the first stone represents west and the second stone represents east.
 - From this point, north is clockwise from west, and south is clockwise from east.
Method 3 of 7: Navigate with your natural environment
 Watch the sun at noon. Around noon the sun can tell you the direction of the north and south, and therefore also the east and west, but that will not tell you which side is north and which is south. If you walk in the direction of the sun in the northern hemisphere, you walk south. In the southern hemisphere, walking towards the sun leads to the north and away from it to the south.
  Use the sunrise and sunset to approximate your position. The sun rises approximately in the east and sets again approximately in the west, so you can use the sunrise and sunset to orient yourself. Look at the sunrise and you are looking east; the north will then be on your left and the south on your right. Watch the sunset and you are looking west; the north is on your right and the south is on your left.
 - The sunrise and sunset provides only an approximation of the direction of the sun for 363 days of the year, because only on the spring and autumn equinox (the first day of spring and fall) does the sun rise and set exactly in the east. the west below.
 Look at the growth direction of vegetation. While using vegetation to determine direction is not exactly an accurate method, it can often give you an initial idea of the different points of the compass. North of the equator, the sun usually hangs in the southern part of the sky, and the opposite is true south of the equator. This means that foliage and vegetation tend to be more abundant and full on the southern side of a tree or undergrowth. The reverse is true in the southern hemisphere, where vegetation is more abundant on the northern side.
 - Many guides will state that moss only grows on the northern side of a tree in the Northern Hemisphere, but that's not true. But while moss can grow on all sides of a tree, it will be thicker on those sides that are more shady (the north in the Northern Hemisphere and the South in the Southern Hemisphere).
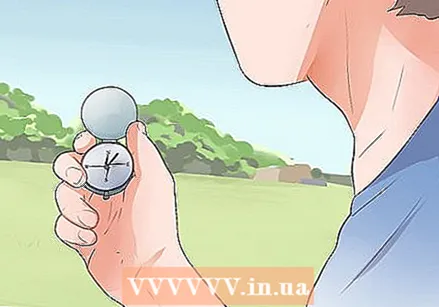
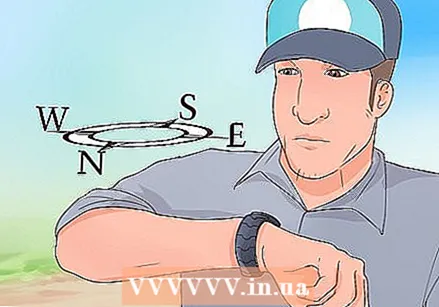 Determine the wind direction with a pointer watch and the sun. The sun can be used in conjunction with a hand watch for approximate directions of the compass if you are lost in the forest but still have a watch with you. In the northern hemisphere, point the hour hand towards the sun. The south is then halfway between the 12 o'clock indication and the hour hand. In the Southern Hemisphere, the 12 o'clock marker is pointing to the sun, with the midpoint between this marker and the hour hand being north.
 - When you look north, east is on your right and west is on your left. If you are looking south, east is on your left and west is on your right.
- In summer time you use 1 hour instead of 12 hours on your watch.
- For this method to work, your watch will need to show the correct time. There may be a margin of error of about 35 degrees, so this method is only reliable for an approximation of the direction.
Method 4 of 7: Navigating with the Polaris (North Star)
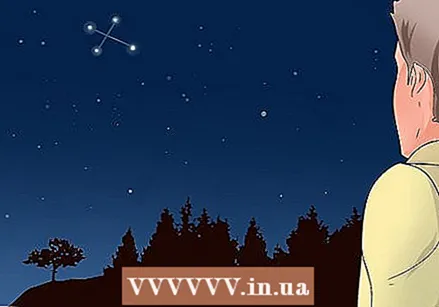
 Learn to recognize the Polaris. Polaris, also called the North Star, can be used in the northern hemisphere to find the north. This is one of the fastest methods of finding your direction when it is night time and does not have a compass or GPS.
 - Polaris (the North Star) is one of the brightest stars in the night sky. Because it is found in the night sky at the North Pole, the star does not move much, and it is useful for accurate navigation.
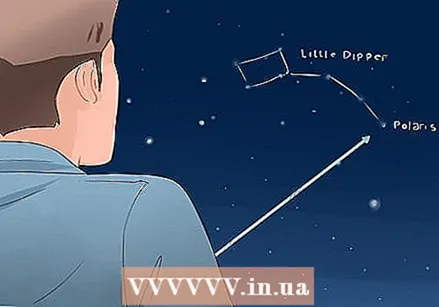
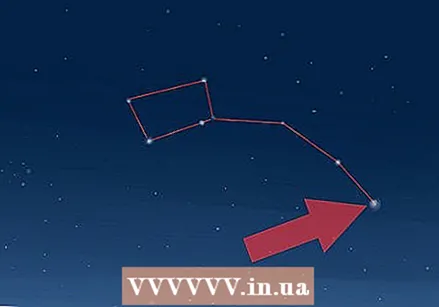 Locate Polaris. Look for the Ursa Major (aka Ursa Major) and the Little Bear (aka Ursa Minor). The Big Dipper looks like a soup ladle (that's why the English name is Big Dipper), with the handle holding a head and the outer edge of the head (furthest away from the handle) pointing in the direction of the Polaris. As a check, Polaris is the last star to be part of the Big Dipper's stem.
 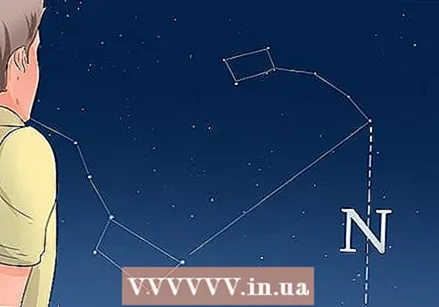 Draw an imaginary line from Polaris to the ground. This is roughly true north. When you look at Polaris, you are looking in the direction of the north; behind you is south and west is on your left, and east is on your right.
Method 5 of 7: Navigate with the Southern Cross
 Learn to recognize the Southern Cross. In the southern hemisphere, the constellation of the Southern Cross (also called the Crux) is useful as a guide to finding the south. This constellation consists of five stars, and the four brightest form a tilted cross.
 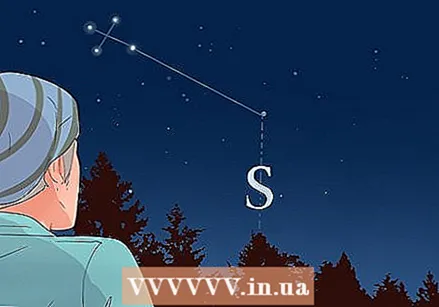 Use the Southern Cross to find the South. Find the two stars that make up the longitudinal portion of the cross and imagine a line extending five times the full length of the cross.
 - When you find the end point of that imaginary line, draw another imaginary line to the ground. This is usually towards the south.
 Choose a prominent spot in the area as your guide. Once you have determined in which direction the south is approximately, it can be useful to choose a prominent place in the landscape at that spot, on the ground, so that you don't lose sight of where the south is.
Method 6 of 7: Make your own compass
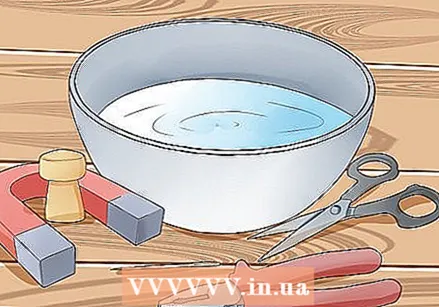 Gather your tools and equipment. A compass is a round instrument on which all directions are indicated. A rotating needle rotates under the influence of the earth's magnetic field, so that you can use it to determine in which direction the compass is pointing. You can make your own rudimentary compass with a few things. You need the following:
 - A metal needle and a magnet
- A bowl or cup filled with water
- Pliers and scissors
- A cork (or just a leaf)
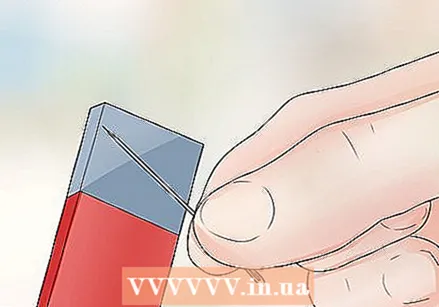 Rub the needle against the magnet. Do this at least 12 times if you are using a weak magnet, such as a refrigerator door, or 5 times with a stronger magnet. This will magnetize the needle.
 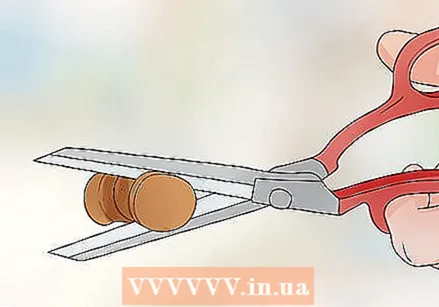 Cut a 1 cm slice off a cork. Then use the forceps to push the needle through the disc. If you don't have a cork, you can also place the needle on a leaf.
 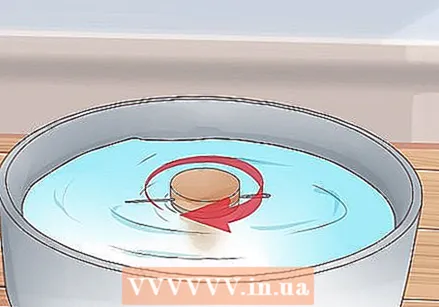 Place the cork disc in the center of the bowl of water. The needle can now rotate freely, just like a compass needle, and will eventually align itself with both poles.
 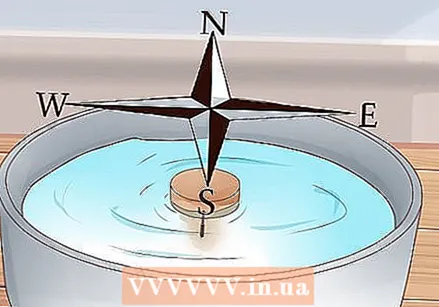 Wait for the needle to stop spinning. If it is properly magnetized, it should show you what the line from north to south is. Note that unless you have a compass or some other reference point, you will not be able to tell if the needle is pointing north or south, just that it is pointing to either.
 - Many websites and books claim that you can magnetize a metal needle by rubbing it with wool or silk, but that only creates static electricity, not magnetism.
Method 7 of 7: Determine the direction with magnetic or electronic equipment
 Determine the correct direction with a compass. During the day and at night, using a compass, GPS or mobile with GPS is the best and easiest way to determine the correct direction. These devices are the most accurate and therefore the most reliable. But it's important to note that if your compass points north, for example, it points to magnetic north, which is slightly different from true north (the same is true for magnetic south versus true south).
 - As you turn in different directions, the needle will continue to point north so you know which way you are facing.
- A compass will no longer be accurate around metal objects such as keys, watches and buckles. The same goes for magnetic objects, such as certain stones or high voltage cables.
 Use a Global Positioning System. Undoubtedly, a GPS is the easiest way to pinpoint your position or find your way, as these electronic devices use satellites to determine your location. You can use a GPS to tell you where you are, to get directions for a route to a specific location, and to track where you are going. A GPS needs to be charged and needs a battery to function. It should also be initialized before use so that it can orient itself (and know where it is), and download the most recent and accurate maps.
 - Turn on your GPS and wait for it to get a signal.
- Not only does a GPS have a compass that you can use to determine which is east, west, north, or south, but the map that is displayed also has an arrow pointing to the direction you are looking.
- Your coordinates will appear at the top of the screen, so you also know the latitude and longitude.
- Because a GPS navigates using satellites, tall buildings, trees, and other geographic features in the area can interfere with the signal.
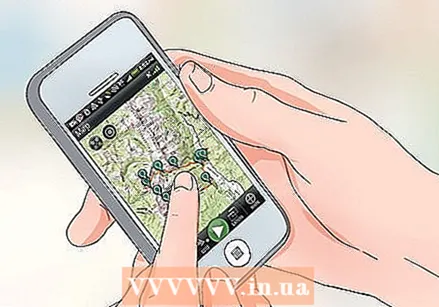 Turn your mobile into a navigation tool. Most modern smartphones come with a compass, GPS, or both. There are also apps you can download or software you can install to equip your phone with these features. In order to use your phone's GPS function, it will need to be connected to Wi-Fi or your home network, and your GPS or location service must be on.
 - To take advantage of these capabilities, you can search for apps with names like "compass", "maps" or "navigation".
Tips
- When preparing for a trek, it is always a good idea to bring plenty of food, water and a compass. Don't go out alone, but if you do, make sure others know where you're going.


